Best Korean Corn Cheese
Creamy, gooey Korean corn cheese is a very easy recipe that you can make with basic pantry ingredients in just 20 minutes. Perfect as a comforting side dish or as a dip for chips and bread, it’s versatile and sure to please.

There’s something about corn that has captured the hearts of Koreans — and let’s not forget Korean sweet potatoes, too. You’ll find it in everything from sweet desserts to savory pizzas.
And if you’ve got a soft spot for corn, you’re going to adore Korean corn cheese. It’s a gooey, cheesy, utterly comforting dish that’s perfect for the nippy fall weather.
Get new recipes via email:
Just imagine a sizzling skillet full of sweet, summer corn smothered in a blanket of melted cheese. It’s simple, it’s irresistible, and it’s bound to bring a Korean twist to your everyday meal.
And this cheese corn creation? It might be the perfect side dish for your Thanksgiving table. Your guests will ask for the recipe!

What is Korean corn cheese?
Korean corn cheese (콘치즈) is a delicious side dish made with canned corn, cheese, a touch of mayonnaise, and a sprinkle of sugar, all baked to gooey, creamy perfection. Melted butter ties these simple ingredients together, infusing the dish with a irresistible aroma and rich flavor.
The trendy Korean-American fusion dish came about when Koreans began mixing Western foods into their own recipes. This cheesy corn dish is a perfect example of how two different food cultures can come together to make something everyone loves.
It’s a popular choice in casual Korean bbq restaurants, bars, and home get-togethers for a good reason – it’s just really tasty and super satisfying. At Korean restaurants, they often cook corn cheese right at your table or bring it out hot and bubbling.
The corn and cheese combination is also great as a dip with chips or toast for an appetizer. It is a perfect match for a cold beer, making it an excellent choice for drinking snack.
Popular Korean drinking snacks: These dishes pair wonderfully – Korean Fried Chicken, Dubu Kimchi (Tofu with Stir-fried Kimchi), Pajeon (Seafood Scallion Pancake), and Jwipo (Fish Jerky) – each one offers authentic flavor and is perfect for your snack spread.
Recipe Ingredients
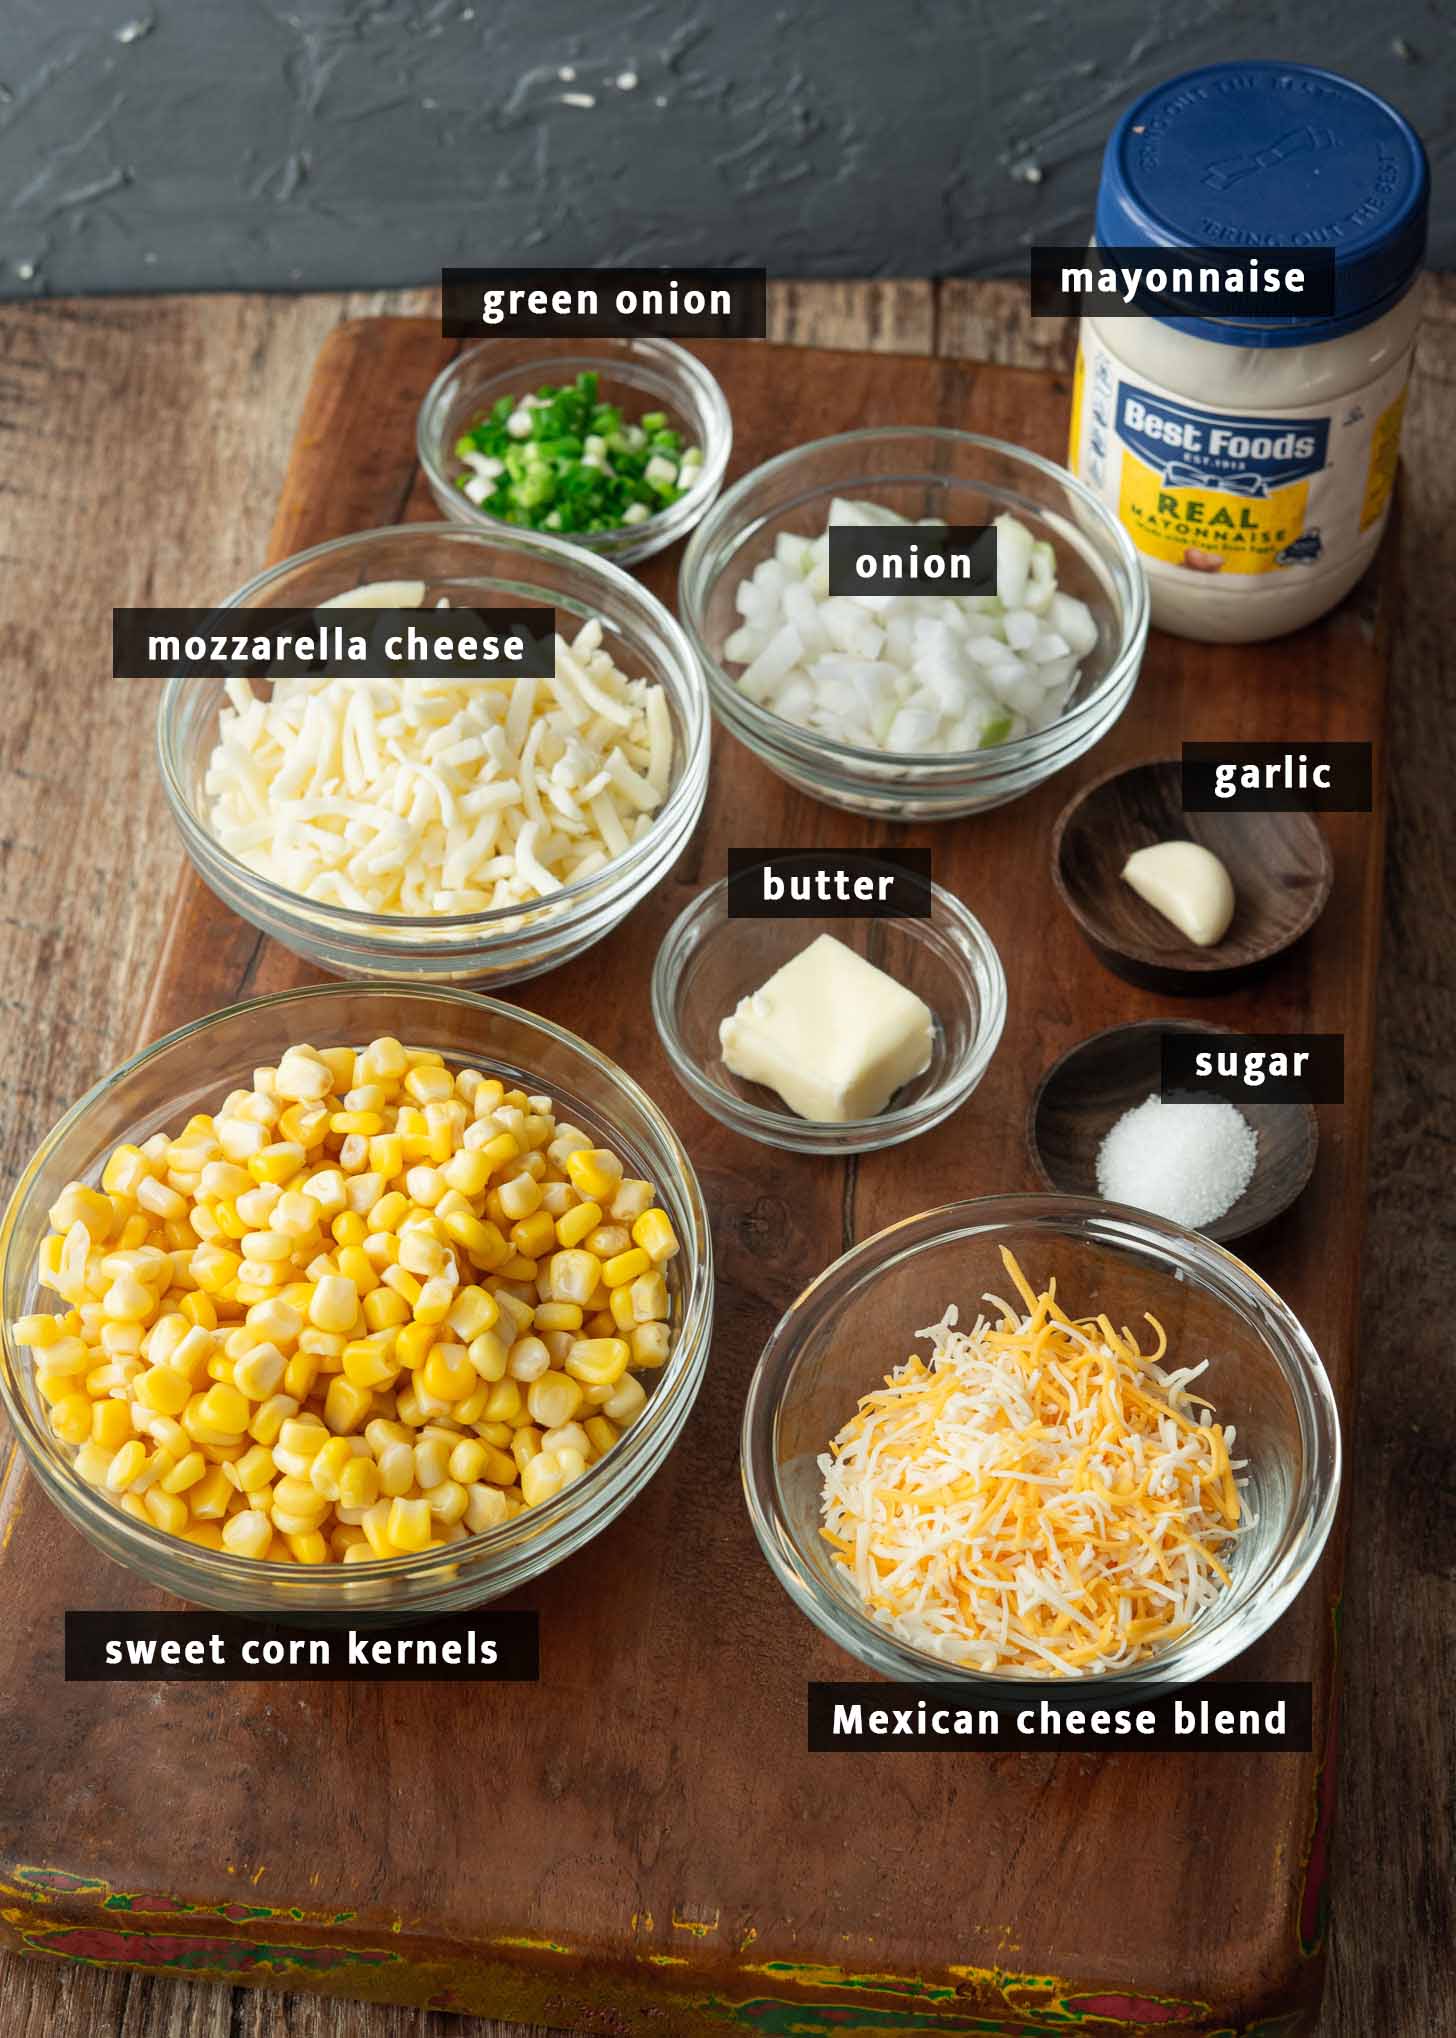
- Canned Sweet Corn: Drain the cork kernels to remove excess water before using. Do not replace with canned creamed corn.
- Butter: Adds rich, creamy, buttery scent and taste that butter brings to the dish.
- Mayonnaise: Asian style Kewpie mayonnaise is popular but any regular American mayo works, too.
- Aromatics: Onion, garlic for cooking, and green onion for topping.
- Sugar: A small pinch can highlight the corn’s natural sweetness, but this is optional and you can omit it if you prefer.
- Cheese: shredded mozzarella is essential for that cheesy stretch, and a Mexican cheese blend can add an extra flavor kick.
Tips for the Best Corn Cheese
Elevate your Korean corn cheese to gourmet levels with these pro tips for the best result:
- Corn: Use canned sweet corn for its pronounced sweetness and authenticity, as it’s the type most Korean restaurants use. If unavailable, fresh corn kernel is a suitable substitute.
- If using frozen corn, make sure to thaw and drain throughly to avoid a watery mixture.
- Savory Boost: A sauté of onions and garlic in butter not only balances the sweetness but also infuses the corn with layers of flavor.
- Cheese Selection: While mozzarella is essential for that stretchy cheese pull, adding a Mexican cheese blend or a sprinkle of shredded cheddar enriches the overall flavor.
- Sugar Touch: A little sugar can enhance the natural sweetness of the corn, but feel free to skip it if you prefer.
- Skillet Choice: For its excellent heat retention and versatility, I recommend using a cast iron skillet, though any oven-safe skillet will do.
- If those aren’t available, sauté the onion and garlic in a regular pan, then combine with the remaining ingredients in an oven-safe dish for baking.
- Broiling Finish: For that irresistible golden brown caramelized cheese top, broil for a moment at the end. Keep an eye on it to avoid burning.
How to make Korean corn cheese
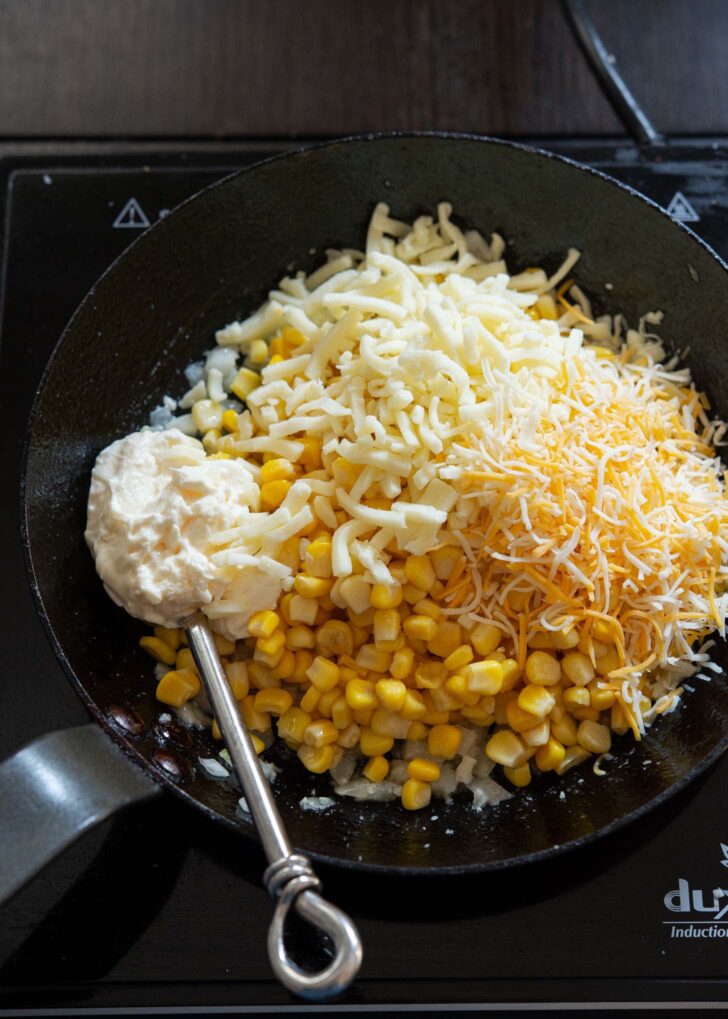
Prepare the Corn Mixture:
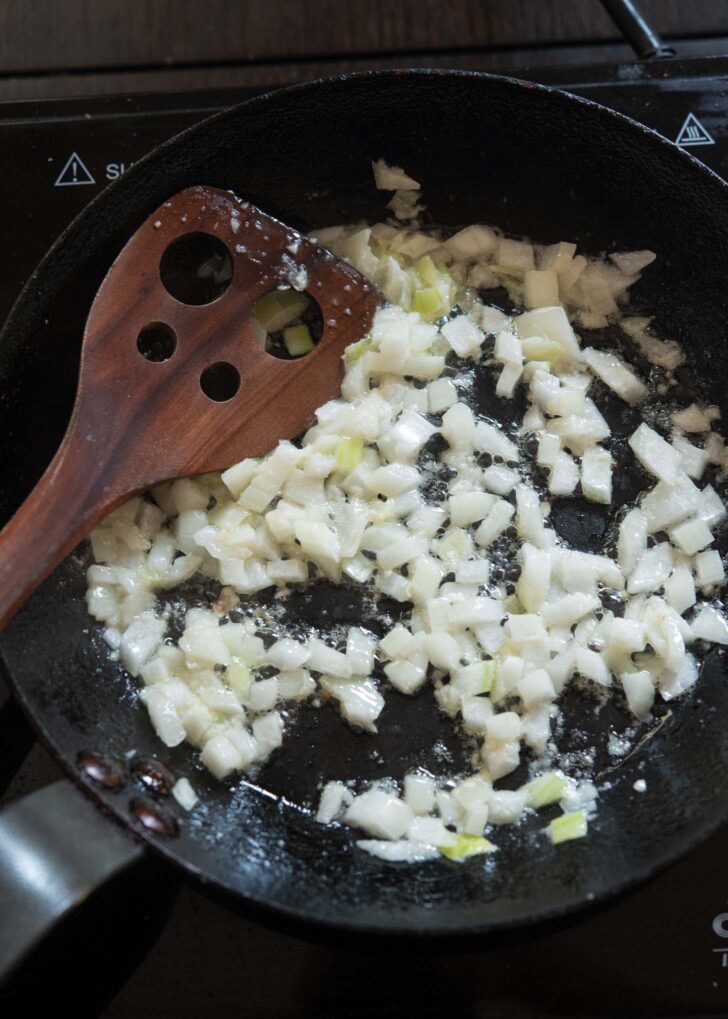
- Start by preheating your oven to 400˚F. In a small cast iron skillet (about 8-inch) or any oven-safe pan, melt the butter over medium heat.
- Saute the onion and garlic until they’re soft and fragrant, about 2 minutes. Take the skillet off the heat, then add the corn, mayo, and sugar, and mix in half of the cheese until everything is evenly combined.
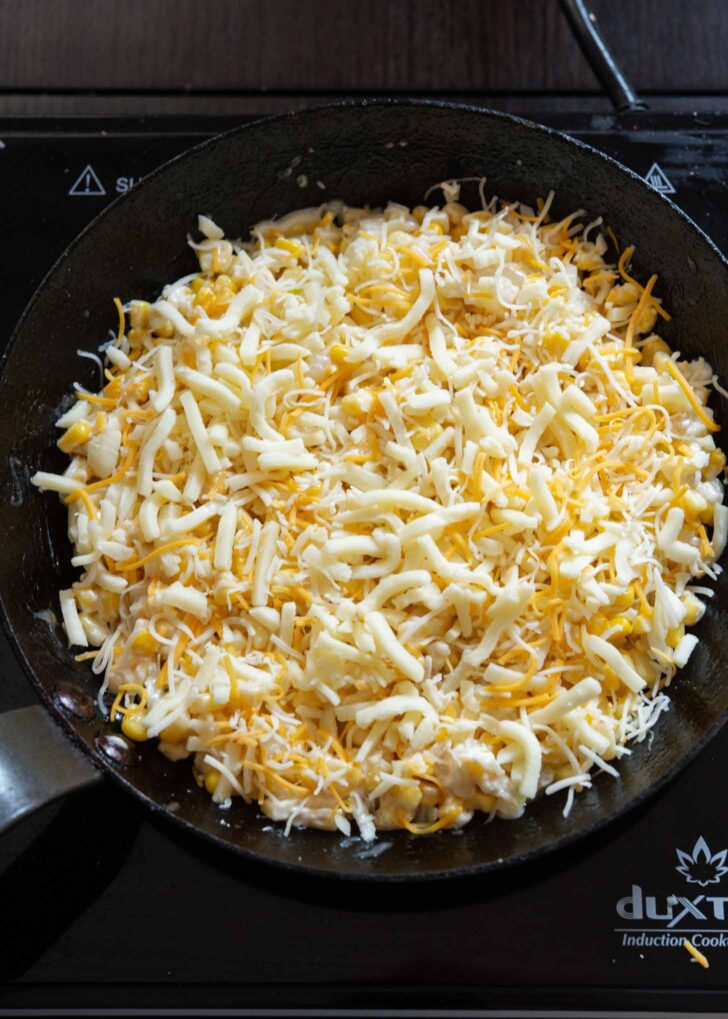
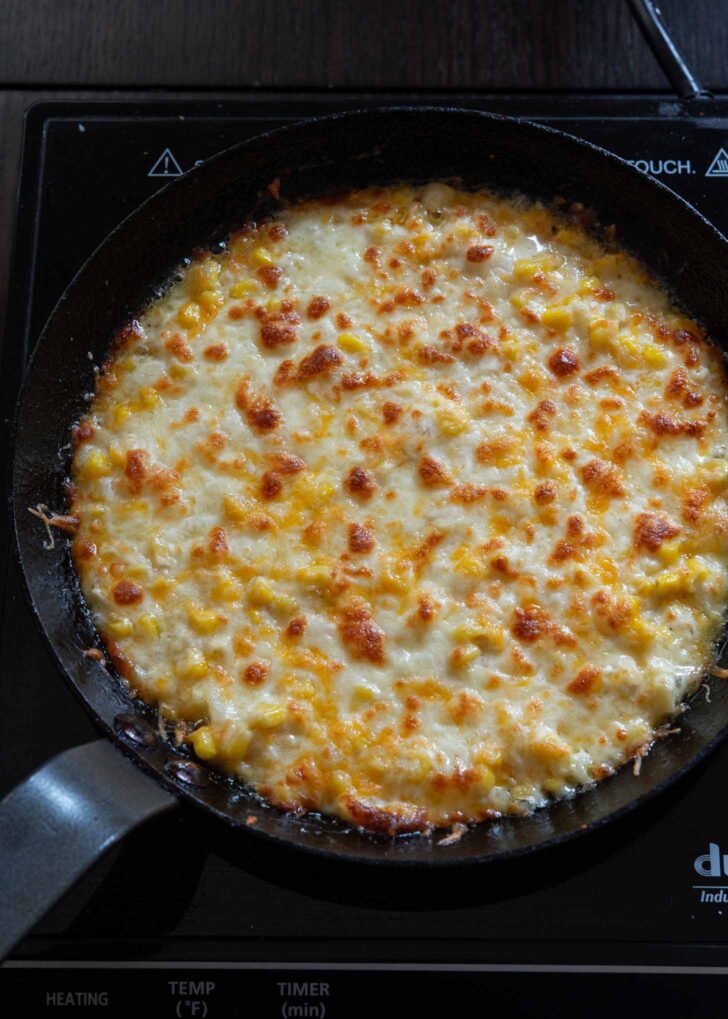
Add More Cheese and Bake:
- Smooth the corn mixture across the bottom of the skillet and generously top with the remaining cheeses. Bake for 10 minutes until the cheese is beautifully melted and bubbly.
- For those who adore a golden crust, give it a quick broil on high for an additional 1-2 minutes until you see those toasted spots appear. Watch carefully to avoid burning. Garnish with chopped green onions.
- Enjoy your delicious cheesy corn fresh out of the oven and see how quickly it vanishes! It pairs well with any of your favorite main dishes.

Make-Ahead and Freezing Tips
Making Ahead: For those who like to plan ahead, you can assemble this Korean corn cheese dish in advance. Simply combine all the ingredients in a baking dish, cover it well, and keep it in the fridge. It’ll stay good for baking for up to 48 hours.
Freezing Tips: Want to save it for later? After mixing your ingredients in a baking dish, wrap it snugly with plastic wrap or foil and pop it in the freezer. When you’re ready to turn up the heat, bake it straight from frozen, adding an extra 10 to 15 minutes to your bake time. Once the cheese is melted and bubbly, give it a quick 2-minute broil as the finishing touch.
Related Recipes
- Korean Corn Dog
- NYT Gochujang Caramel Cookies
- Rose Tteokbokki
- Korean Street Toast
- Easy Cream Cheese Garlic Bread

Best Korean Corn Cheese
Ingredients
- 1 tbsp butter
- 1/4 small onion, finely chopped
- 1 clove garlic, minced
- 1 15 oz (430 g) canned whole kernel corn, drained
- 3 tbsp mayonnaise
- 1 tsp sugar
- 1 cup (8 oz) shredded mozzarella cheese, divided
- 1/2 cup (4 oz) shredded Mexican cheese blend, divided
- 1 green onion, finely chopped, optional
Instructions
- Heat your oven to 400˚F. Melt butter in a skillet over medium heat, then cook the onion and garlic until soft. Remove the skillet from the heat, then stir in the corn, mayo, and sugar. Add half of the mozzarella and half of the Mexican cheese, blending well with the corn mixture.
- Spread the mixture in the skillet, sprinkle with remaining cheeses, and bake for 10 minutes or until cheese melts and bubbly.
- For a golden brown top, broil for 1-2 minutes at the end of baking. Keep a close eye to prevent burning. Enjoy the Korean corn cheese warm from the oven and serve with your favorite main dish.

