Easy Seolleongtang (Ox Bone Soup)
Seolleongtang is Korea’s classic beef bone soup—creamy white, deeply nourishing, and pure comfort on a cold day. Traditionally simmered for hours, this homemade Instant Pot version brings the same rich flavor in far less time. A cozy, everyday Korean soup that’s perfect with rice, noodles, and tangy radish kimchi.
For me, seolleongtang (설렁탕) isn’t just soup—it’s the taste of home. On cold winter weekends, my mom would pull out a huge stockpot, fill it with beef bones, and let it bubble away for hours, sometimes days.
The whole house smelled warm and comforting, and we all knew that pot meant a week of nourishing meals ahead. I loved this old-style ox bone soup even when I was little.

Get new recipes via email:
Now I make the same soup for my own family. I don’t always have the time my mom did, so the Instant Pot has become my shortcut for the same creamy white broth in a fraction of the time. The rhythm is different, but the flavor and comfort are still there—and it carries the same sense of tradition I grew up with.
In this recipe, I’ll share both versions: the slow, old-fashioned stovetop simmer and the faster Instant Pot method. I’ll also show you how to choose the right bones, prep them properly, and serve seolleongtang the Korean way—with rice, noodles, and plenty of kimchi on the side.
Making Seolleongtang with an Instant Pot
The Instant Pot is my go-to when I want homemade seolleongtang without spending two days at the stove. Pressure cooking draws out marrow and collagen quickly, and a final boil on sauté mode transforms the broth into the creamy white soup you’d expect from an authentic bowl.
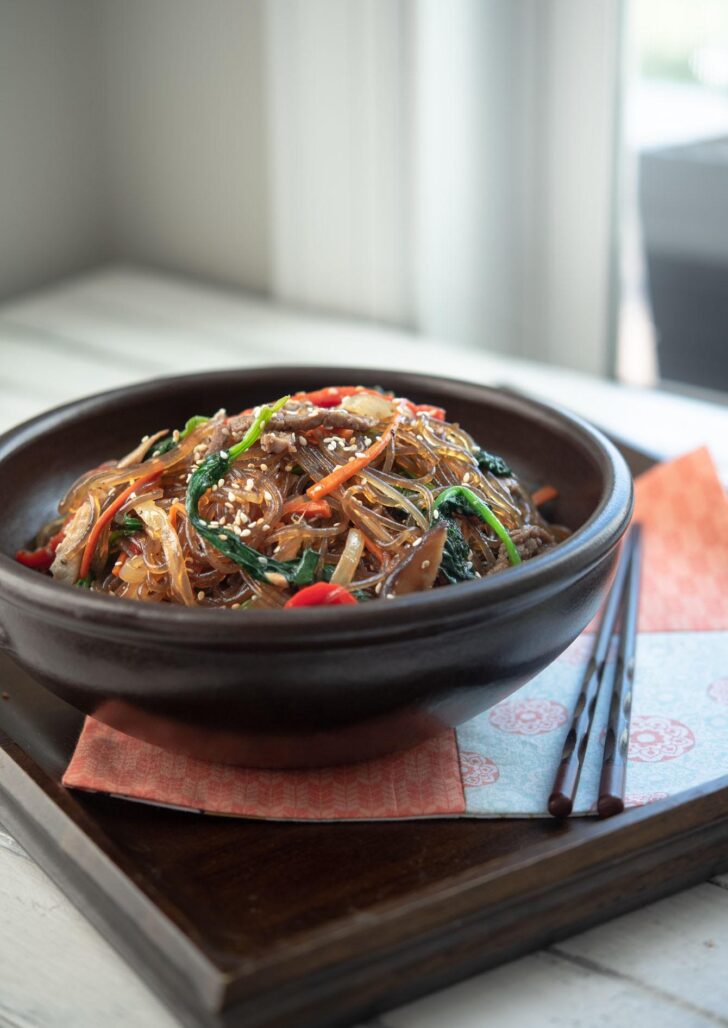
The best part is how far it goes. You can re-boil the same bones for extra batches, building enough broth to enjoy all week or to freeze for later. It’s a time-saver that keeps the heart of tradition intact. This broth also makes a wonderful base for tteokguk (rice cake soup).
If you enjoy this Instant Pot seolleongtang, you’ll also like my Instant Pot Galbitang (Korean short rib soup). Both use the same slow-simmered beef flavor but with different cuts of meat.
Types of Ox Bones to Use
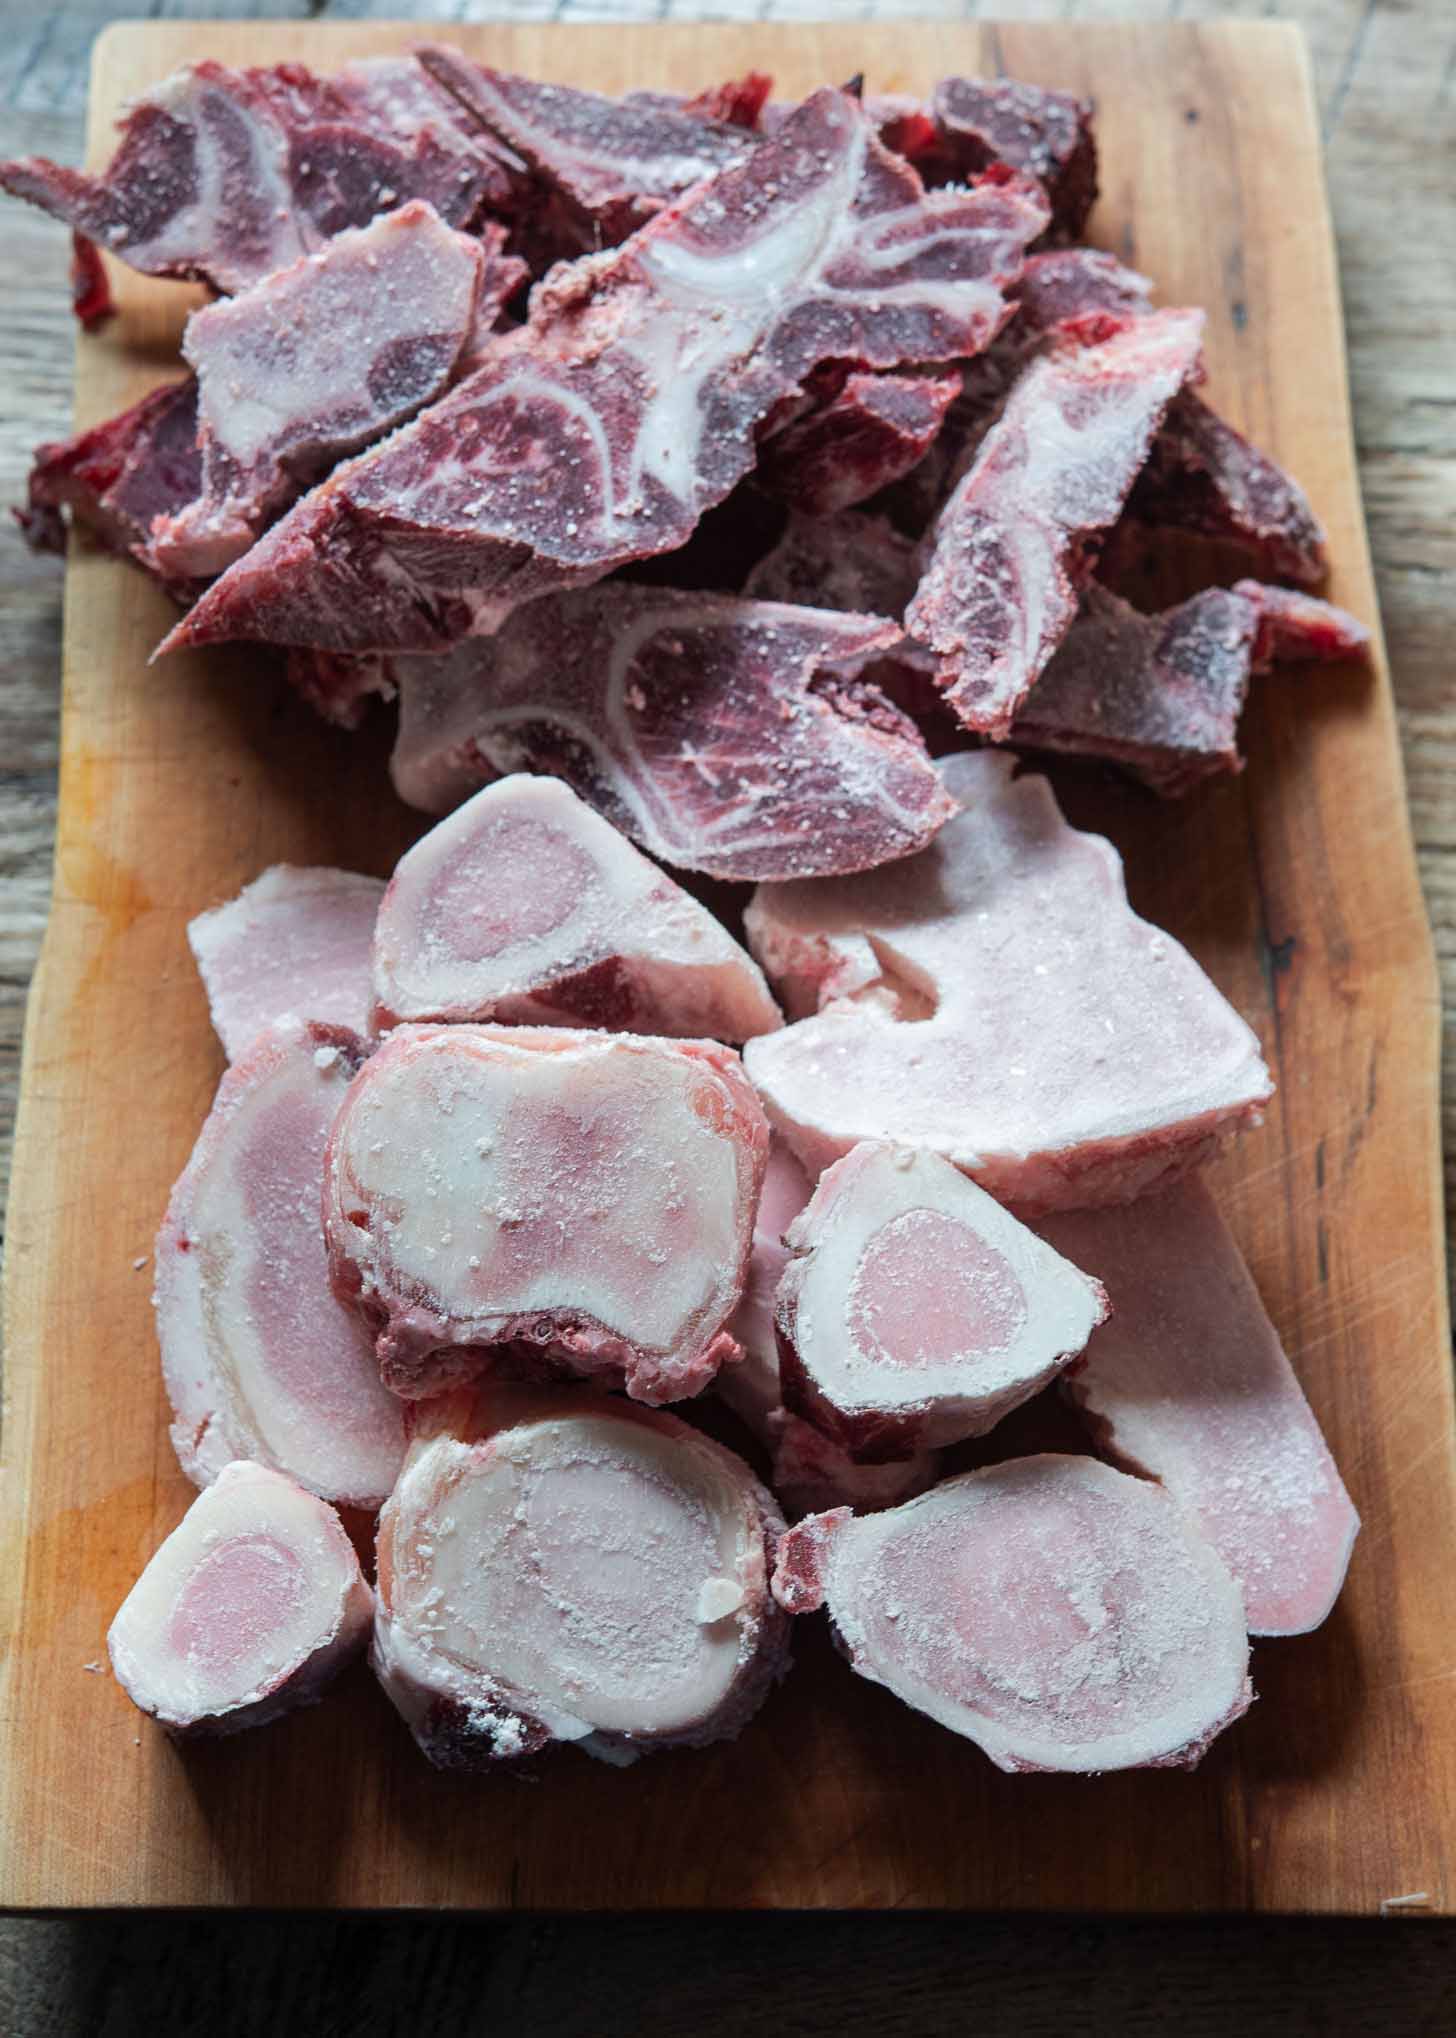
Seolleongtang is traditionally made with ox leg bones, especially marrow bones (sagol, 사골), which give the broth its signature richness. For even more depth, Korean cooks often mix in:
- Knuckle bones (dogani, 도가니) – add body and gelatin.
- Ox foot (ujok, 우족) – gives a sticky richness.
- Assorted bones (jappyeo, 잡뼈) – sold in packs at Korean markets, great for balancing flavor.
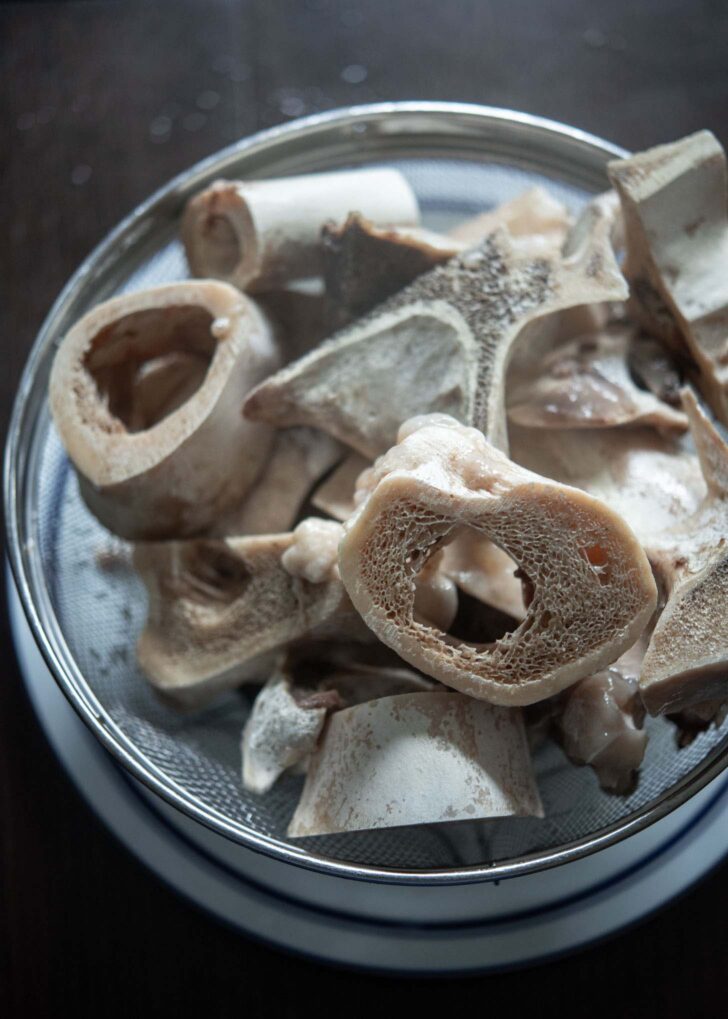
Using 2–3 types together gives the most authentic flavor. Look for bones that are white in the center with a pinkish edge for a clean broth.
Substitutes like oxtails (used in kkori gomtang), beef shank, or other marrow bones won’t be quite the same, but still produce a deeply satisfying soup.
How to Make Seolleongtang (Instant Pot Method)
Prepare the Bones
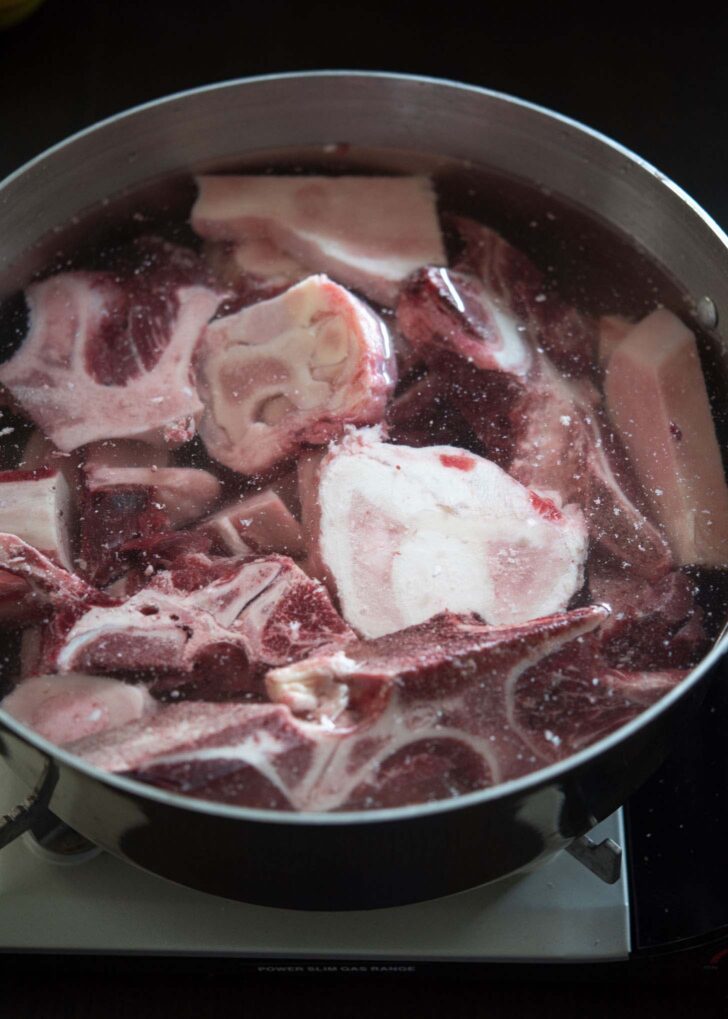
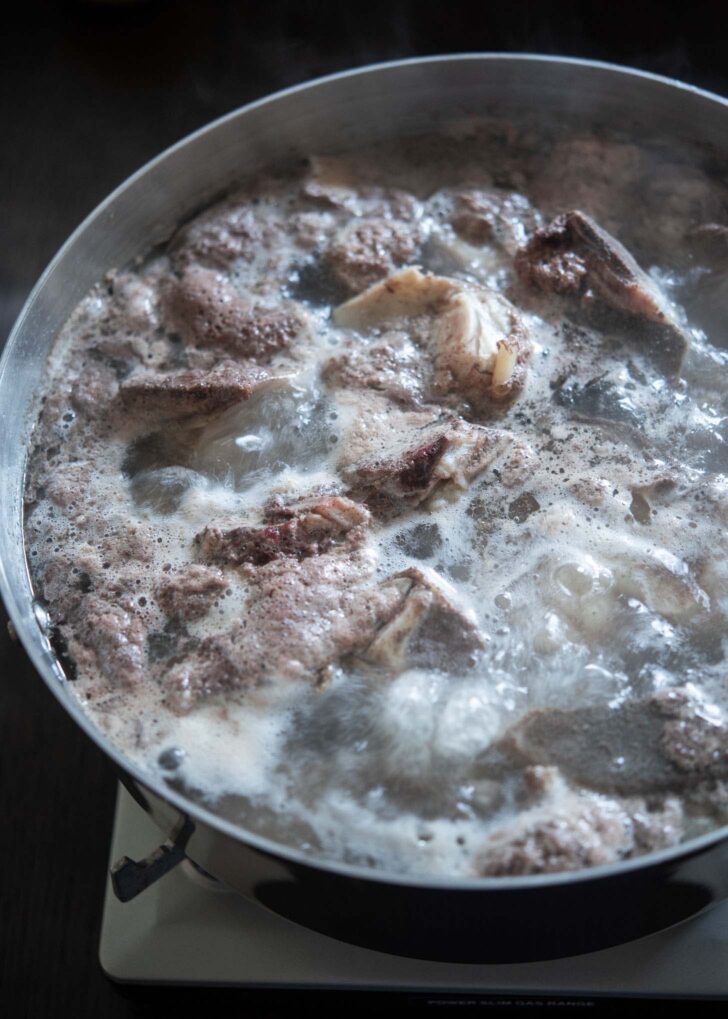
Before cooking, parboil the bones in a large pot for about 10 minutes. As the water boils, scum and fat will rise to the surface.
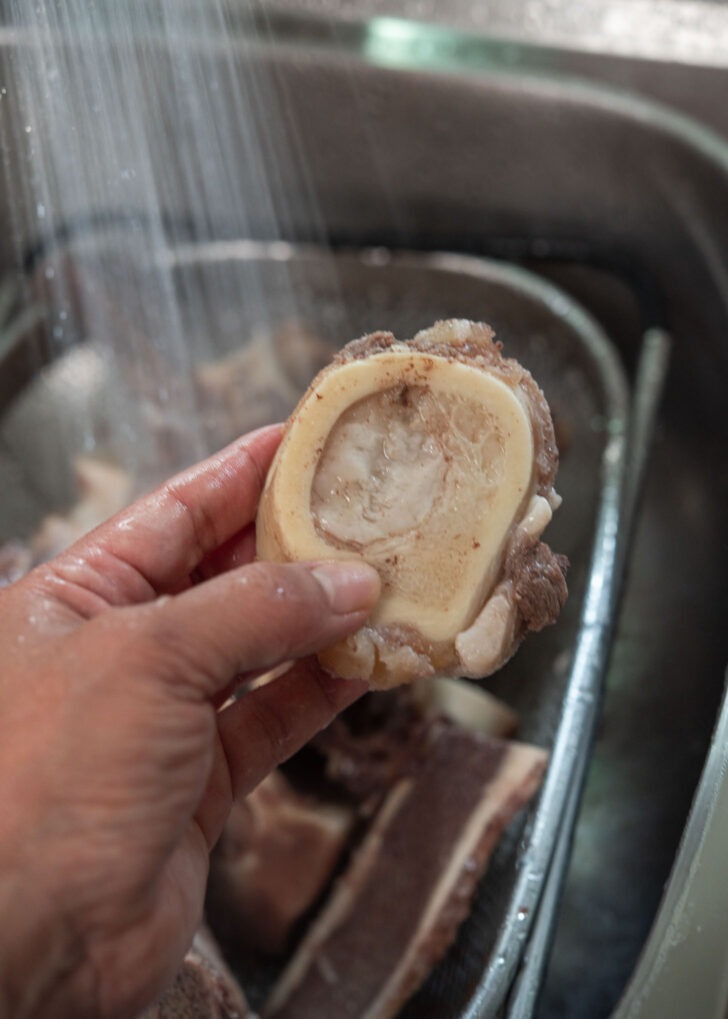
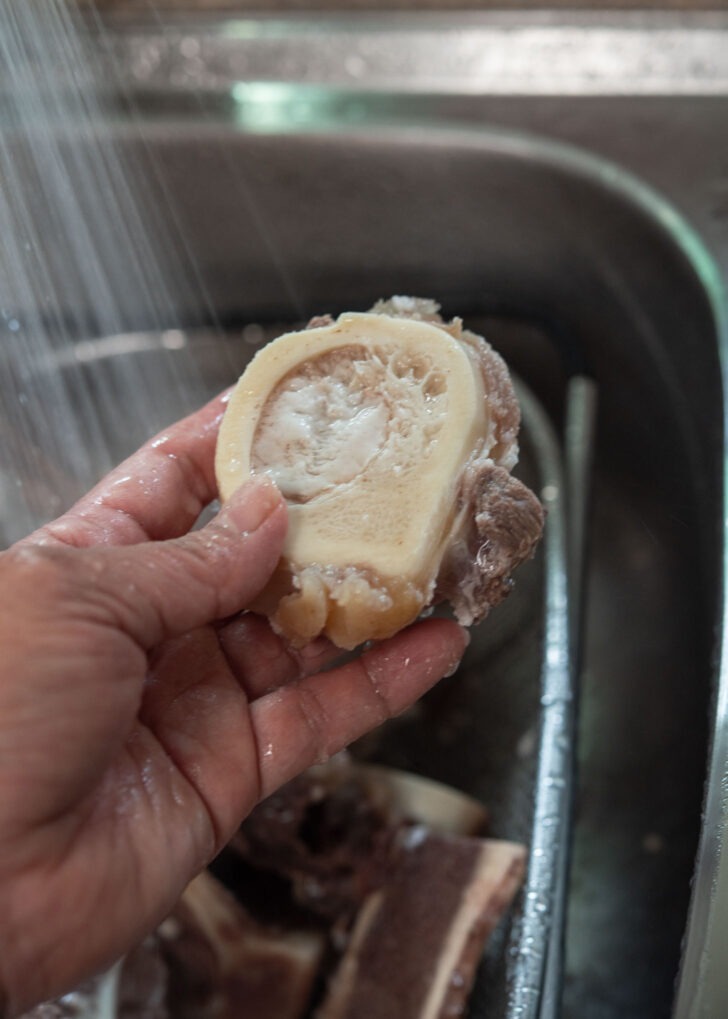
Drain and rinse the bones under cold water. This simple step clears out impurities and prevents unwanted odors.
Cook the First Broth
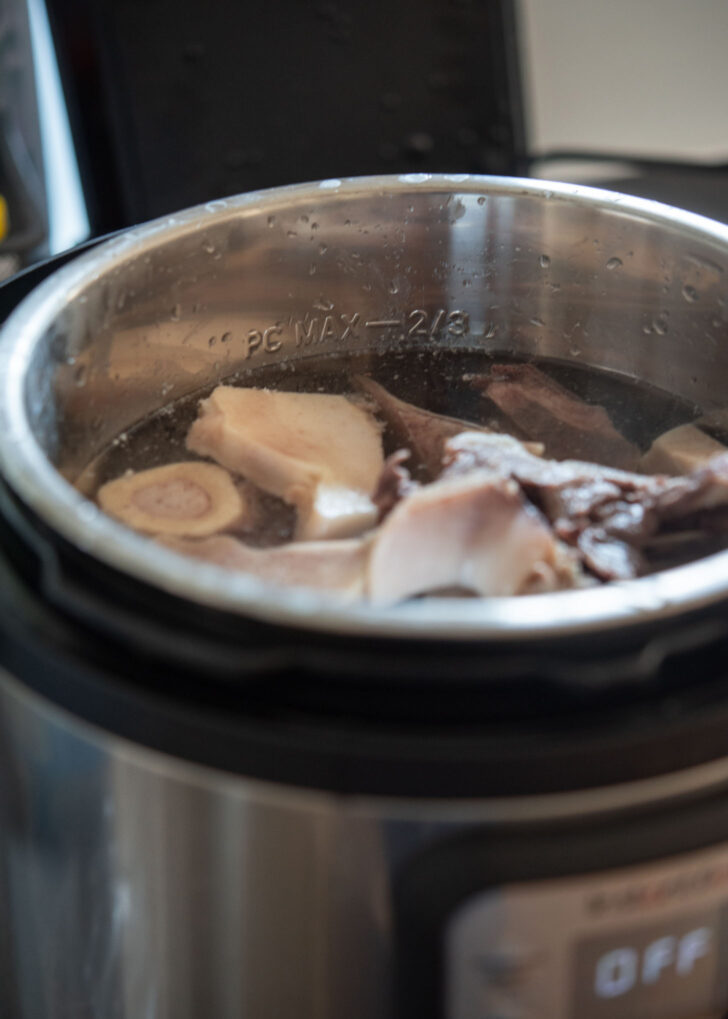
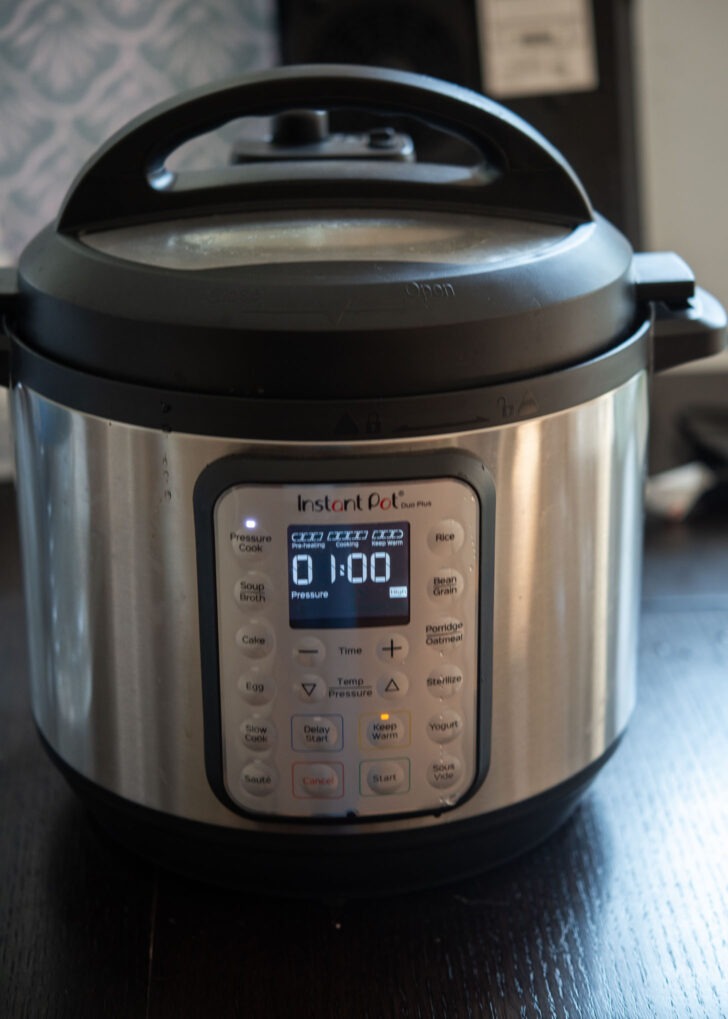
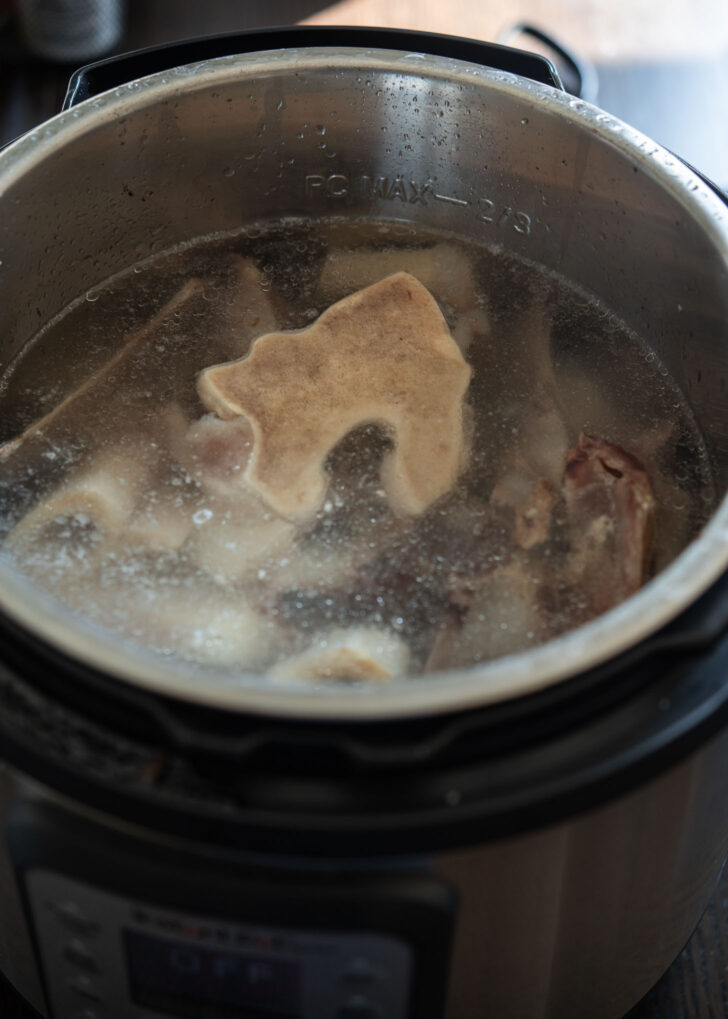
Add the cleaned bones to your Instant Pot (8-quart or larger works best). Fill with cold water to about 1 inch below the max line. Cook on high pressure for 1 hour, then let the pressure release naturally.
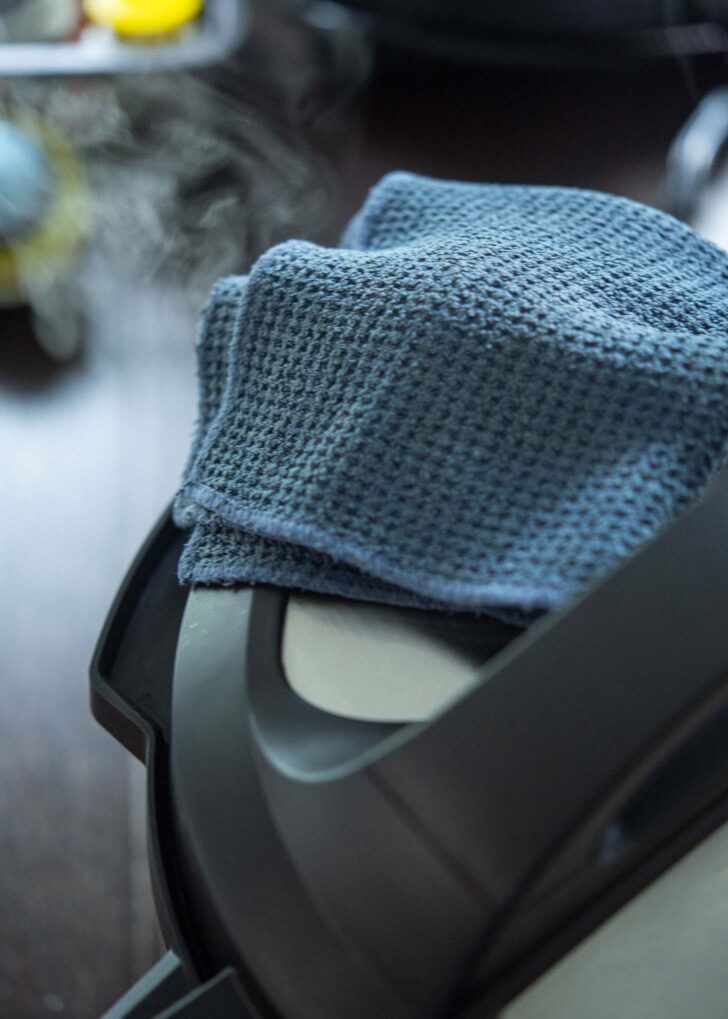
Important Note: Once done, refrain from using the quick-release feature, or you’ll risk a messy eruption of hot broth. Allow the pressure to release naturally, which can take up to 1.5 hours. After that, use a kitchen towel to cover the vent, ensuring all pressure is released, then open the lid.


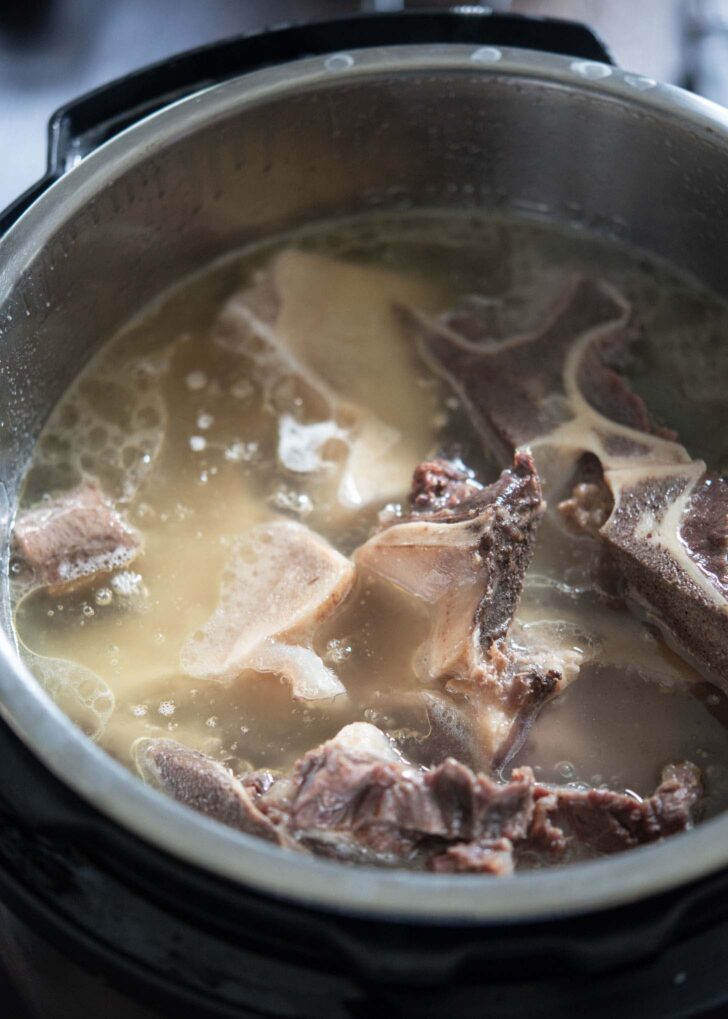
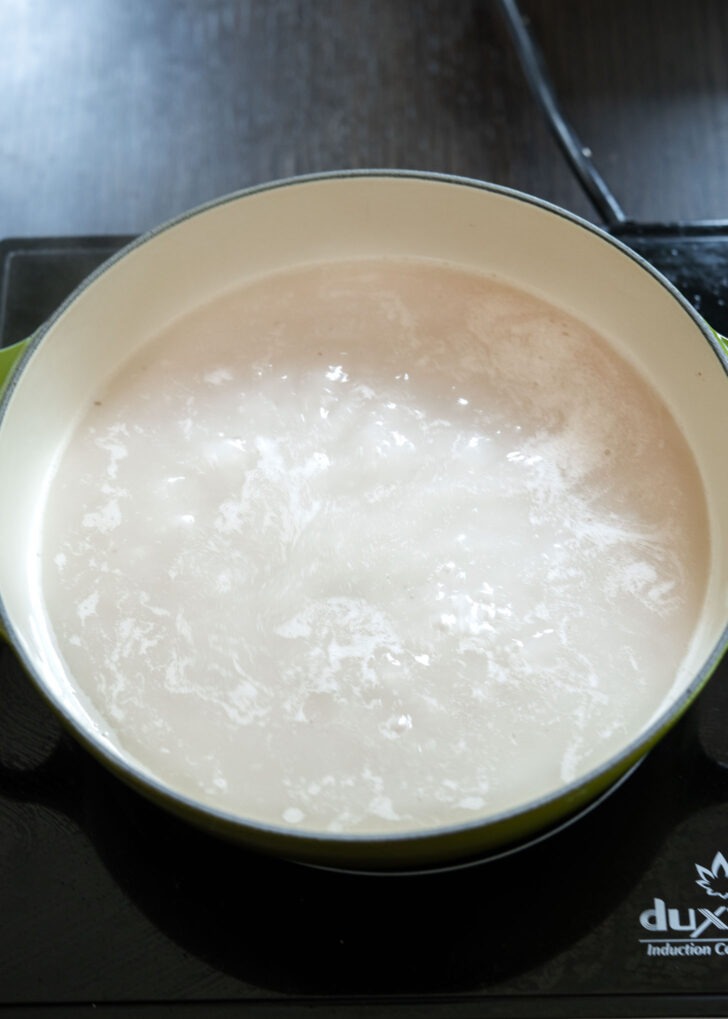
At this stage, the broth will look clear. Switch to sauté mode and boil for about 1 hour (restart every 30 minutes if needed). This is when the transformation happens—the broth becomes creamy white and full of body.
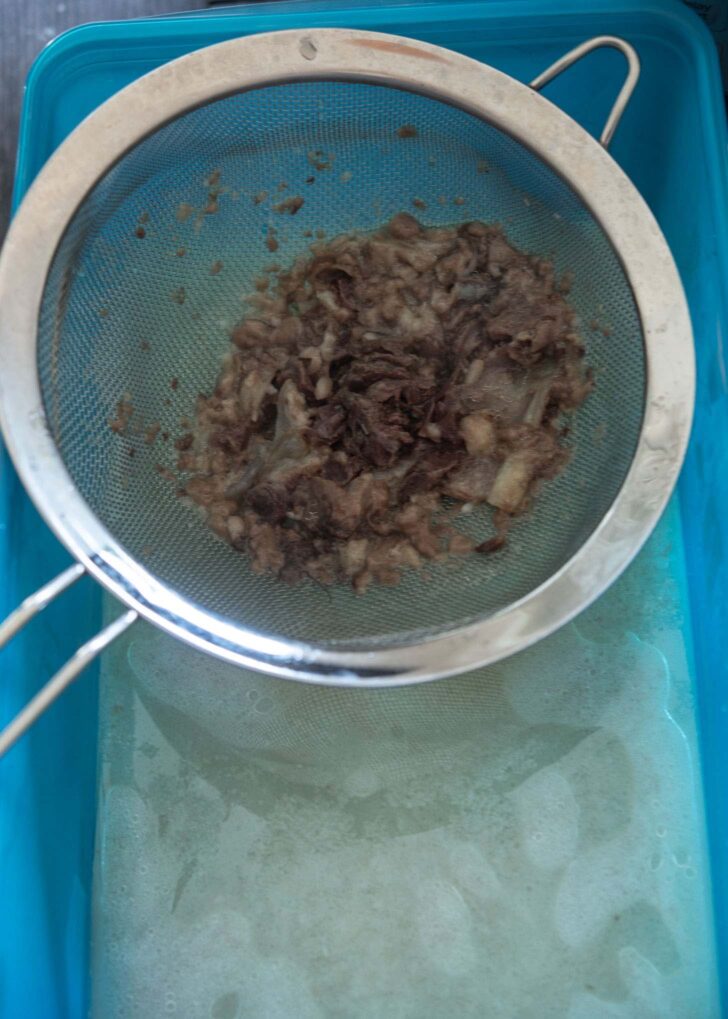
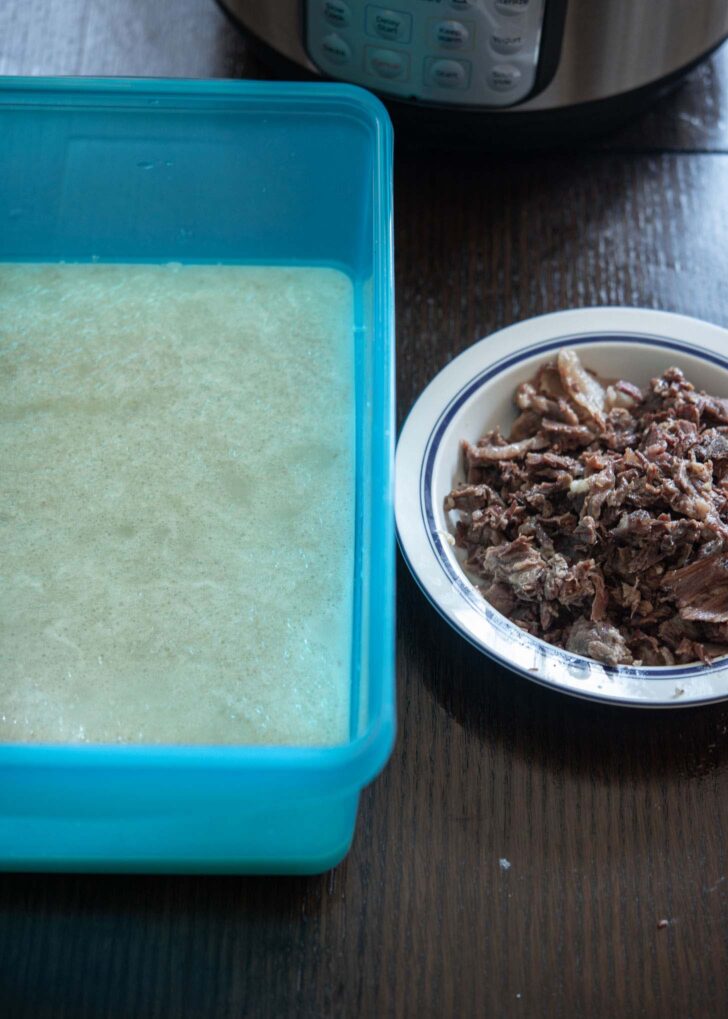
Strain the broth into a large container and set the bones aside. If there’s any meat on the bones, strip it off and reserve separately.
Re-Boil the Bones for More Broth
Don’t stop after the first batch—these bones still have plenty to give. Return them to the Instant Pot, add fresh water, and boil again on sauté mode for 1–1½ hours. This second round of broth is just as flavorful. Combine it with the first batch.
If you’d like, repeat once more for a third batch. By then the bones will be brittle and hollow, and you’ll have enough broth for days (or freezer storage).
Chill, Defat & Reheat
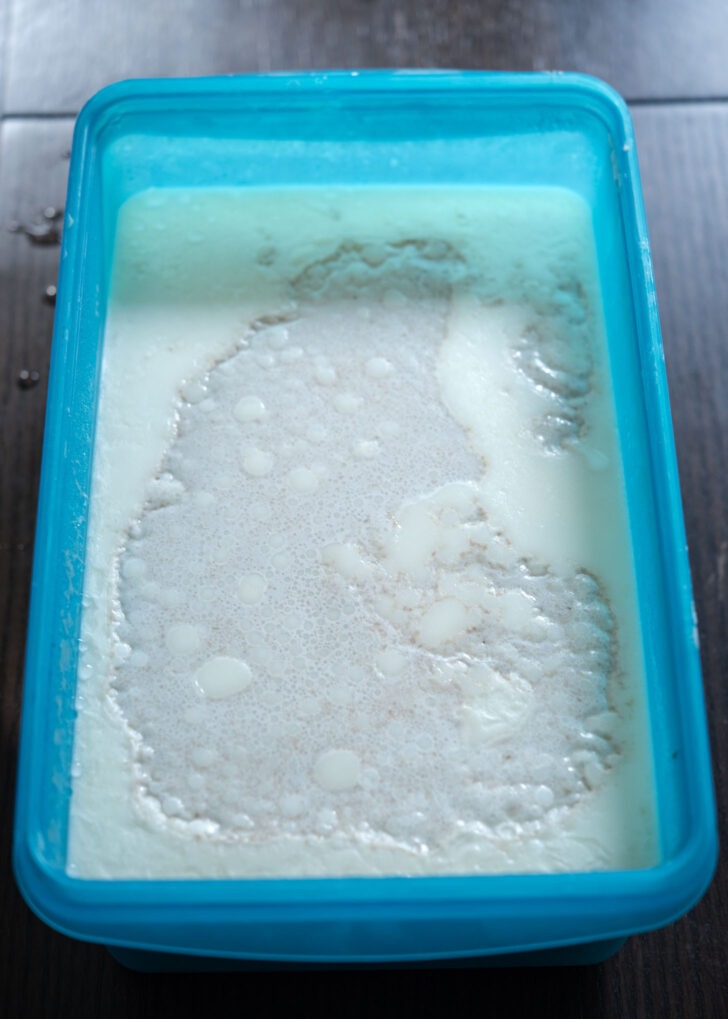
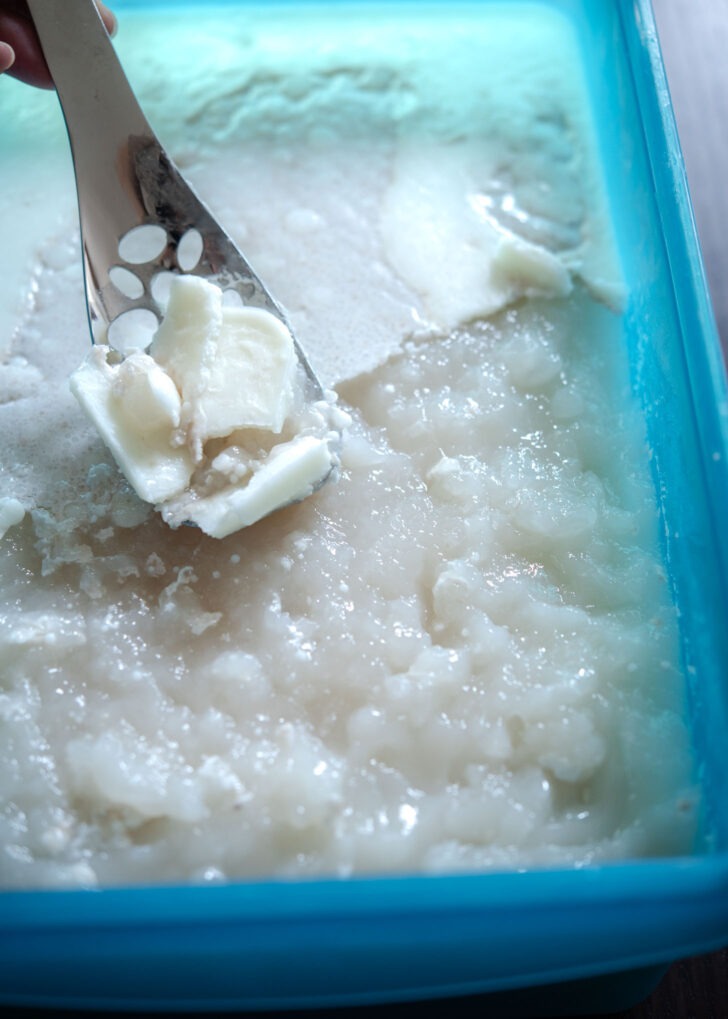
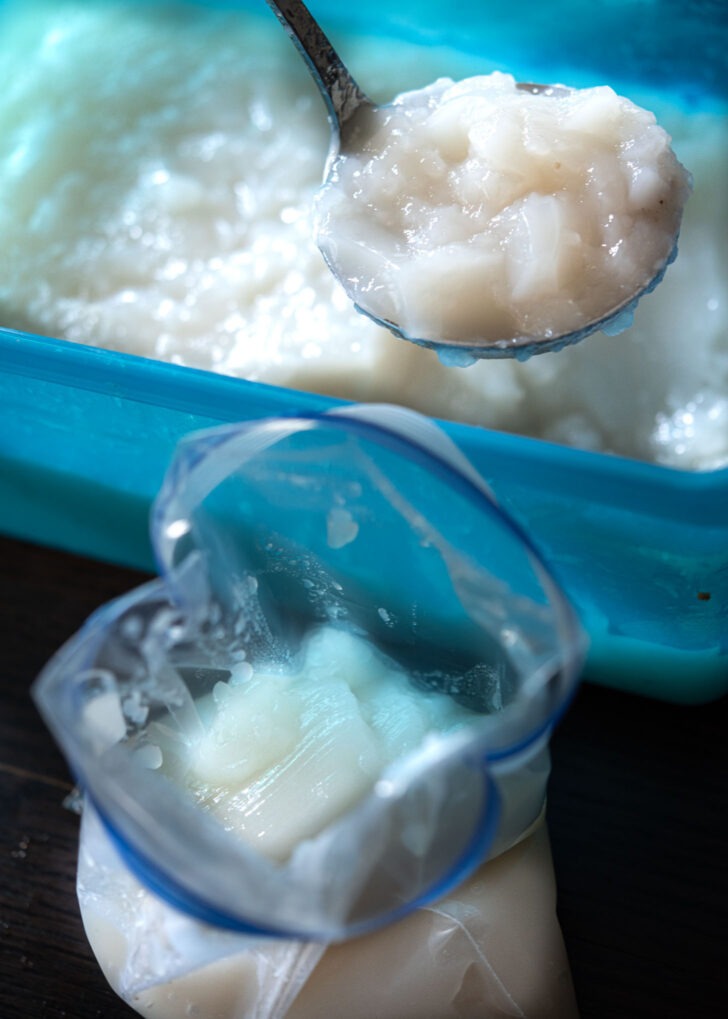
Cool the broth completely, then refrigerate until the fat solidifies on the surface—overnight is best. Skim off the hardened fat with a spoon. You’ll notice the broth gels when chilled, which is a good sign of collagen-rich marrow.

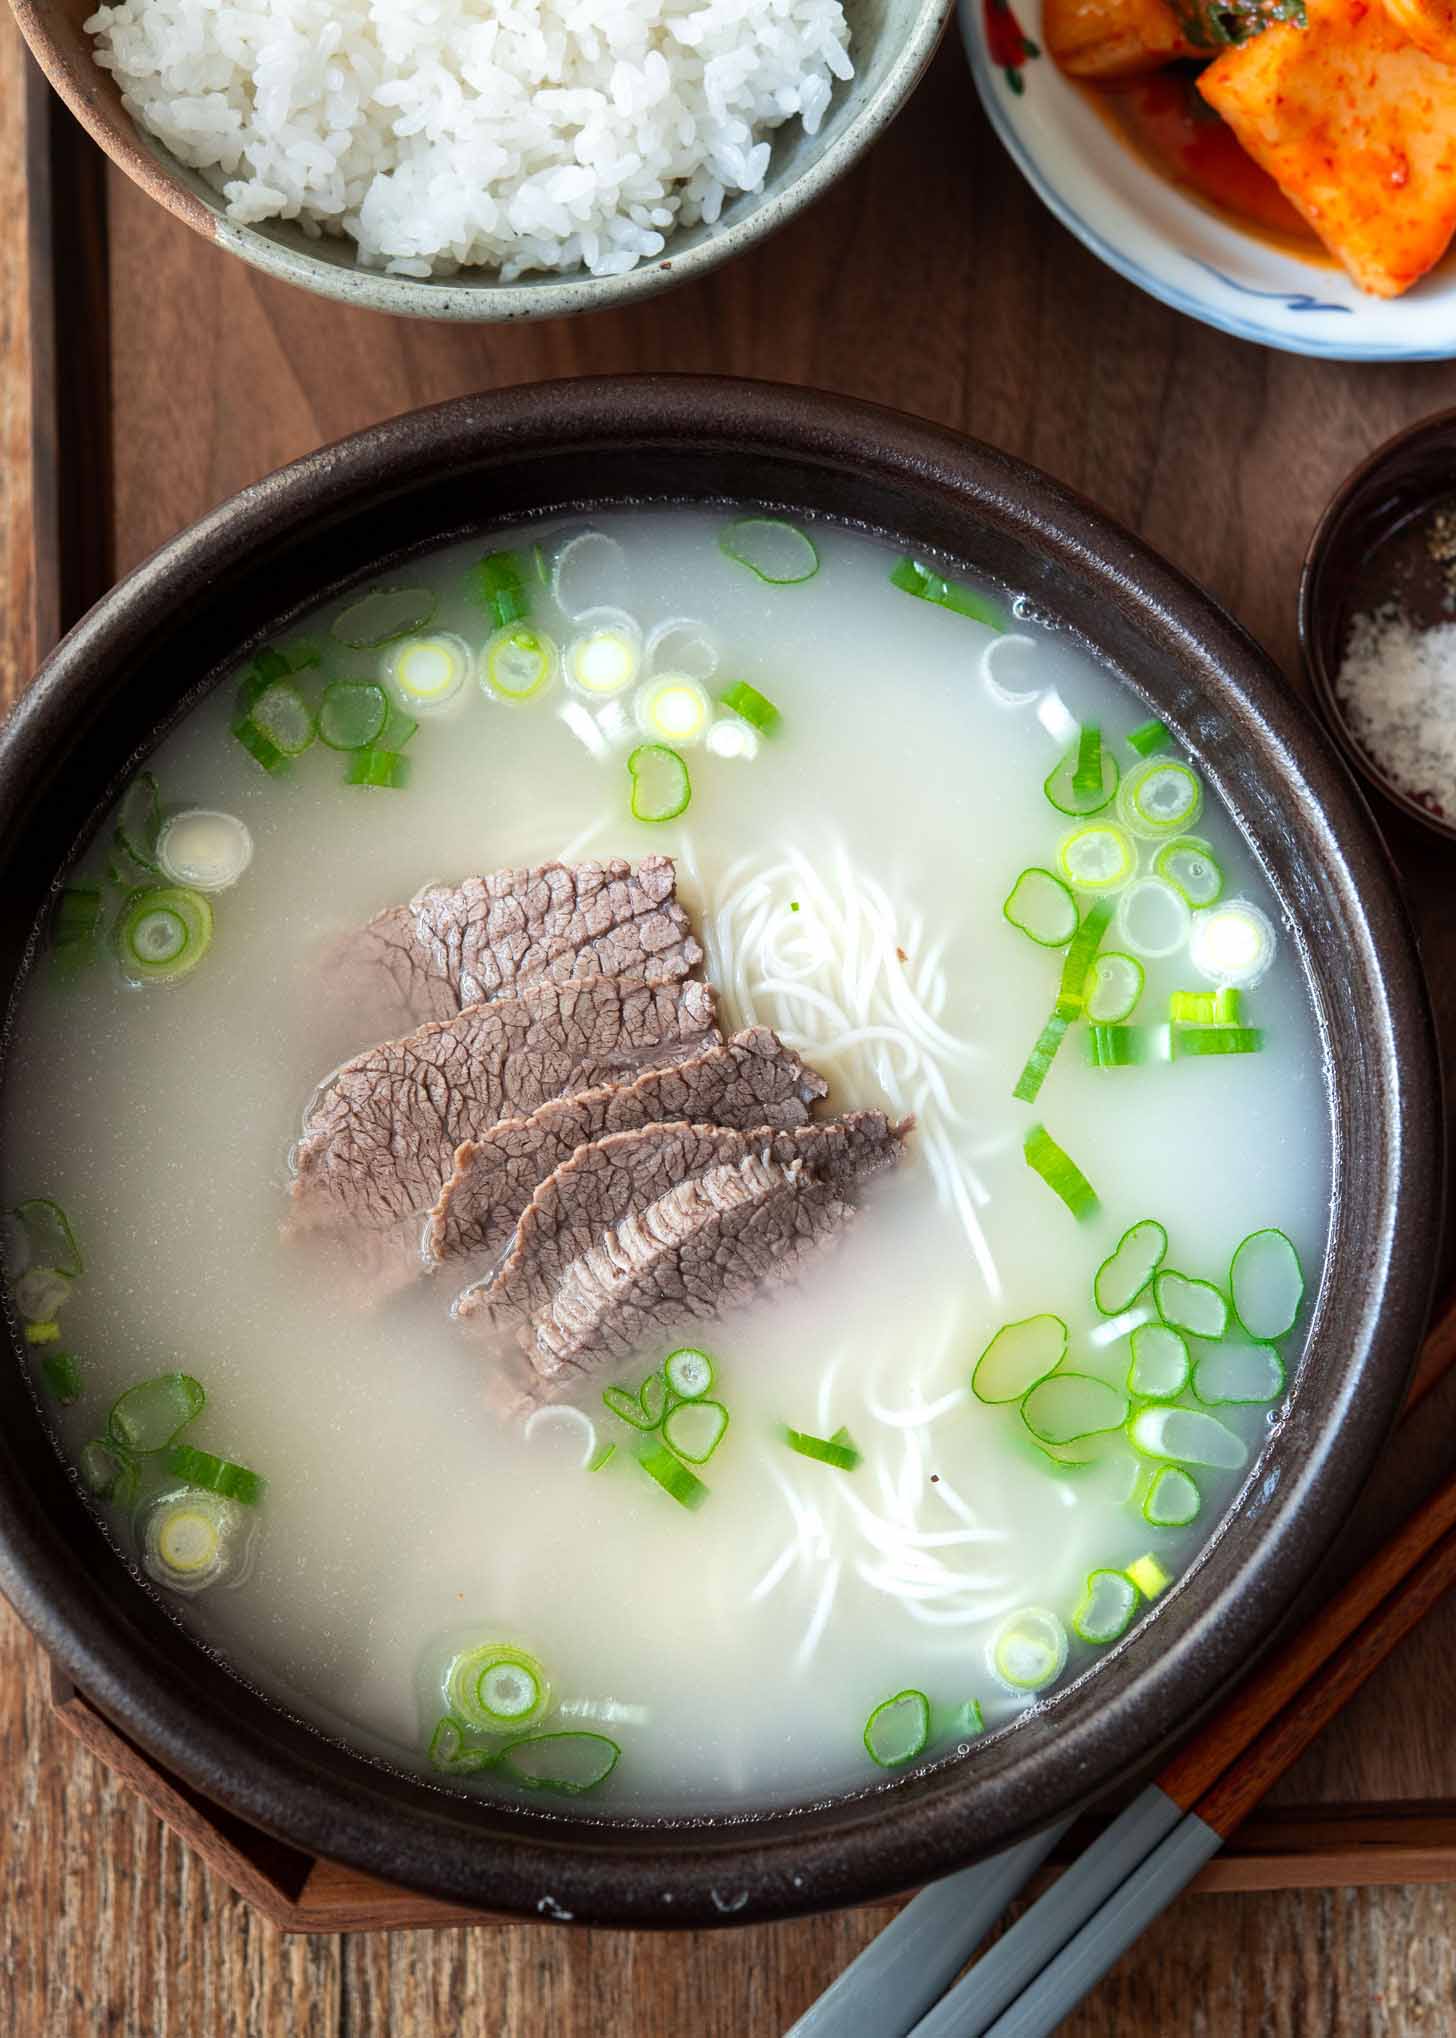
When ready to serve, reheat gently with any reserved meat. The broth will return to its milky white consistency.

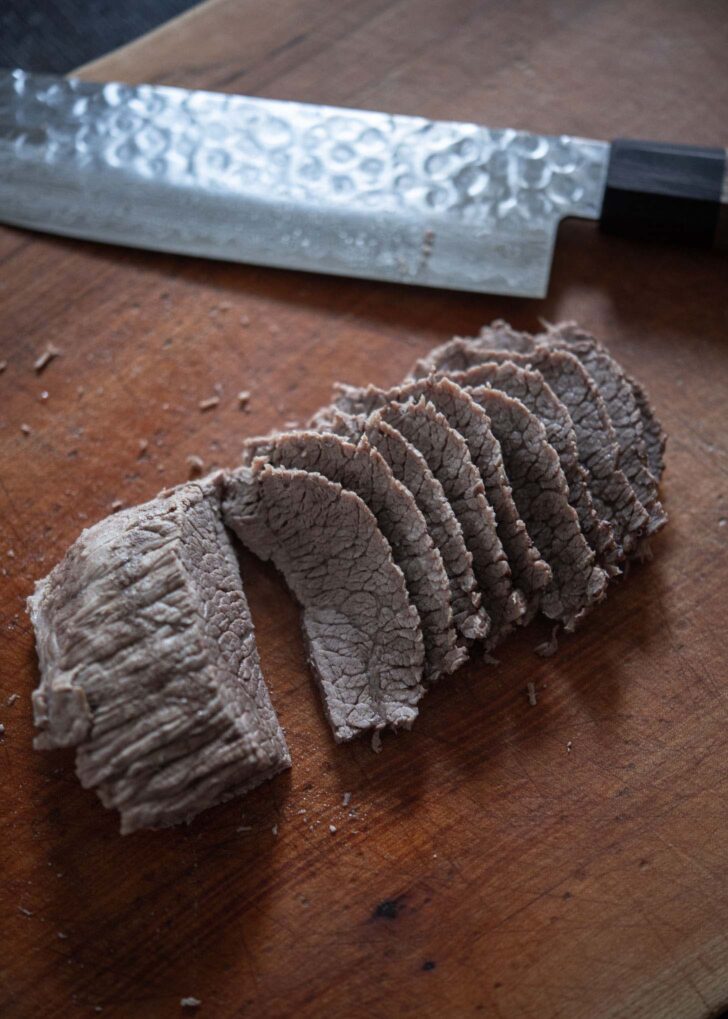
Optional: For extra heartiness, simmer beef brisket separately with aromatics like onion, garlic, and peppercorns, then slice thin and add on top of each bowl.
Traditional Stovetop Cooking Method
If you prefer the old way, place the cleaned bones in a large pot of water and simmer gently for 6–8 hours, until the broth turns milky. Refill with water and repeat for a second and optional third batch, combining all broths. This method takes up to two days but delivers a deep, classic flavor.

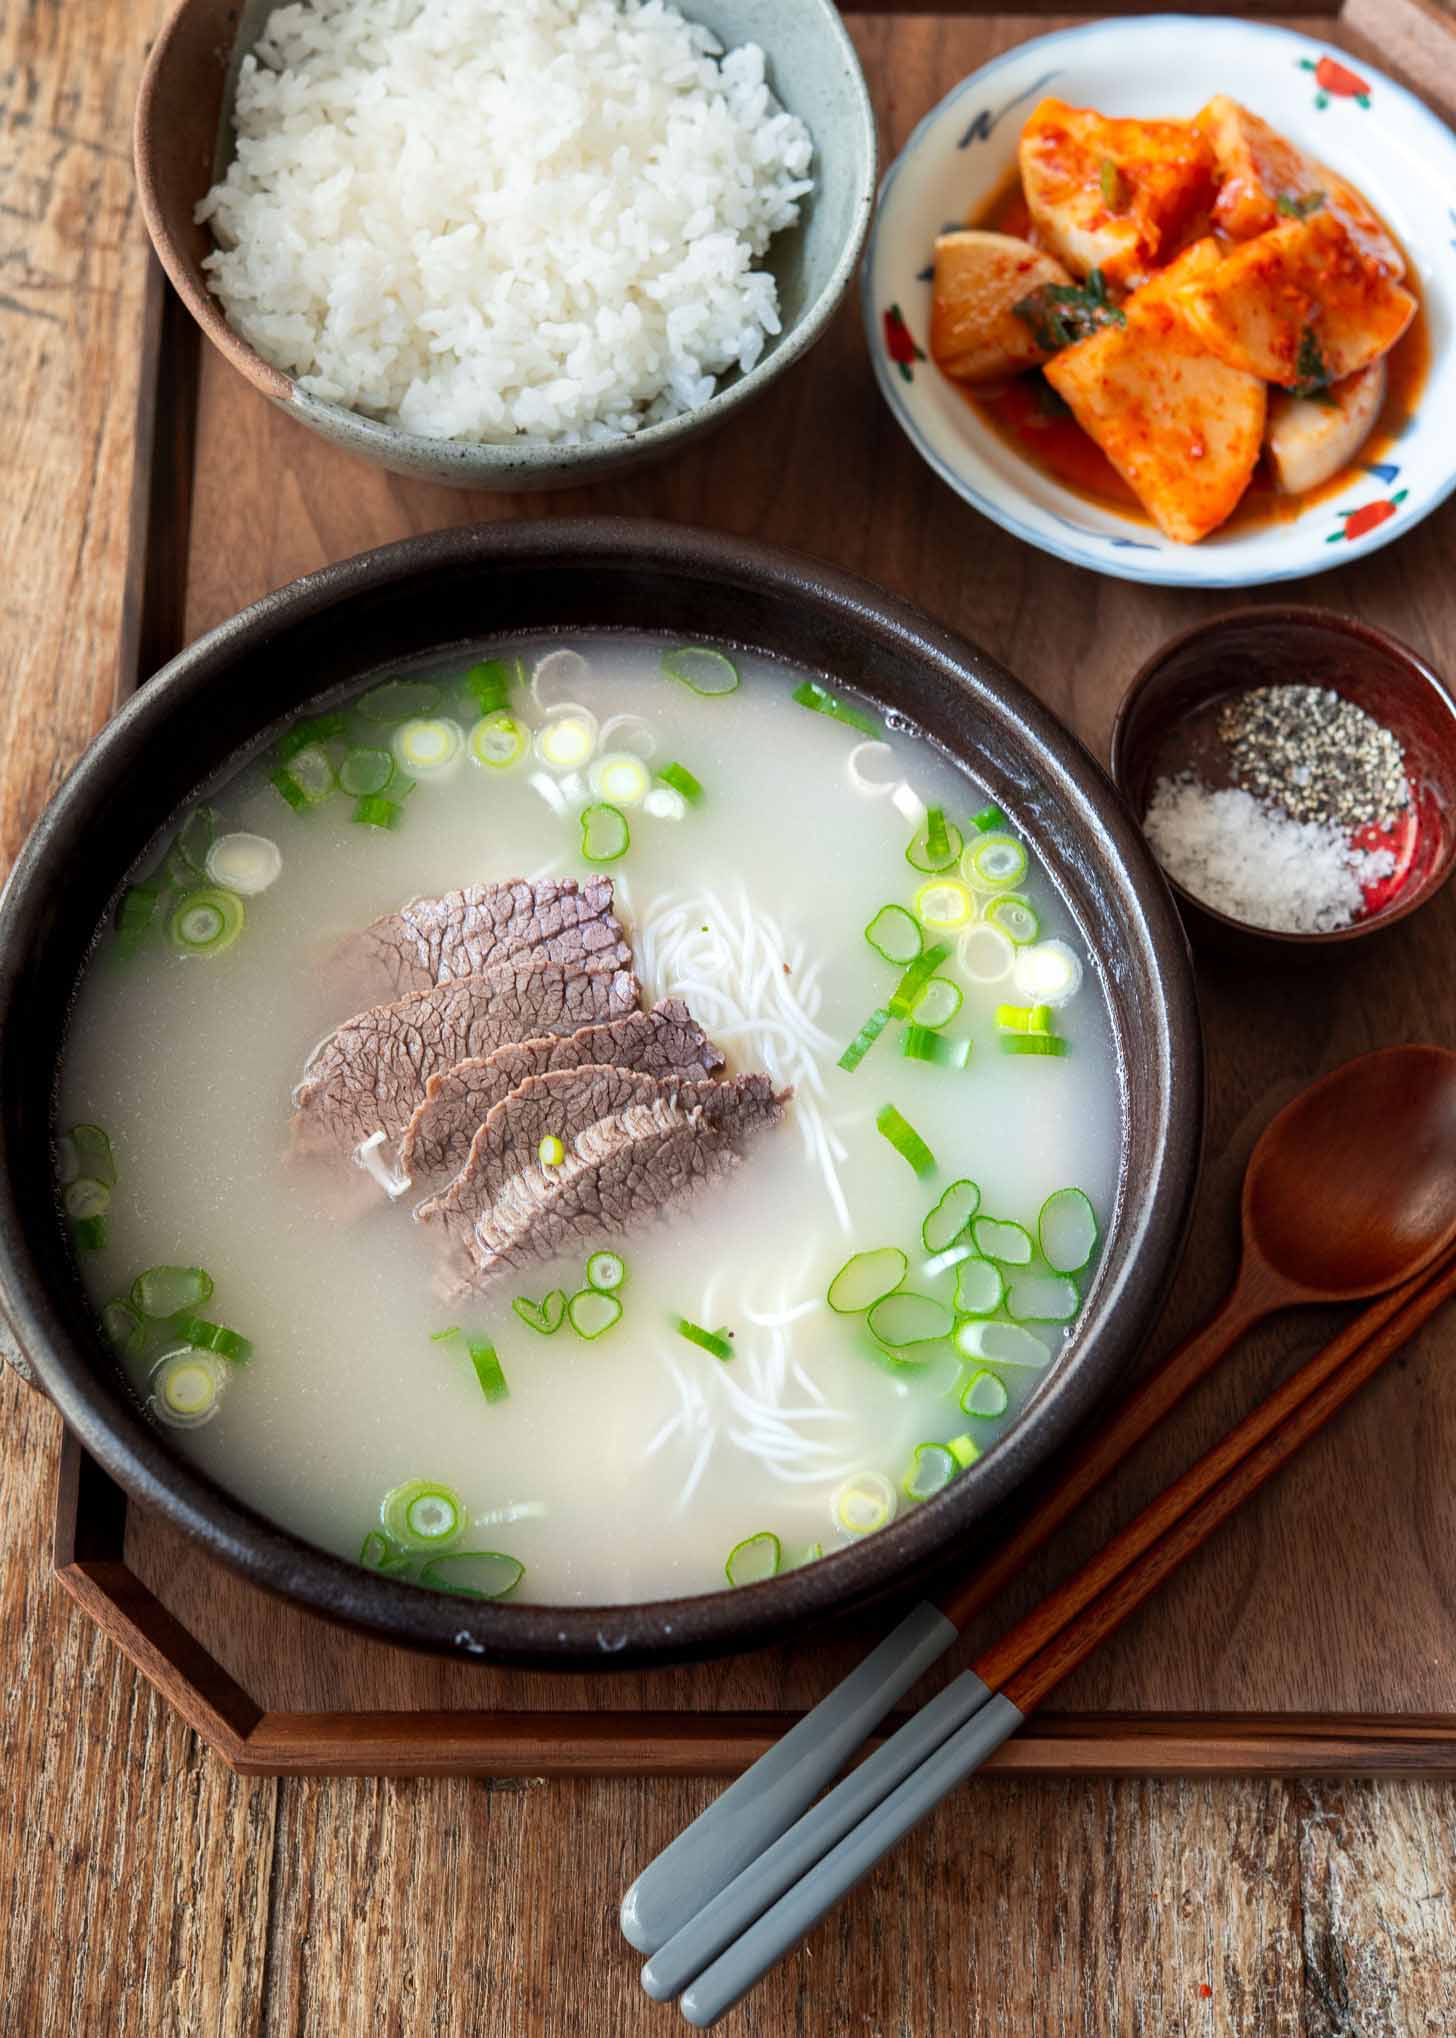
How to Serve Seolleongtang
Seolleongtang is served with short-grain rice, somyeon noodles, or both. The broth itself is unseasoned, so everyone adjusts their own bowl with salt, black pepper, and plenty of chopped green onions.
I like to add a splash of kkakdugi (radish kimchi) juice for tang, while others prefer a clean, mild flavor. If brisket has been simmered, slice it thin and place it on top of the steaming sou just like at a Korean restaurant.
Storing and Freezing Recommendations
This soup keeps beautifully, which is why many Korean families make it in large batches. Once cooled, the broth will gel from the collagen—a sign of good bones. Store it in the refrigerator for up to 5–7 days, skimming off hardened fat before reheating.
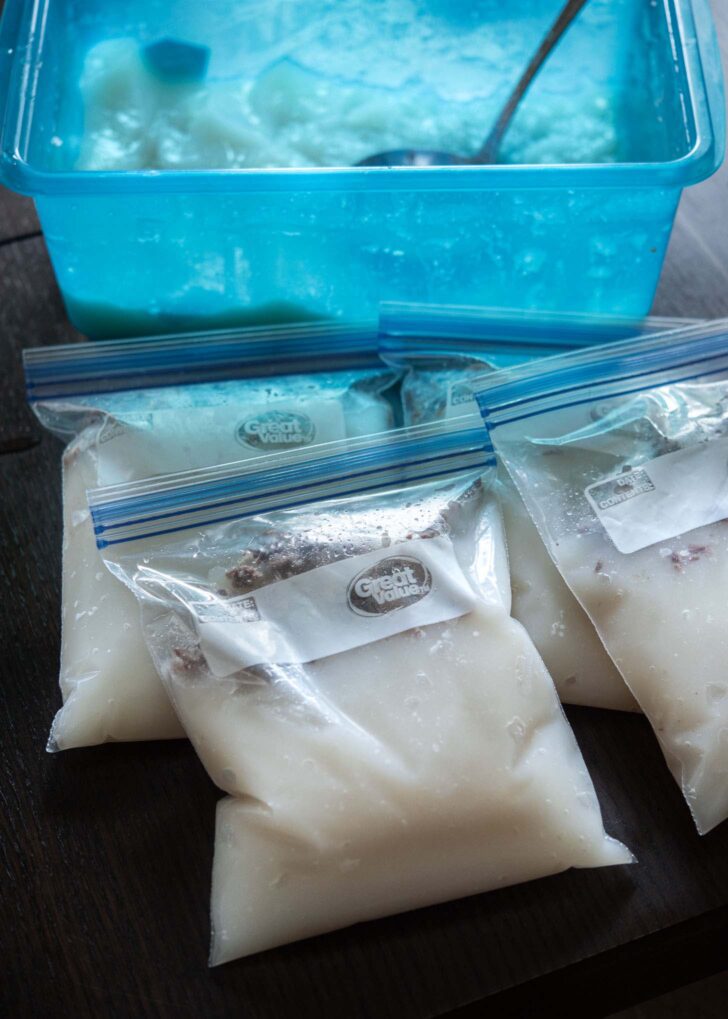
For longer storage, divide into freezer-safe containers or bags, and freeze up to 3 months. Thaw overnight and reheat until the broth turns milky again. It will be a great stock base for my Busan-style pork rice soup (dwaeji gukbap).
If you love brothy Korean comfort food like this, my Korean Soups & Stews collection has plenty more to warm your kitchen.
Love this recipe? Rate it and share your experience in the comments below! On Instagram? Tag me to showcase your creation. For more delicious recipes, subscribe to our newsletter!

Seolleongtang (Korean Ox Bone Soup)
Ingredients
- 3-1/2 lb (1.5 kg) beef marrow bones (sagol)
- 3-1/2 lb (1.5 kg) assorted bones, or knuckle bones
- 1 lb (450 g) beef brisket, optional
- water, 3 liter (3/4 gallon) per batch
For serving
- cooked rice
- cooked somyeon noodles
- chopped green onion
- thinly sliced beef brisket meat
- salt and pepper to taste
Equipment
- instant pot 8-quart or larger capacity
Instructions
For parboiling
- Begin by placing the bones in a large stockpot and covering them with water. Bring the water to a rolling boil and let it bubble for about 10 minutes. During this time, skim off the scum, fat, and impurities that float to the surface. Once boiled, drain the bones and give them a thorough rinse to wash away any remaining residues.
First batch
- Put the cleaned bones into an Instant Pot, ideally one that's 8-quart or larger. If you have a smaller model, simply use fewer bones. Fill the pot with cold water to about 1 inch below the maximum fill line, which is approximately 3 liters for 8-qt pot.
- Close the Instant Pot lid and cook on high pressure for 1 hour. Expect it to take about 30-45 minutes for the pot to pressurize before the cooking time starts. When finished, let the pressure release on its own, which might take up to an hour and a half, to avoid a broth explosion. Once the pressure has fully released, carefully open the vent with a kitchen towel covering it, then open the lid. Your broth will look clear at this stage; the milky appearance develops with further cooking.
- Switch the Instant Pot to sauté mode and boil the broth for 30 minutes. Do this twice, so you have an hour of boiling in total. Keep the pot partially covered with a glass lid to let steam out. After this, the broth will turn from clear to milky. Pour the broth through a strainer into a large bowl or container, and keep the bones aside. Peel any meat off the bones and keep it separately for later use.
Second and third batch
- Put the bones back in the Instant Pot and fill it with 3 liters of fresh water. Boil the broth using the sauté setting for an hour (an hour and half is even better). Remember to turn the sauté function back on after the first 30 minutes. After boiling, mix this new batch of broth with the one you made earlier.
- For a third batch, if you choose, repeat the boiling with fresh water and combine all batches together. With each additional batch, the bones will turn brittle and hollow.
Skimming fat
- Let the broth cool down before placing it in the fridge. Once chilled, the fat will harden on top, making it simple to skim off with a spoon. You’ll see the broth take on a jelly-like consistency, indicating a high marrow content.
Optional beef brisket
- You can either simmer the brisket along with the bones until it's tender or cook it separately with aromatics like onion, garlic, and whole peppercorns for added flavor. I prefer the latter, especially when I plan to chill the bone broth and serve it the next day.
Serving
- Heat the broth and beef together in a pot until it's warm and turns milky. Season it at the table to suit your taste with salt, pepper, and lots of chopped green onion. Add some gochugaru or kimchi juice for extra flavor. Add slices of cooked brisket on top if you have them and serve with rice and radish kimchi. Enjoy your meal!
Freezing tip
- If you're looking to freeze it, transfer the leftover broth and meat pieces to freezer bags. Ensure you leave some space for expansion. The broth can be frozen for up to 3 months.
Hello, I followed the recipe with 1.5kg of Bone Marrow, 750g of knuckles and 750g of feet, and it turned out super creamy white and tasted delicious!
I am definitely going to make it again in the near future, but just for clarification –
After the first boil, the instructions say to remove meat attached to the bone. My experience, there were few meat pieces, but most of the pieces stuck to the bones was collagen.
Am I supposed to get rid of the collagen and fat attached to these bones as well? I wasn’t sure because iirc the collagen and far emulsifying through hard boil is what caused the whiteness.
After the first boil, you only need to remove actual meat bits or blood residue that can cloud the broth. Do not remove the collagen or fat attached to the bones. That collagen and marrow fat are exactly what emulsify during the long boil and give seolleongtang its signature milky-white color and rich body.Happy cooking!
My boyfriend is Korean and we often go to this Korean restaurant for their seolleontang because it’s my favorite soup. I made your recipe in my instant pot, I did 3 batches. I left it overnight to chill, removed the tallow on top and simmered a cup for breakfast. I added my salt to taste and am sipping on it now! This tastes like the authentic broth we get from the restaurant. Thank you so much for this simplified recipe. My bf’s Umma is going to be proud lol
Aww, that makes me so happy to hear! I’m thrilled it turned out just like the restaurant version. Thank you for sharing and for taking the time to make it with such care. Enjoy your cozy bowl of seolleongtang!
This turned out perfectly cloudy! Low maintenance way to prepare. I have the smaller IP and was able to fit 1.2 kg of bone marrow. I used the strained bone marrow fat to make butter after.
Amazing recipe. Thank you!
I’m so glad to hear that. Thank you!
Made this recipe twice already and it has never failed me. Thanks for making this so easy to follow! I now have enough seolleongtang broth to last me for weeks. 🙂
You are very welcome! It is so happy to hear that this worked out great for you. Thank you very much!
Thanks for posting this Holly! Made this recipe three times so far and it’s a lot of work, but never fails. I don’t have a lid that fits the IP for the saute step so it’s a lot of babying during that time to avoid extra drips over the side.
Despite the work involved, feels less risky than the classic method of leaving the stove on overnight. For the second half of the saute, if the broth already looks milky white, I turn on low saute instead of normal or else a lot more of it boils away.
I have a very large pressure cooker and only used 5 lbs of bones, but an hour of pressure cooking seems to have burned the bones. I have to throw this out and try again with half the bones…
I’m sorry to hear about your issue. If you’re using a conventional stovetop pressure cooker, not an Instant Pot, you’ll need to adjust the cooking time. Once the pot reaches pressure and starts to whistle, lower the heat to medium low and simmer for 30 minutes. After that, wait until all the steam has been released before removing the lid. Then, collect the broth. You may need to repeat this process 1-2 more times to gather more broth. I hope this helps. Thank you!
Hi Holly, could you use a cuckoo rice cooker porridge setting for making this? I don’t have a pressure cooker sadly.
You can, but it will require a lot longer time and you might not get the milky colored broth sine the porridge setting is on lower temperature. If you don’t have the pressure cooker, I would recommend to simmer over stove top with medium heat.
Can you use the pressure cooker for the second and third batches? How come it’s only used for the first batch?
Yes, you can use a pressure cooker for the 2nd and 3rd batches, but the first pressure cooking usually extracts most of the marrow from the bones. After that, just boiling the bones will give you the creamy white broth. Boiling them for about 1 hr to 1.5 hrs on medium to medium high works well. This way, you get the white color of the broth faster than with pressure cooking. It also saves time since you don’t need to wait for the pressure to release. You can do the same for the third batch, but remember, the flavor might be lighter as the bones have less nutrients left.