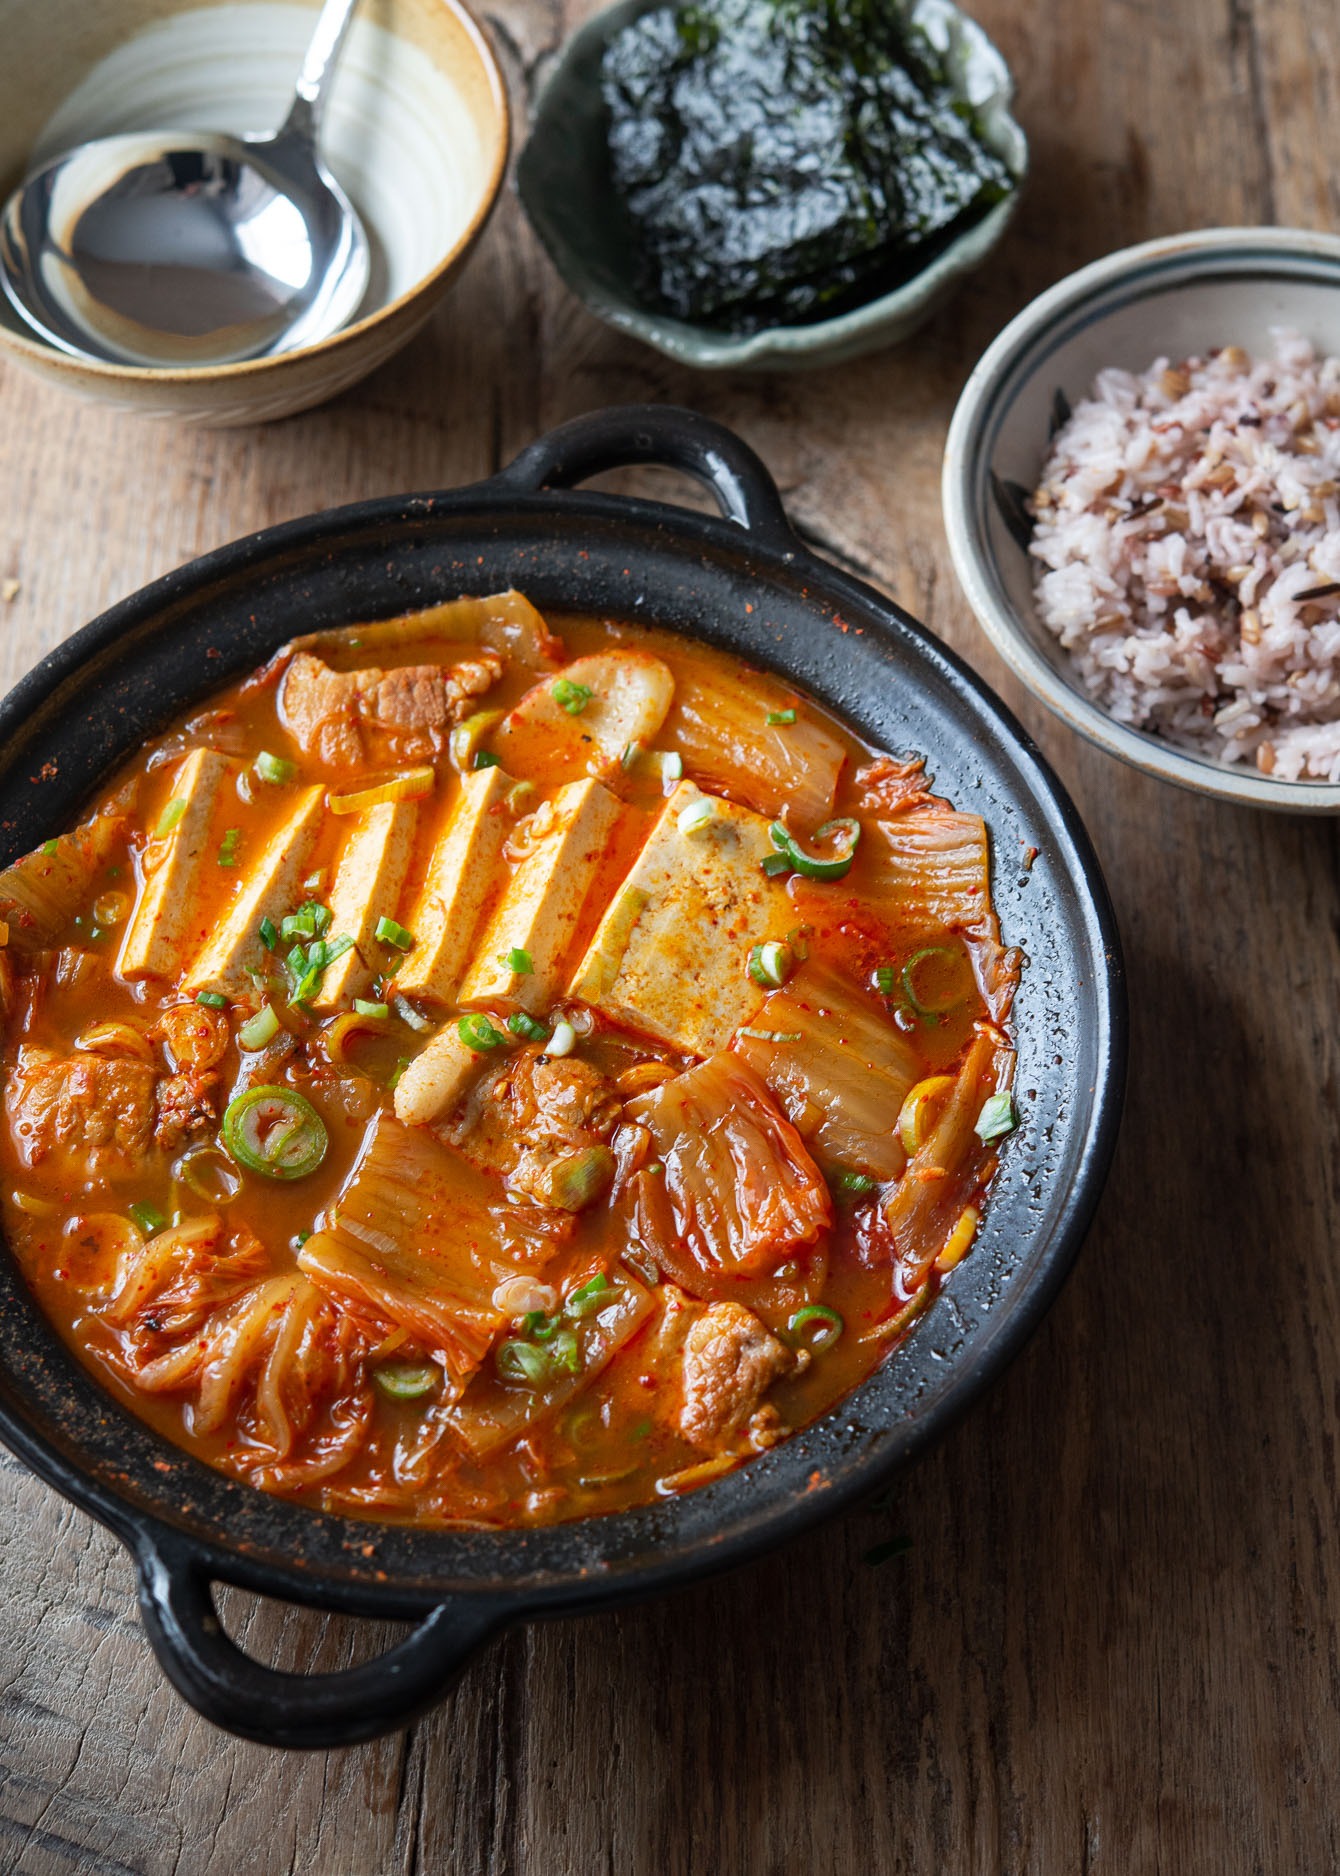
Kimchi Jjigae with Pork (Korean Kimchi Stew)
A warm and tangy kimchi jjigae made with sour, fully fermented kimchi and rich pork belly. This Korean stew comes together in about 40 minutes and uses simple pantry ingredients. Includes my native-cook method for deeper flavor, plus tips for using rice water and tofu. Quick, cozy, and perfect with a bowl of hot rice.
Get new recipes via email:
The Only Kimchi Jjigae Recipe You’ll Ever Need
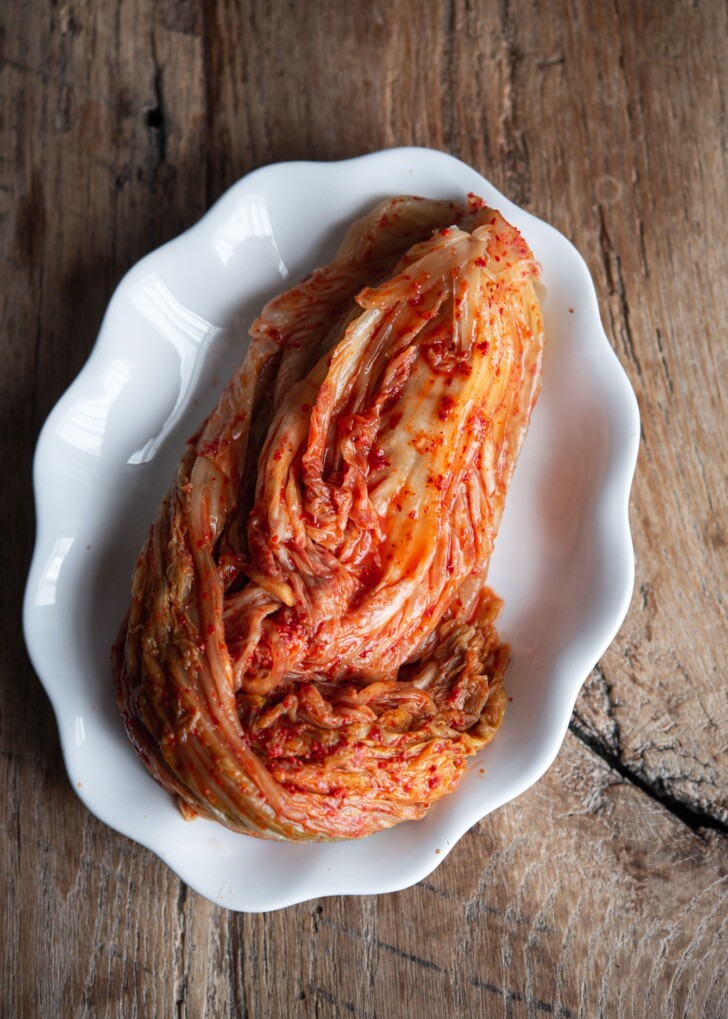
If you have a jar of “scary” old kimchi hiding in the back of your fridge—the kind that’s so sour it makes your eyes water—congratulations. You’re halfway to the best meal of your week. In a Korean home, we don’t throw that kimchi away; we treat it like gold because it’s the only way to make a truly soul-warming Kimchi Jjigae (김치찌개).
I’ve made thousands of pots of this stew, from my mother’s kitchen in Korea to my own home today. While many recipes overcomplicate it with fancy stocks, I’m showing you the authentic, “everyday” version that relies on one thing: the perfect balance of fatty pork and fermented funk.
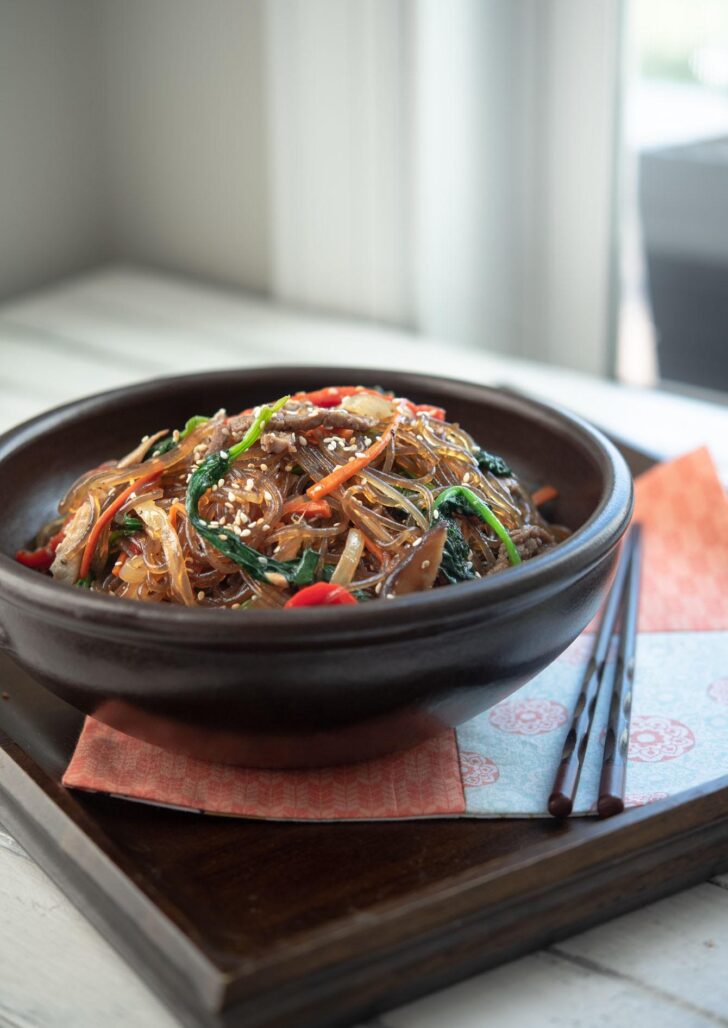
If you’re craving something quicker, try my kimchi fried rice made with extra-aged kimchi before diving into this deep simmer.
My 3 Rules for the Perfect Kimchi Stew
Forget the generic tips. If you want your stew to taste like a grandmother’s cooking in Korea, you have to follow these three non-negotiables:
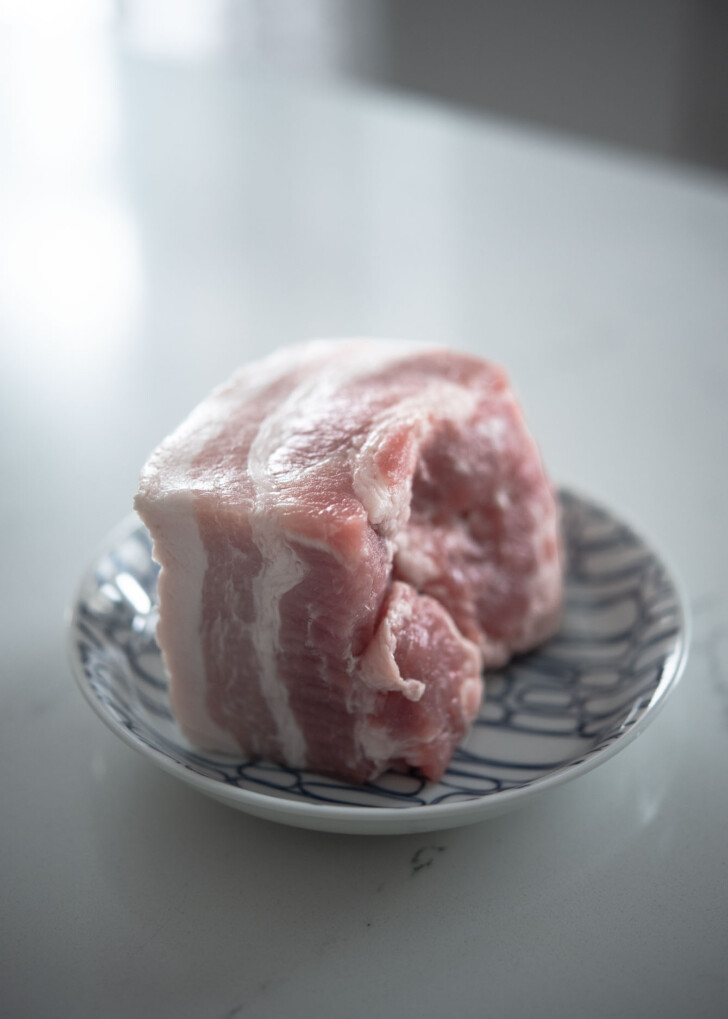
- The Kimchi Must Be “Old”: If your kimchi is fresh and crunchy, stop right here. It won’t work. You need aged, sour kimchi. If yours isn’t there yet, leave the jar on your counter for 24 hours. You need that fermented acidity to cut through the richness of the pork.
- Fat is Flavor: I always use pork belly. The way the pork fat renders out and mingles with the spicy kimchi juice is what gives the broth its “velvety” mouthfeel. Lean pork will leave your stew tasting thin and sad. Short on time? Use my 15-minute pantry version with Spam kimchi stew instead.
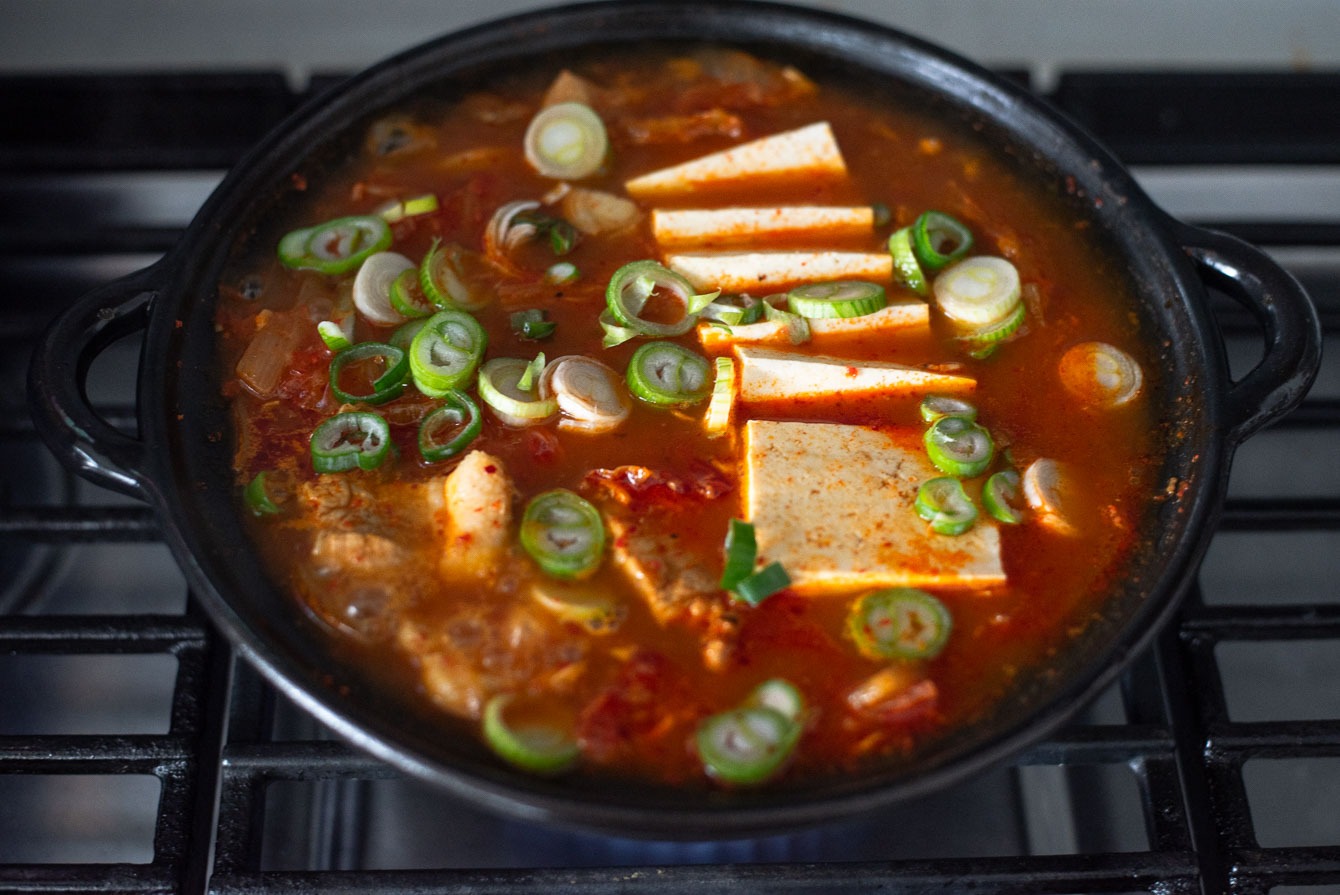
- The Rice Cake or Rice Water Trick: I love adding a few rice cake rounds. They bring a chewy bite and release a little starch as they simmer. The broth becomes fuller and feels more satisfying. If you don’t have rice cakes, use rice-rinsing water (Ssal-tteumul) instead of plain water. The starch in the rice water gives the stew the same gentle thickening. I use this method in my doenjang jjigae made with rice cake water, and it works beautifully here too.
How I Build the Flavor (Step-by-Step)
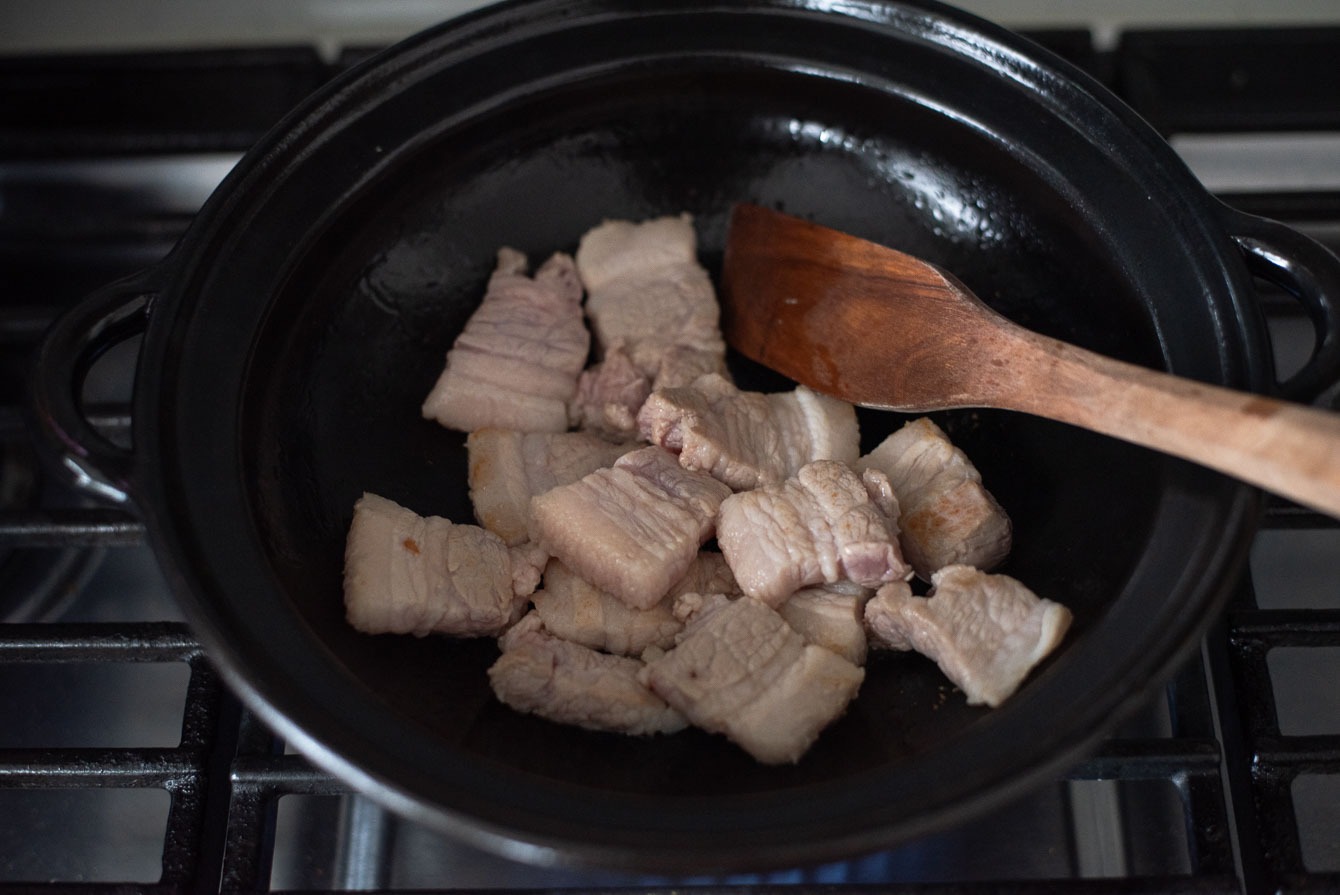
Step 1: The Sear
Don’t just dump everything in water! Start by browning your pork belly slices in the pot. We want that fat to render. Once it’s sizzling, I toss in the onion, garlic, and a healthy tablespoon of gochugaru. This toasts the chili flakes in the pork fat, creating a smoky, deep red base that water alone can’t achieve.
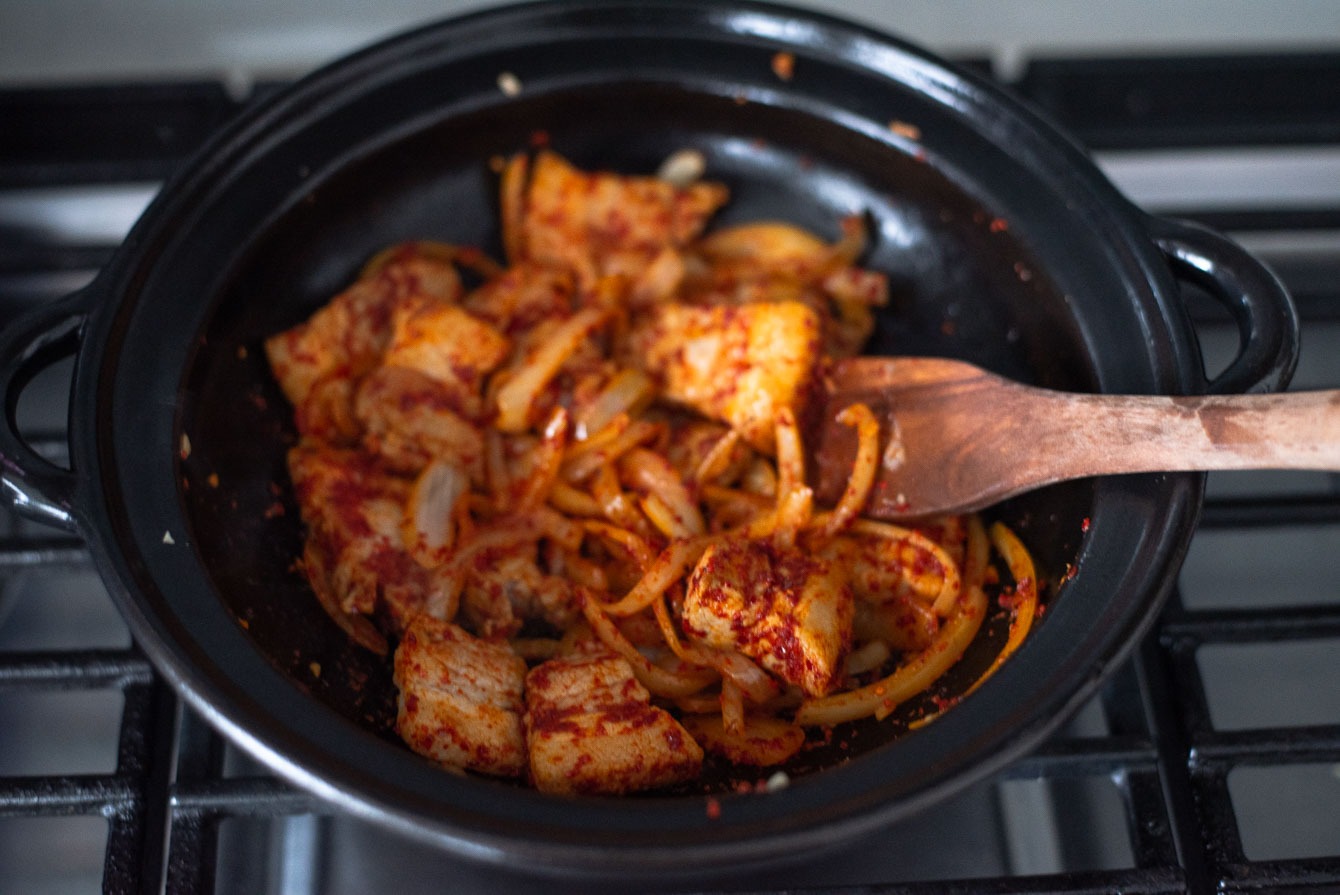

Step 2: The Fond and the Funk
Now, stir in your sliced kimchi. I like to sauté the kimchi with the pork for a minute or two before adding the water. This softens the cabbage and intensifies the flavor. Don’t forget the kimchi juice—that’s your liquid gold.
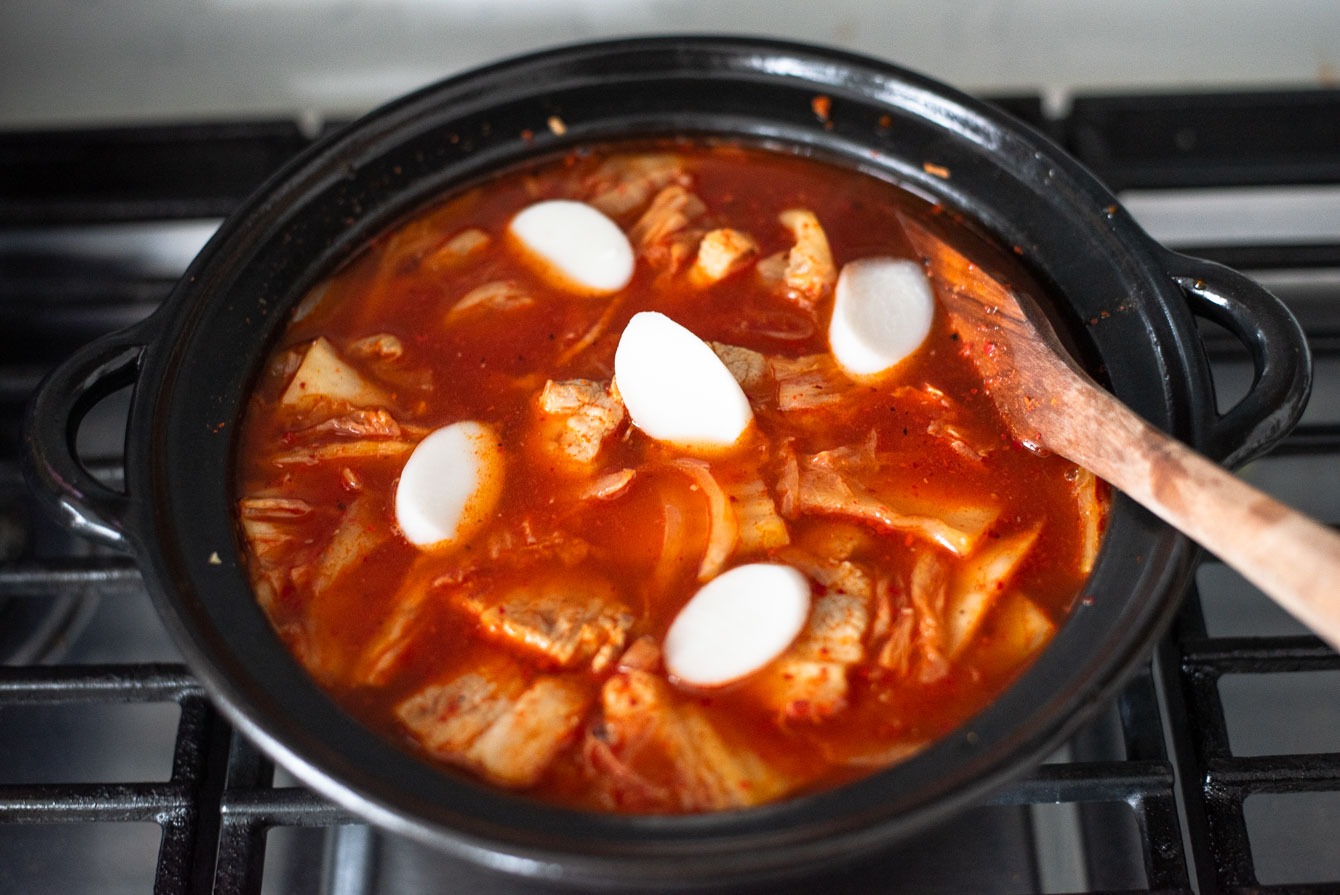
Step 3: The Slow Simmer
Add your water (and rice cakes) or rice water. Now, the hardest part: waiting. Cover it and let it simmer on low for at least 20 minutes. You want the kimchi to become translucent and tender. If you rush this, the flavors will taste “separate.” We want them to become one.
Step 4: The Umami Finish
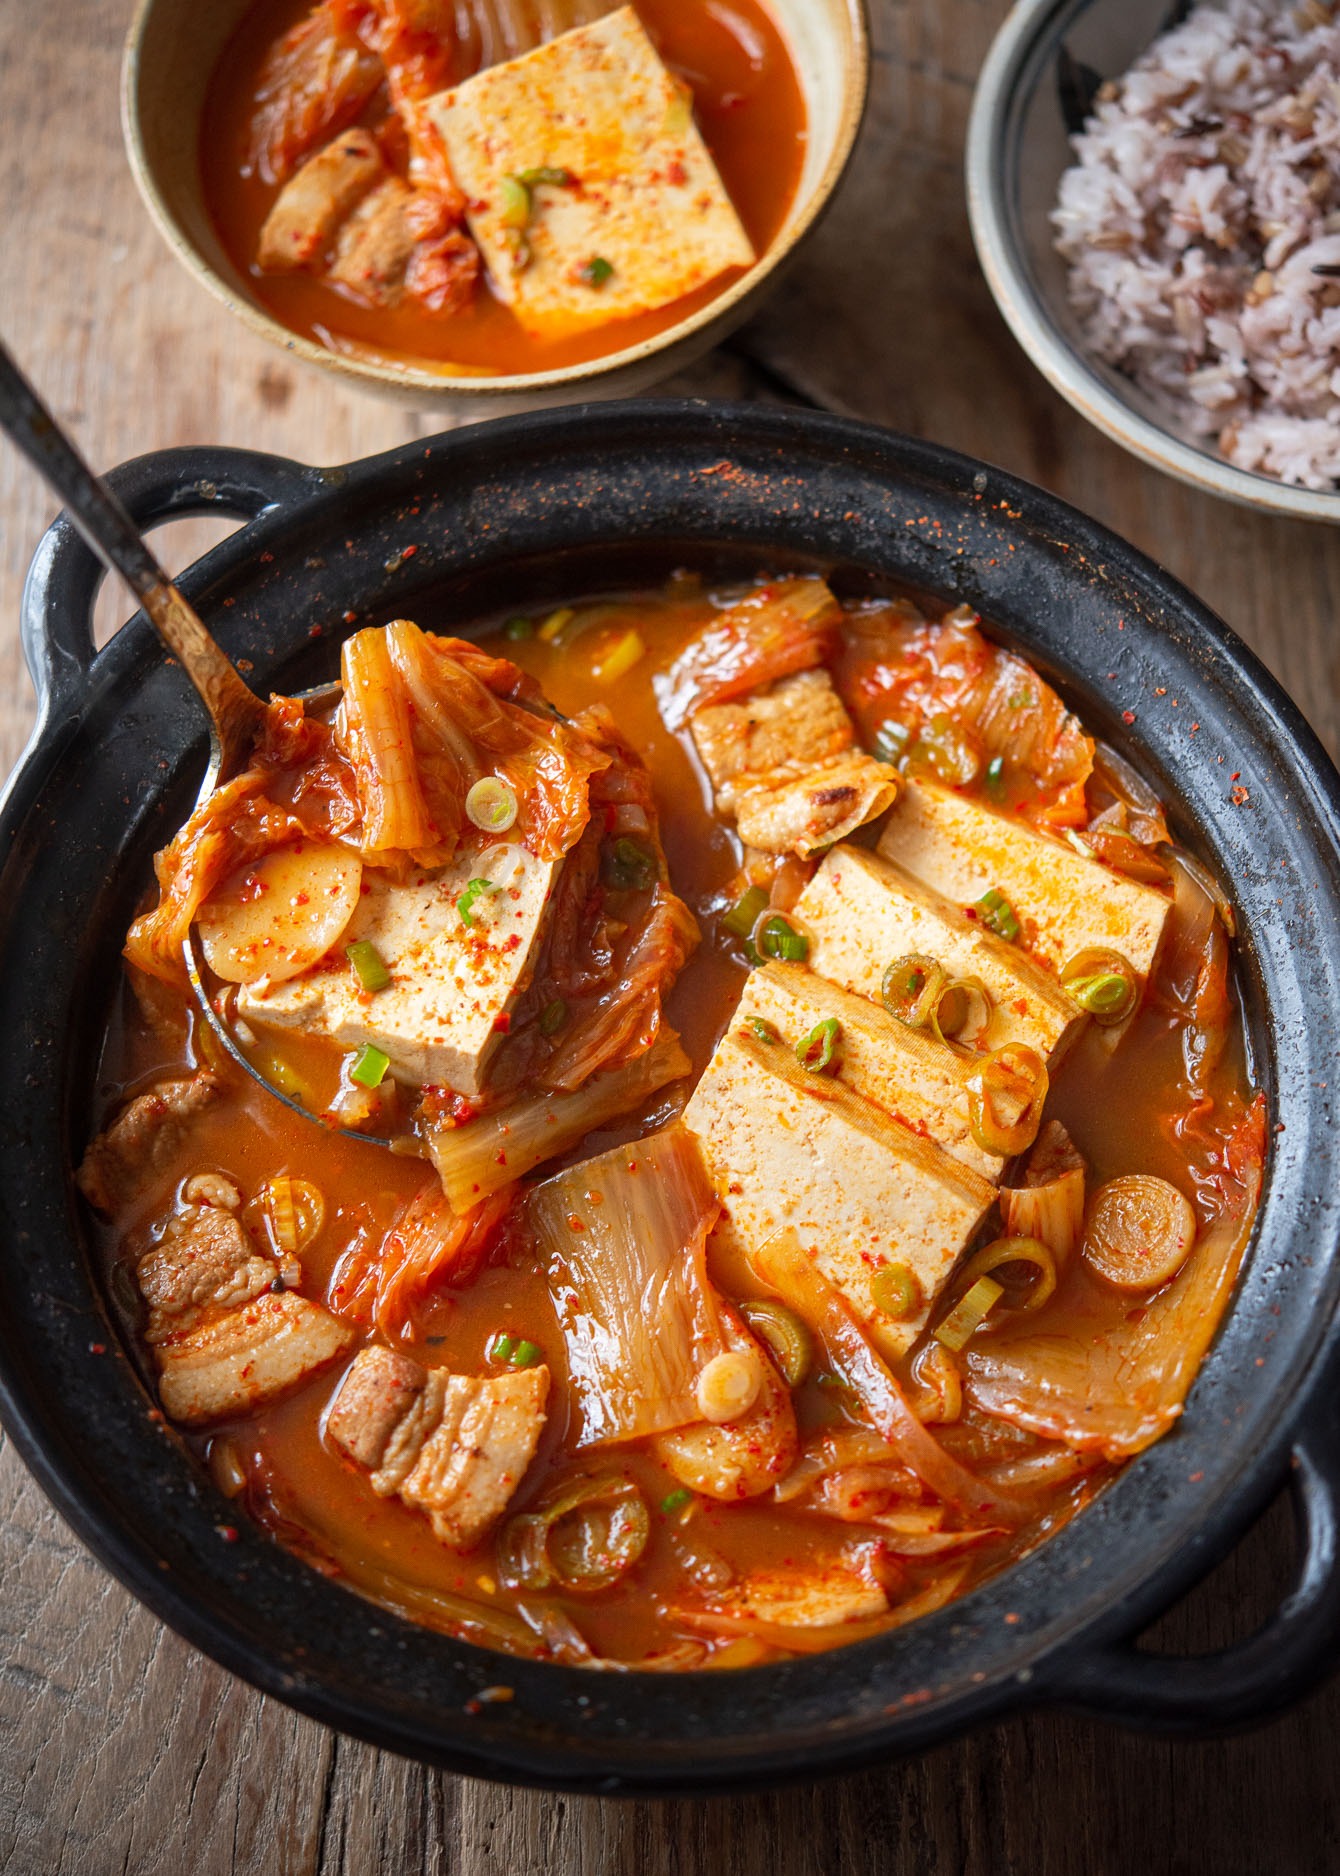
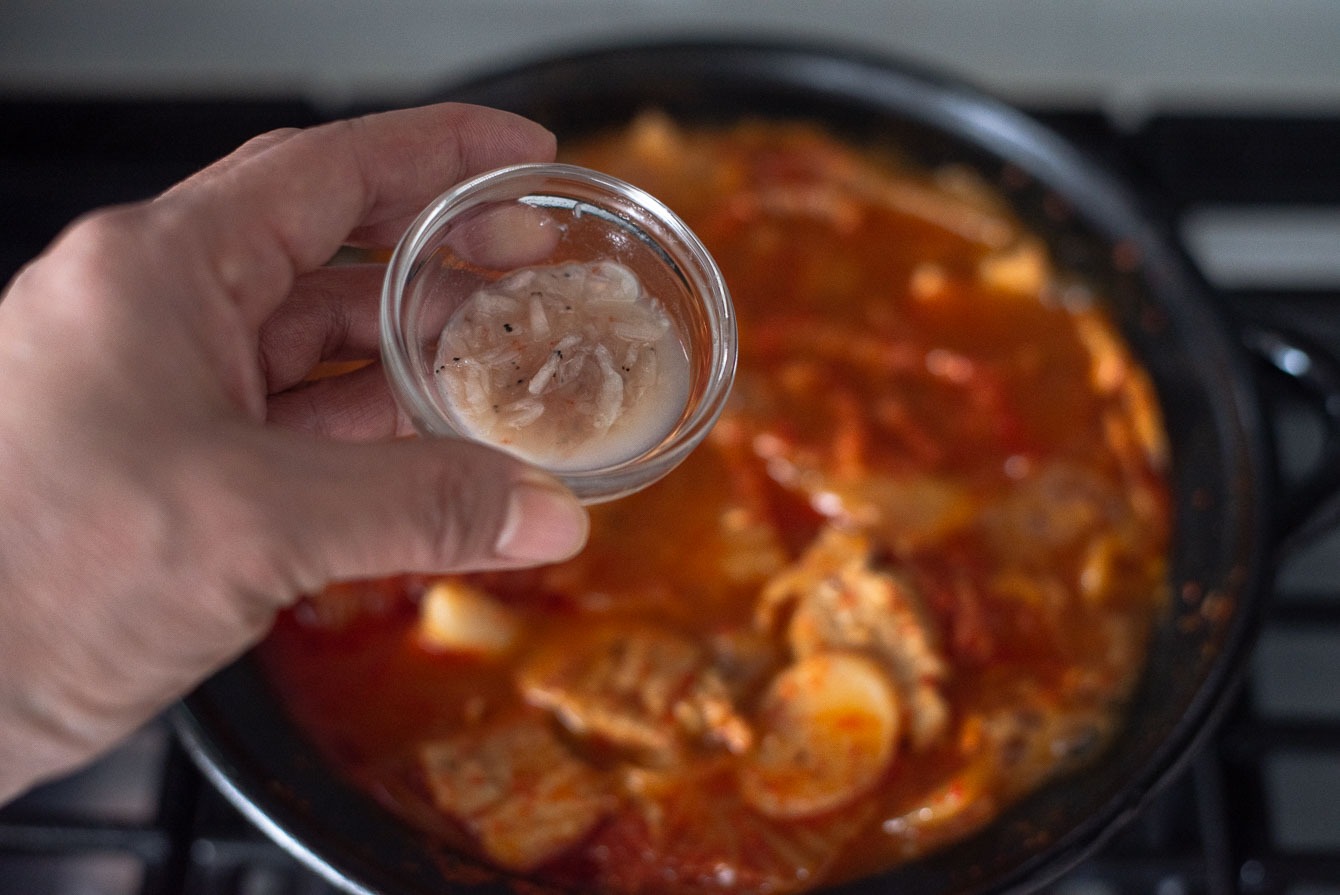
This is where the magic happens. I season mine with Korean salted shrimp (saeu-jeot) and a splash of soup soy sauce. These add a layer of salty, fermented depth that salt alone just can’t touch. Finally, slide in the soft tofu. Let it bathe in that spicy broth for 5 minutes until it’s hot through.

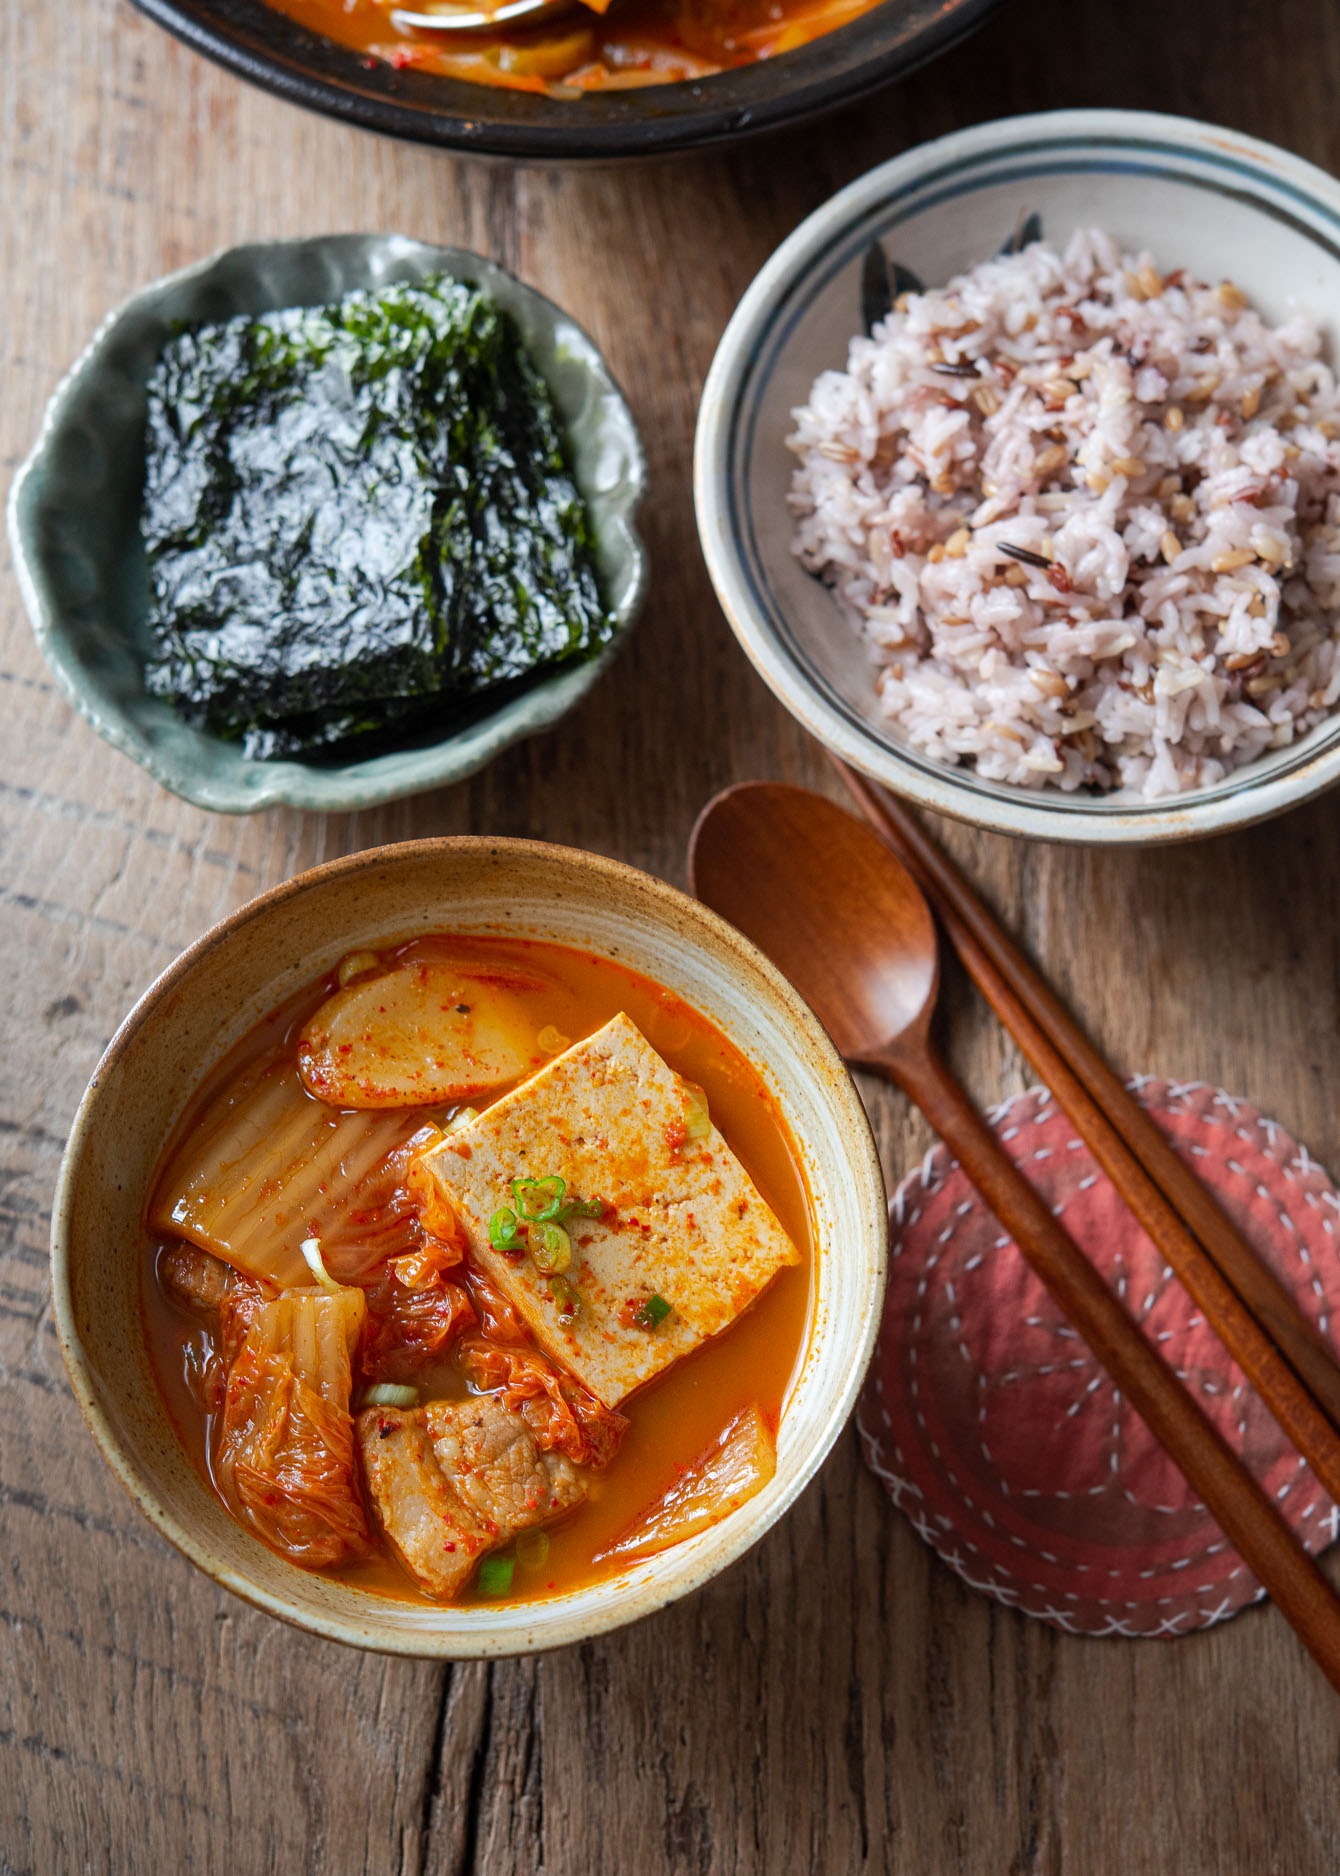
What to Serve with Kimchi Jjigae
In my house, this is a one-bowl wonder. All you need is a bowl of steaming rice.
Hyegyoung’s Tip: Take a piece of roasted seaweed (gim), put a spoonful of rice on it, top it with pork and kimchi from the stew, then fold it up for one perfect bite. And save the leftovers. Kimchi jjigae often tastes even better the next day after the broth deepens overnight and the kimchi turns softer and richer.
If you love cozy bowls like this, you can browse my full collection of Korean soups and stews for more home-style favorites.
Love this recipe? Rate it and share your experience in the comments below! On Instagram? Tag me to showcase your creation. For more delicious recipes, subscribe to our newsletter!

Kimchi Jjigae with Pork (Korean Kimchi Stew)
Recipe Video
Ingredients
- 1 tbsp (15 ml) oil
- 1/2 lb (225 g) pork belly, sliced
- 1/2 medium onion, sliced
- 2 cloves garlic, finely minced
- 1 tbsp Korean chili flakes (gochugaru)
- 1 lb (450 g) sour kimchi, sliced
- 4 tbsp (60 ml) kimchi juice
- 2 1/2 cup (600 ml) water
- 5 piece rice cake rounds, optional, see notes below
- 1 tsp (5 g) Korean salted shrimp
- 1 tbsp (15 ml) Korean soup soy sauce (gukganjang), or Korean tuna sauce
- 1/2 lb (225 g) soft tofu, sliced
- 1 green onion, chopped
- pinches salt , to taste
Instructions
- Cook the pork: Heat oil in a pot over medium-high heat. Add the pork belly slices and cook until fully browned. Add onion and garlic, and sauté for 1 minute. Sprinkle in the gochugaru and toss to coat everything evenly.
- Add kimchi and simmer: Add the sliced kimchi, kimchi juice, water, and rice cakes (if using). Cover the pot and bring to a boil. Reduce the heat to low and let it simmer for 15–20 minutes.
- Season the stew: Stir in the salted shrimp and soup soy sauce. Taste the broth and adjust seasoning with more salt if needed.
- Add tofu and finish: Gently add tofu slices and simmer for another 5 minutes. Just before serving, garnish with green onion. Serve hot with steamed rice and your favorite Korean side dishes. Enjoy!
Notes
- If you don’t have rice cakes, you can use rice-rinsing water (Ssal-tteumul) instead of plain water. It adds a gentle starch and brings a deeper body to the broth.
- Kimchi stew actually tastes better the next day, as the flavors deepen over time. Store leftovers in an airtight container in the fridge for up to 2 weeks—it reheats beautifully!

Hi Holly!
15 years after the first comment and I’m making this recipe. I practically live at my local Asian market and gochujang and gochugaru are staples in my kitchen.
I fell in love with kimchi and korean food a few years ago and I love cooking it.
This recipe came out amazing and I can’t wait to try it again tomorrow.
Congrats on your success!!!
Thank you so much! It always makes me smile when someone discovers Korean food and starts cooking it at home. I’m thrilled to hear the recipe turned out so well for you. And yes, I think it often tastes even better the next day! Thanks for your kind words and for taking the time to leave a comment.
A brand new H Mart opened near town recently, so it was the perfect time to go shopping and try this recipe. My family loved it! It was hearty and filling with amazing taste! It was easy and affordable to make and my husband helped me make it. His wide eyes and antisipation to sit down for dinner was a joyous site. We have a new family favoriate, Thank you Holly! Much Love!
Thank you so much for sharing this! I’m so happy your family enjoyed it and made it together. What a joy to hear it’s a new favorite!
Hi Holly,
I can’t thank you enough for this recipe! My favorite dish is kimchee jigae and I could never replicate it at home despite trying several recipes. This is a winner and my family all agreed. It’s easy, simple to make, and delicious.
So happy to hear that, Kay! I hope you also get to try different varieties of kimchi jjigae recipe on my site. Thank you very much.
wow i just came across this and i cant believe the comments are from a long time ago…hope yall r doin well
I found your site while looking for kimchi recipe and i have to say i cant stop reading your post lol Very authentic Korean cooking that i want to try out one by one! Those ingredient is v easy to find in Singapore, i saw them at Korean stores but never tried, your step by step guide with amazing photos is great help. Thanks for sharing and wish you a smooth move home.
Thank you I am really interested in making this stew… but I must wait for my kimchi to ferment… I was wondering if there is a specific amount of reserved kimchi juice that you need. 1 cup? 1 1/2 cups? Please let me know, thank you!
Hi Joanna
The recipe says 1/2cup of kimchi juice. Hope you like the stew!
thank i am very much interested to try make this stew kimchi i love to eat thank you very much ,,,HOLLY
Hi Holly
Can you please let know how long can kimchee be kept in the fridge?
Thank you.
Depends on the types of Kimchi, it can be kept from 1 month to 1 year. Usually cabbage kimchi last longer than radish kimchi or cucumber kimchi. If the cabbage kimchi is in whole (wrapped in its own leaf, not diced) made with Korean cabbage, they can last up to 1 year if stored properly in the fridge. Some cabbage kimchi can last longer but those are for stews and braising dishes. I have tried 3 year old kimchi. Very sour, can’t eat the way it is, but made wonderful stews.
that looks like a beautiful stew! i made korean gamjatang before, and would love to try more korean stews! yay and i have kimchee now, althought not as good as yours.
I`m falling in love with your blue pot. With kimchi stew in it 😀 With this kind of weather, kimchi stew is the best!
LOVE your Staub! I have one in Grenadine. It really is true love.
While i'm not a huge fan of kimchee, your pictures are beautiful and I -really- like your blue pot, what is the brand of it?
What a funny story! hehe I love kimchi jjigae 😀 and love your step by step photos as always