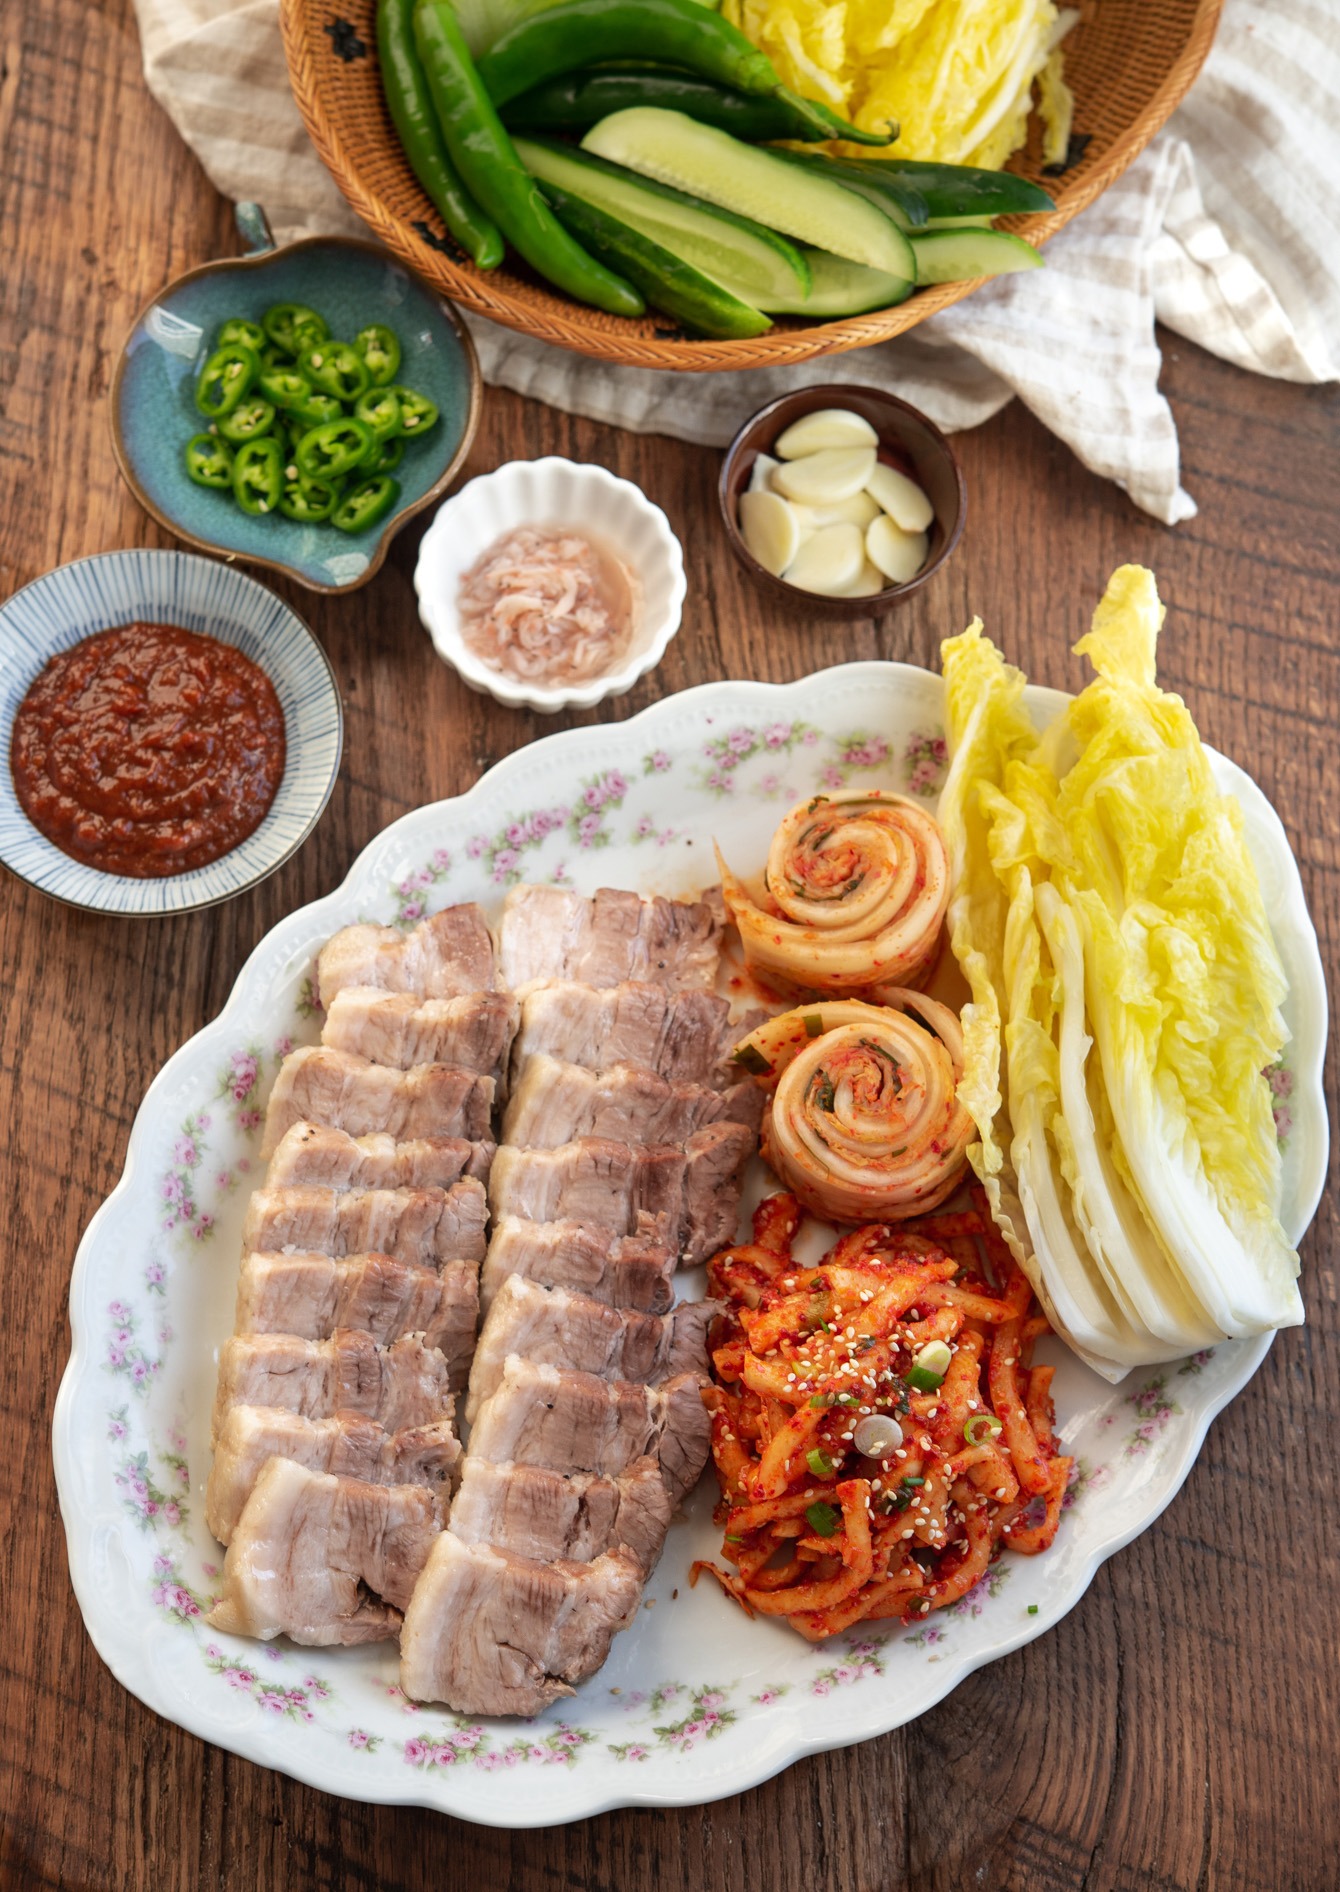
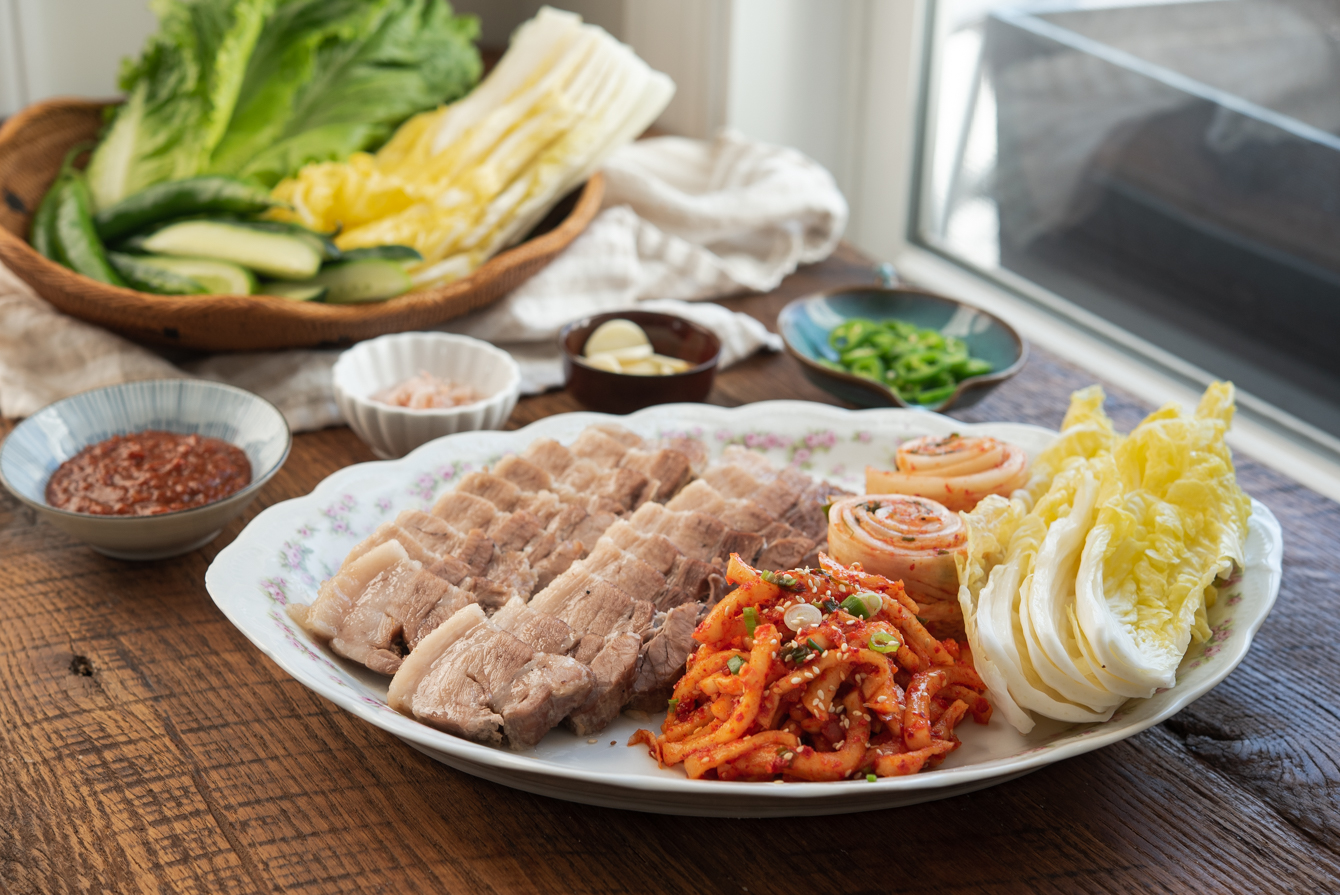
Bossam (Korean Boiled Pork Belly Wraps)
Bossam (Korean boiled pork belly wrap) is a classic dish made with juicy pork simmered with aromatics. This low-moisture braising method locks in flavor and moisture. Wrapped in cabbage with kimchi, ssamjang, and sides, this easy recipe delivers bold, authentic flavor.
Bossam (보쌈) is one of my favorite Korean dishes to make when I want something simple but deeply satisfying. Thick pork belly is gently braised with garlic, ginger, and onion until it turns tender and rich with flavor—then sliced and wrapped in cabbage or lettuce with bold, savory sides.
You can mix and match fillings—kimchi, spicy radish (musaengchae), ssamjang, or fermented shrimp (saeujeot)—to build your perfect bite. It’s a hands-on, crowd-pleasing meal that’s easier to make at home than you might think.
Get new recipes via email:
In Korea, bossam is often served during kimjang, when families make their annual batch of kimchi. I remember my mom simmering a huge pot of pork belly while we prepped the cabbage.
Once the work was done, everyone sat down to wrap warm slices of pork in fresh leaves with all the sides. That’s when I learned: bossam doesn’t have to be fancy—it just has to be done right.
In this post, I’ll show you how to make tender, flavorful pork bossam and serve it with the classic Korean sides that bring everything together.

What I Do Differently with Bossam (And Why It Works)
Most traditional bossam recipes boil the pork belly in seasoned water, often with doenjang or coffee to mask the smell. While that method works, I’ve found it can dilute the pork’s natural flavor.
Instead, I use a low-moisture braising method—something I refined after years of making bossam at home. The pork simmers gently in its own juices with aromatics like onion, garlic, ginger, and a splash of sweet rice wine.
Using a heavy pot with a tight-fitting lid (like a Dutch oven) traps steam and enhances the flavor without the need for excess water. The result? Pork that’s incredibly tender, rich-tasting, and free of any gamey smell—exactly what you want in a good bossam. This quickly replaced the old boiling method in my kitchen.
Making Bossam (My Easy Method)
Follow this overview to get a feel for the process—I’ve included step-by-step images to help visualize it. Full measurements and instructions are in the recipe card below.

Choosing the Right Cut of Pork for Bossam
For bossam, pork belly is the most popular choice—it’s rich, juicy, and slices cleanly after cooking. If you prefer something a bit leaner but still tender, pork shoulder (Boston butt) is a great alternative.
And just to clarify—this isn’t samgyeopsal! Both dishes use pork belly, but samgyeopsal is grilled and eaten right off the pan, while bossam is slow-cooked and wrapped in cabbage with bold condiments. Same cut, totally different experience.
Step-by-Step Instructions

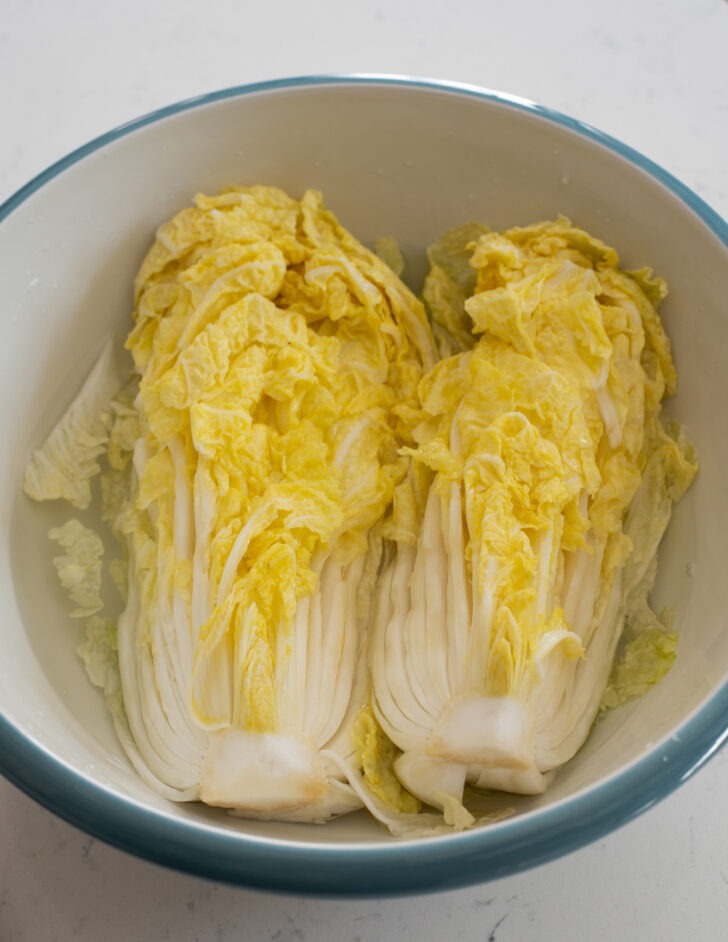
Prep the Cabbage:
Don’t skip this step—it makes all the difference. Lightly salting between the napa cabbage leaves helps soften and season them so they wrap more easily and taste better. It’s a small effort with a big payoff.
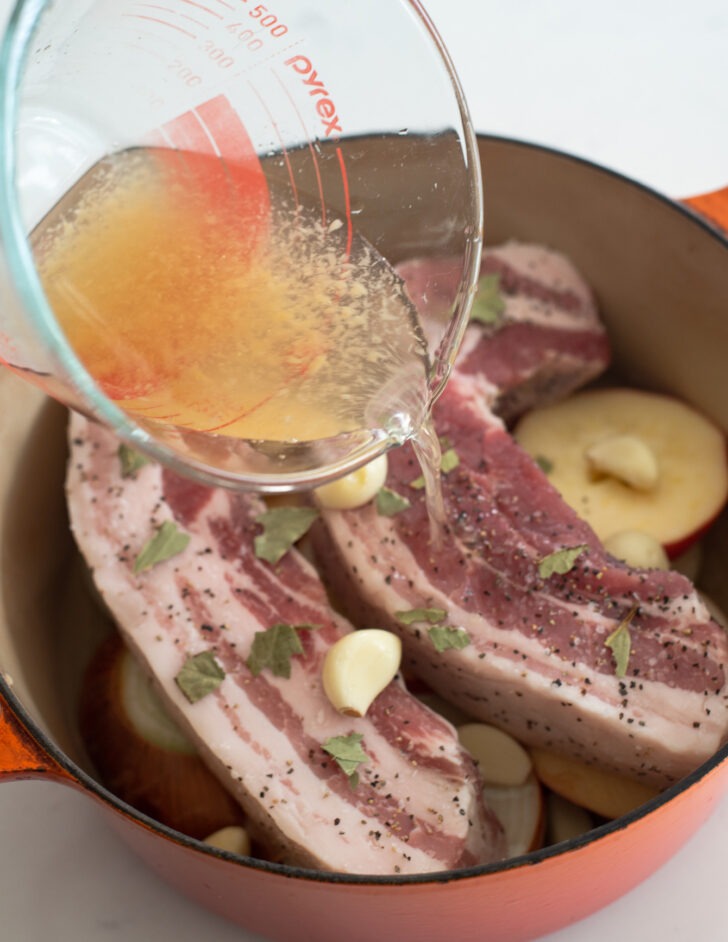
Build the Flavor Layers:
I layer sliced onion and apple in a heavy pot, season the pork belly lightly, and add aromatics like garlic, bay leaf, grated ginger, and a splash of rice wine. A few leek slices or green onion go on top.
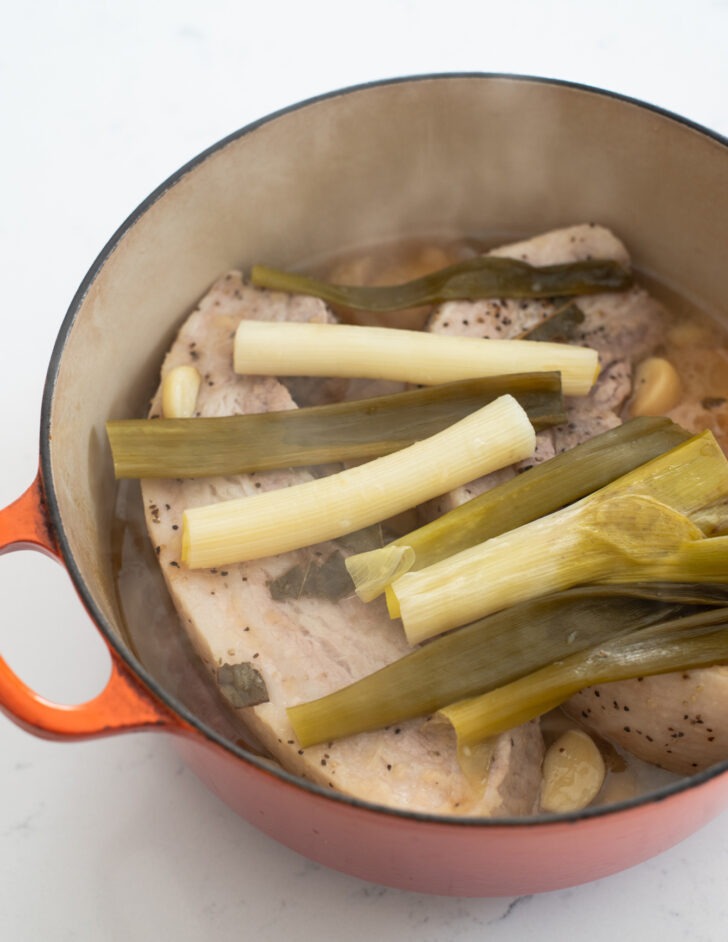
Low-Moisture Braise:
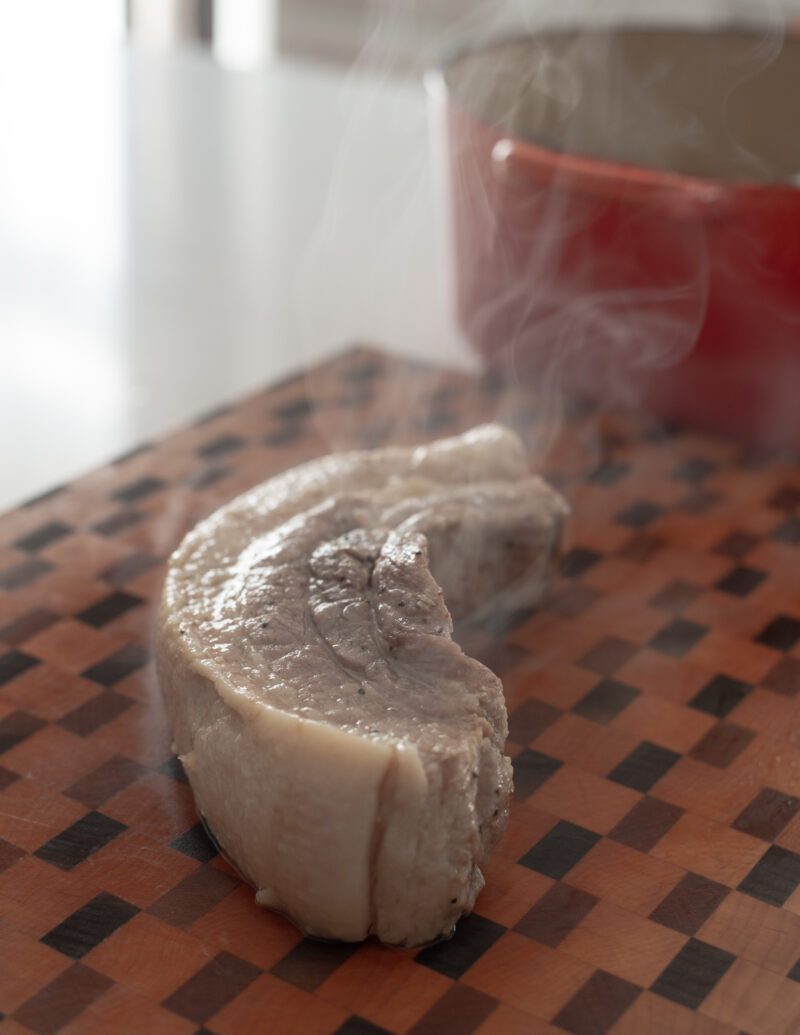
Cover tightly and simmer over low heat. This method keeps the pork moist and flavorful—without boiling away its natural richness. I recommend letting the meat rest before slicing so it stays juicy.
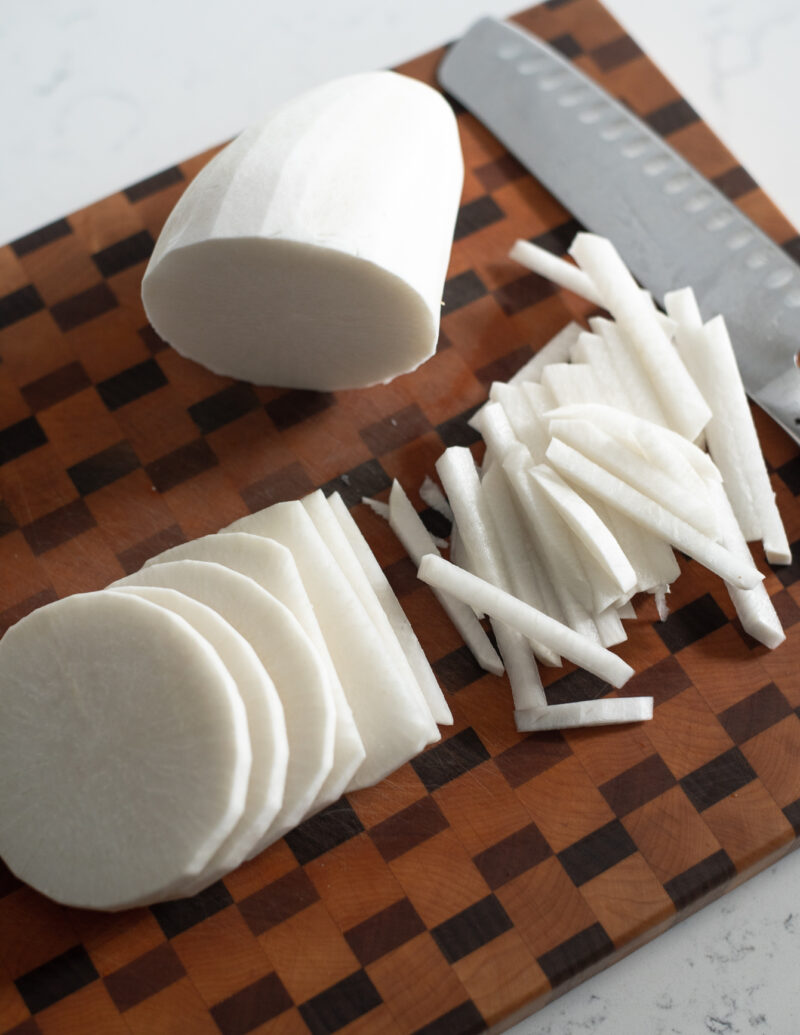
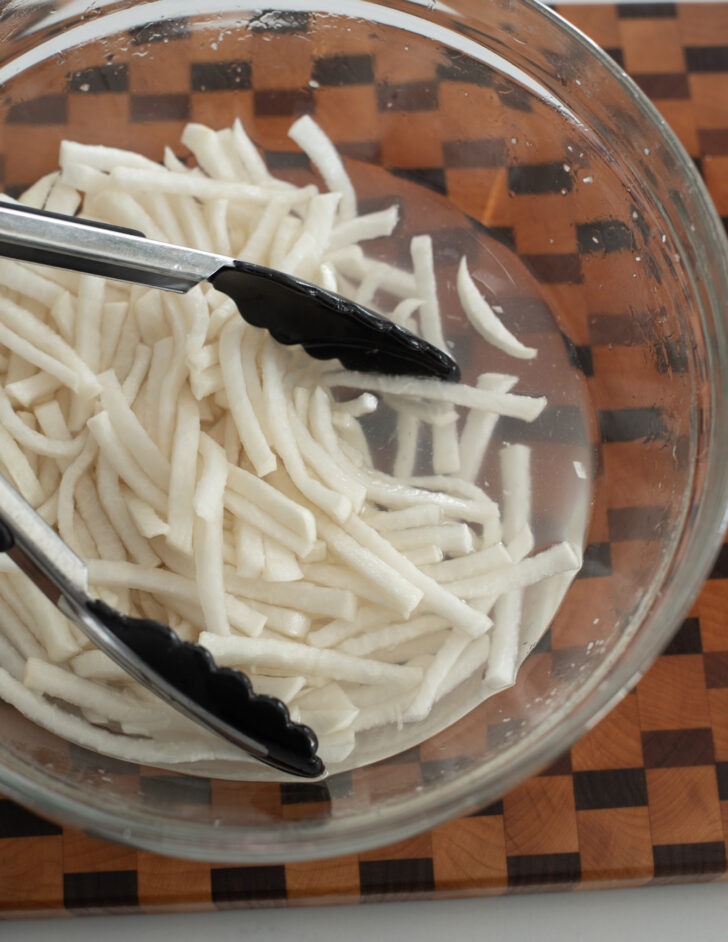
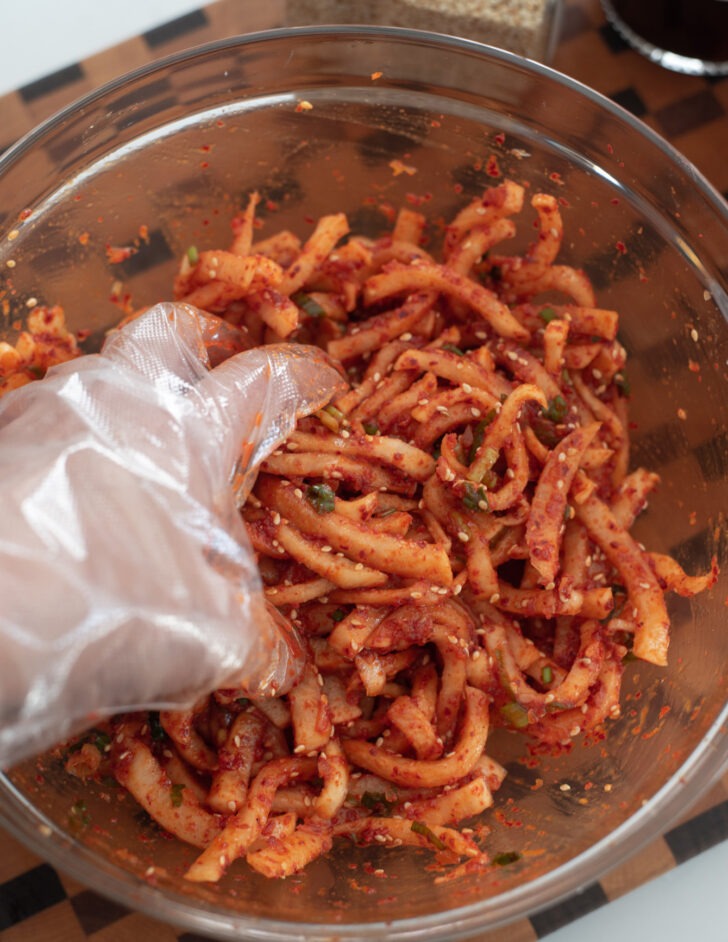
Toss the Radish Salad:
While the pork cooks, mix up a quick musaengchae (spicy radish salad). Squeeze out moisture from the shredded radish and season with gochugaru, garlic, fish sauce, and a touch of sugar.

Pro Tip: Corn syrup draws out moisture more effectively than sugar or salt and helps the radish stay crunchy. The salad keeps its shape and stays fresh in the fridge for up to 2 weeks.
Bossam Dipping Sauce (Ssamjang)
No bossam spread is complete without ssamjang—the savory, umami-packed sauce that ties it all together. Store-bought works in a pinch, but homemade ssamjang takes just a minute and tastes far better.
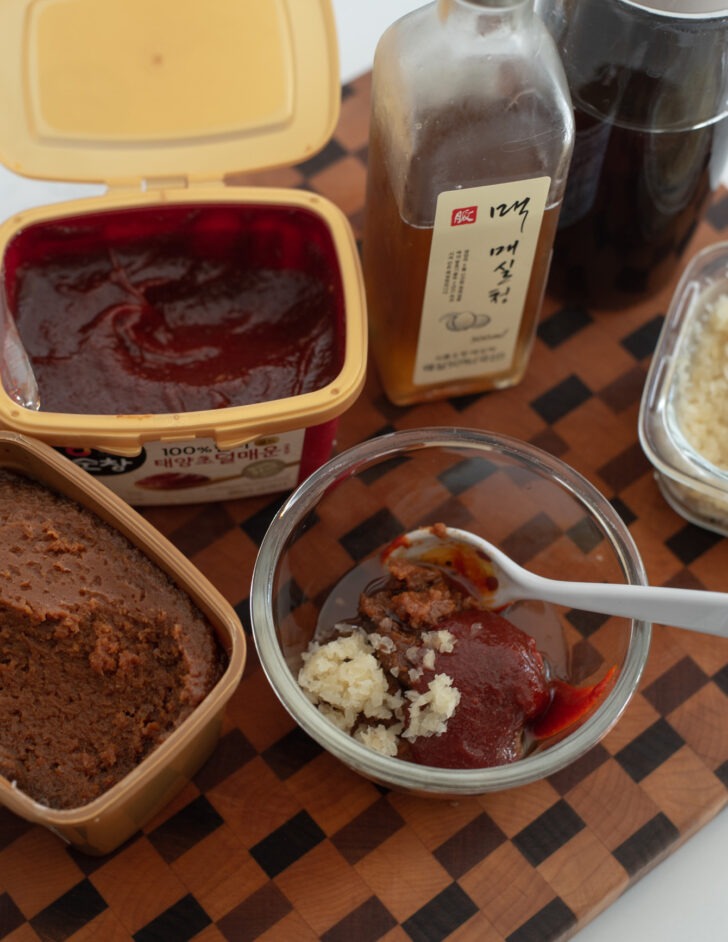
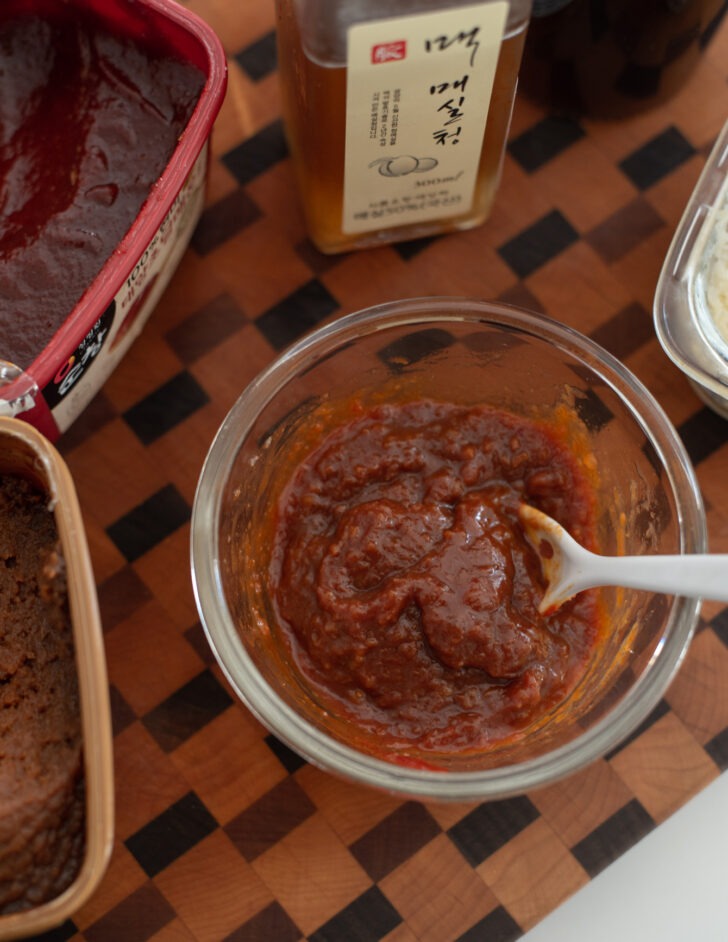
Mix all the ssamjang ingredients in a bowl and chill it until you’re ready to serve—it makes every wrap more flavorful.
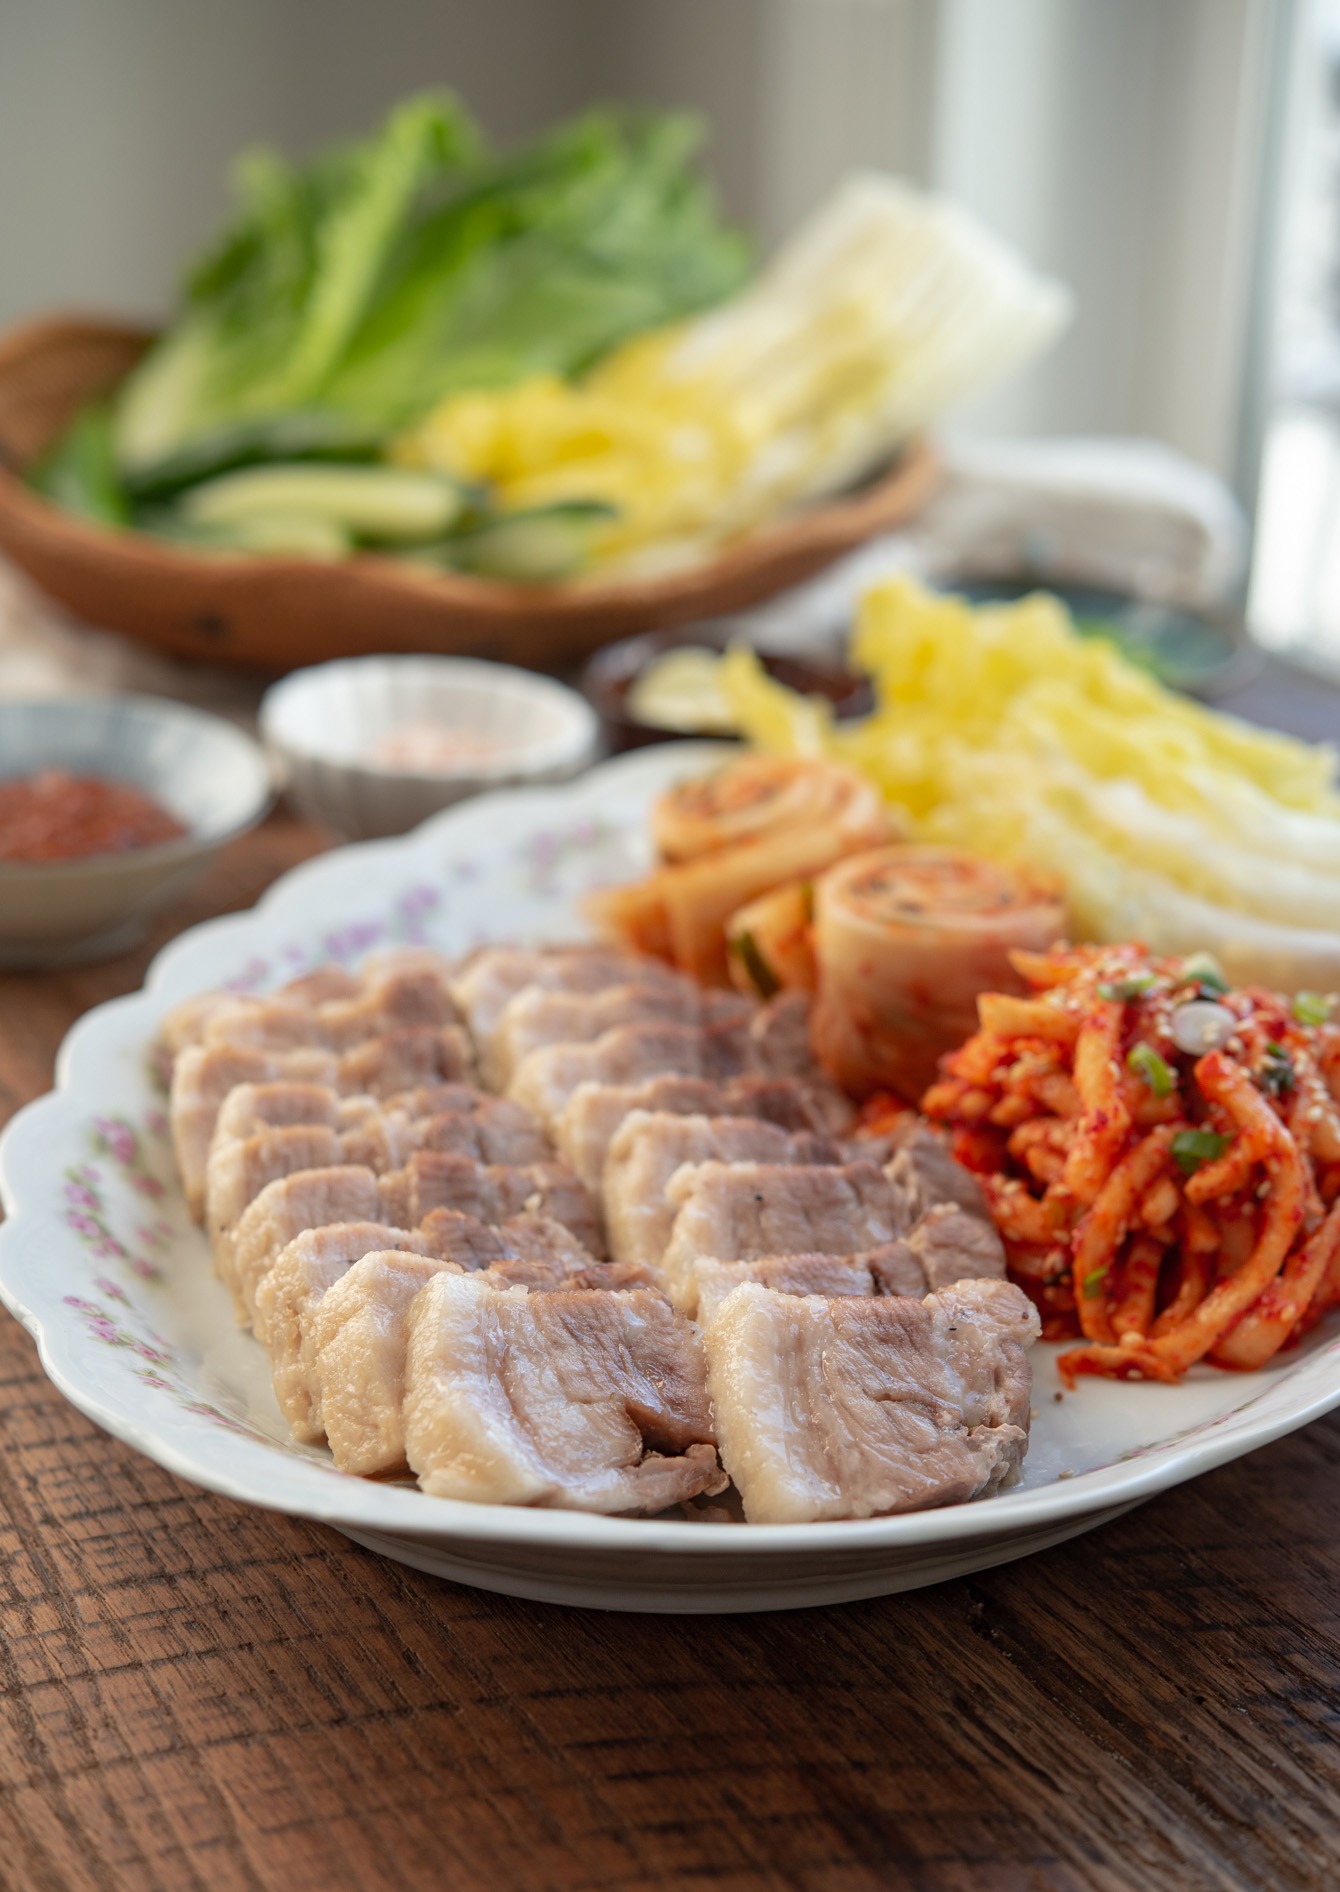
The Best Way to Serve and Enjoy
Now comes the fun part—setting up your bossam spread with all the sides and toppings that make every wrap a flavor bomb.
Arrange the sliced pork belly on a large platter and surround it with fresh wrap leaves, bold condiments, and a few key banchan (side dishes). Here’s what I like to serve with mine:
Wraps:
- Napa cabbage – use salted or fresh leaves (see prep instructions above)
- Red or green leaf lettuce
- Perilla leaves (kkaennip) – earthy and aromatic
Condiments & Toppings:
- Ssamjang – see homemade recipe below
- Salted shrimp (saeujeot) – store-bought is fine
- Raw garlic & green chili slices – for that spicy, punchy bite
Side Dishes (Banchan):
- Spicy radish salad (musaengchae) – recipe below
- Green onion salad (pa-muchim) – tangy and fresh
- Geotjeori (fresh cabbage kimchi) – adds crunch and zing
- Minari salad – optional, but so refreshing with pork
- Fresh oysters – a classic bonus if you’re feeling extra
I love setting it all out buffet-style and letting everyone build their own wraps—it turns dinner into a fun, hands-on experience.
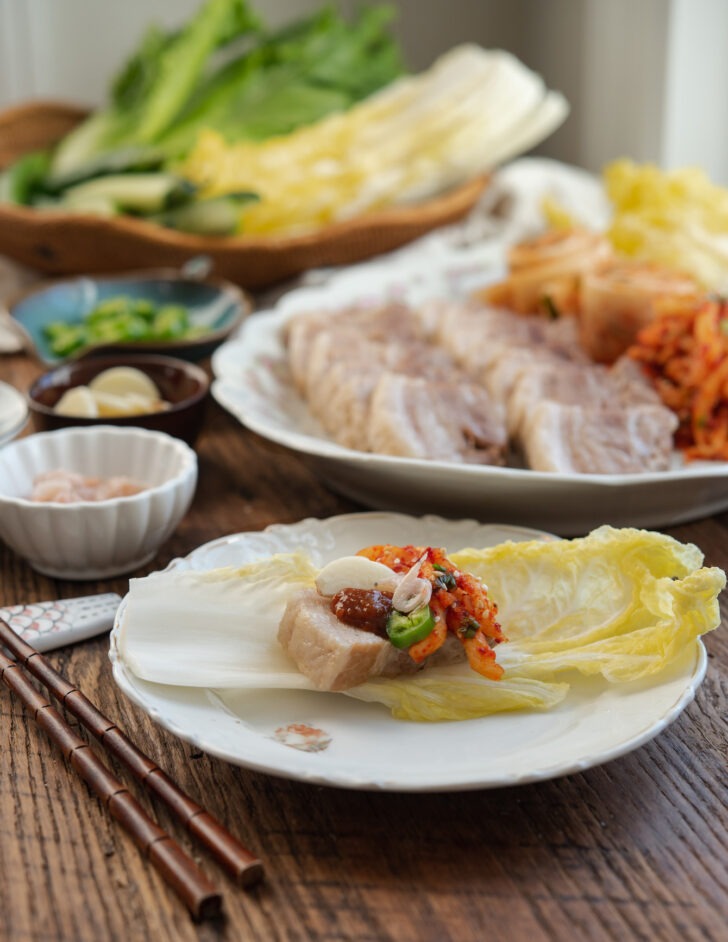
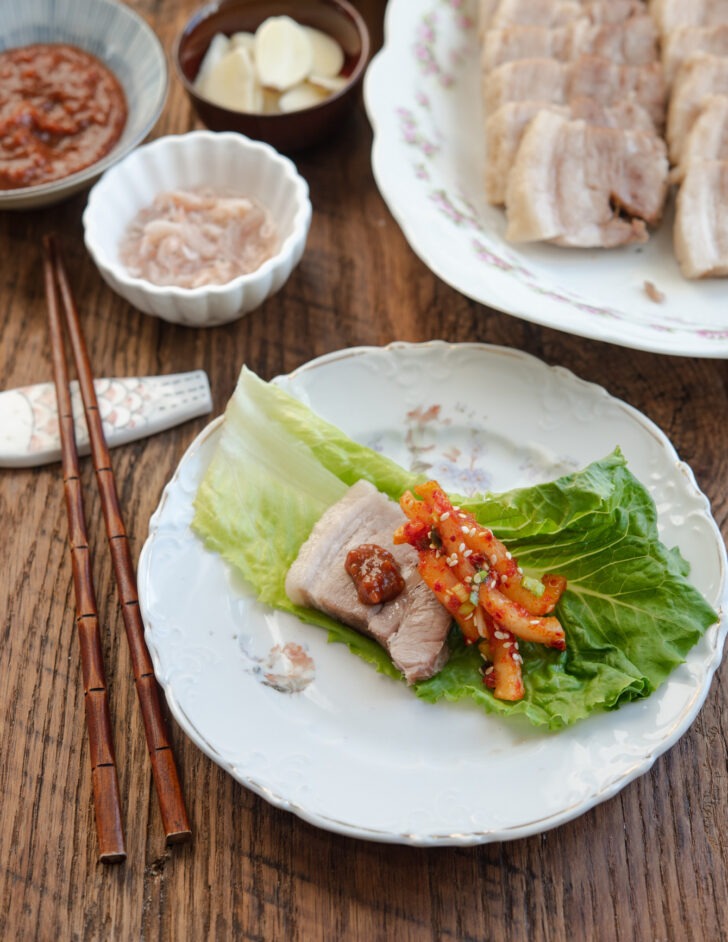
How to Build the Perfect Korean Pork Wrap
Start with a cabbage or lettuce leaf. Add a slice of pork belly, a dab of ssamjang, a bit of salted shrimp, garlic, and chili—then wrap it up and eat in one bite (the Korean way!).
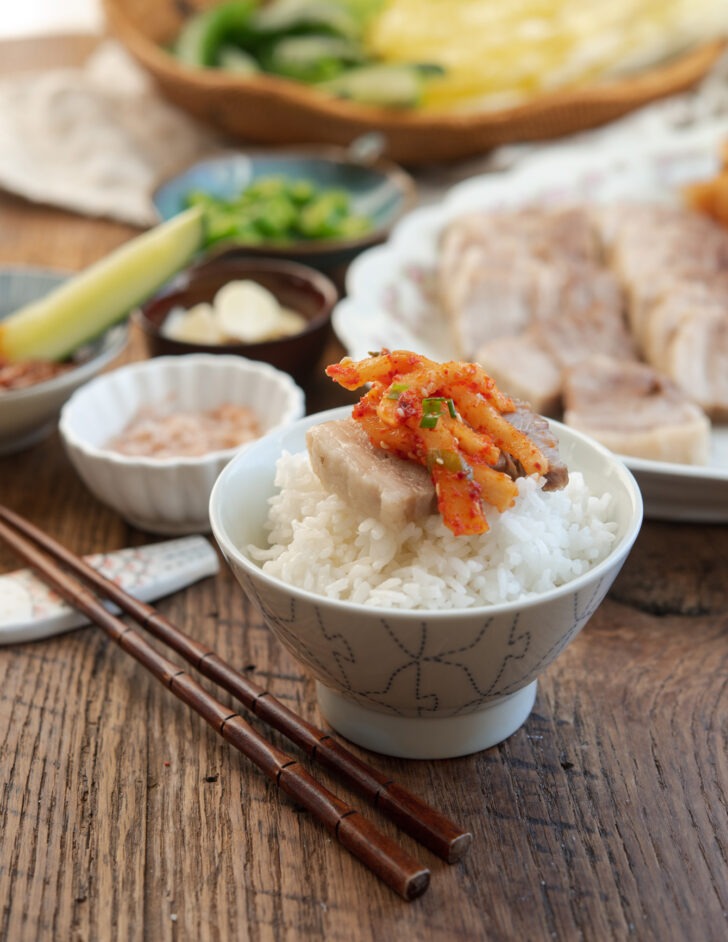
Don’t feel like wrapping? Just pair the pork with spicy radish salad and a bowl of rice—it’s just as satisfying.
This recipe was originally posted in November 2016. I’ve updated the recipe with minor changes, new photos, and more information.
Love this recipe? Rate it and share your experience in the comments below! On Instagram? Tag me to showcase your creation. For more delicious recipes, subscribe to our newsletter!
Easy Bossam (Korean Pork Wraps)
Ingredients
For bossam wraps
- bunch assorted lettuce
- bunch perilla leaves (kkennip), optional
- cabbage kimchi, freshly made kimchi preferred
- bunch fresh oysters, optional
- 2 tbsp salted shrimp
- 5-7 cloves fresh garlic , sliced
- 1-2 fresh green chilies, sliced
For pickling cabbage
- 1 head (about 2 lb, 900 g)) small napa cabbage, quartered
- 4 tbsp kosher salt, see note below
For pork belly
- 2 1/2 lb (1.2 kg) thick pork belly, preferably skin removed
- pinches salt and pepper , to season
- 2 onion, roughly sliced
- 1 apple, roughly sliced
- 10 cloves garlic
- 2 bay leaves, crumbled
- 1/2 cup (120 ml) sweet rice wine (mirim)
- 1 tbsp ginger paste
- 1 Asian leek, optional, roughly sliced
For radish salad
- 1 1/4 lb (560 g) Korean radish or daikon radish, peeled
- 1/2 cup (120 ml) Korean corn syrup (mulyeot)
- 2 tsp salt
- 2-3 tbsp Korean chili flakes (gochugaru)
- 1 tbsp Korean fish sauce
- 1/2 tbsp salted shrimp
- 1 tbsp minced garlic
- 1/2 tbsp sugar
- 1 tbsp Korean plum extract (maeshil-cheong), optional
- 1 tsp ginger paste
- 2 green onion, fienly chopped
For bossam sauce (ssamjang)
- 3 tbsp Korean soybean paste (doenjang)
- 1 tbsp Korean chili paste (gochujang)
- 2 tsp minced garlic
- 1 tbsp Korean plum extract (maeshil-cheong), or water
- 2 tsp sesame oil
Equipment
Instructions
To pickle the cabbage
- Use the yellow inner part of napa cabbage. Quarter the cabbage lengthwise. Depending on the size of your cabbage, you might only need 2 of them. Rinse the cabbage with water and drain.
- In a large shallow mixing bowl, place the cabbage pieces and sprinkle salt over the cabbage trying to reach in between the layers of leaves, especially the thick white stem parts. Let the cabbage sit for 50 minutes, turning them upside down 2-3 times. Rinse the cabbage once and squeeze out the extra moisture.
To cook pork belly
- In a large, heavy bottom pot, put in diced onion followed by sliced apples. Season pork belly with salt and pepper and place it on top. Add the garlic and crumbled bay leaves.
- In a small mixing bowl, mix together sweet rice wine and ginger puree, and drizzle it around the pork belly. Top the pork belly with sliced leek (or green onion).
- Cover with lid and let it cook over medium high heat for 5 minutes. Reduce the heat to low and simmer for 40-50 minutes depending on the thickness of your meat.
- Let the pork rest in the pot for 10 minutes, then slice it.
To make spicy radish salad
- Slice radish into 1/4-inch thick matchsticks. Place them in a mixing bowl.
- Add corn syrup and 1 tablespoon of salt. Toss well and let it sit for 30-45 minutes. You will see lots of moisture come out from the radish. Squeeze out the moisture firmly and put the radish in to another mixing bowl.
- Add the Korean chili flakes, Korean fish sauce, salted shrimp, sugar, garlic, Korean plum extract (optional), ginger puree, sesame seeds, and green onion. Mix well and chill in the refrigerator until ready to serve.
To make bossam sauce
- In a small bowl, combine Korean soybean paste, Korean chili paste, garlic, Korean plum extract (optional), and sesame oil. Mix well and chill until ready to serve.
To serve bossam
- Put pork belly slices on a large serving platter and arrange the spicy radish salad, salted cabbage, and other wrap materials around it.
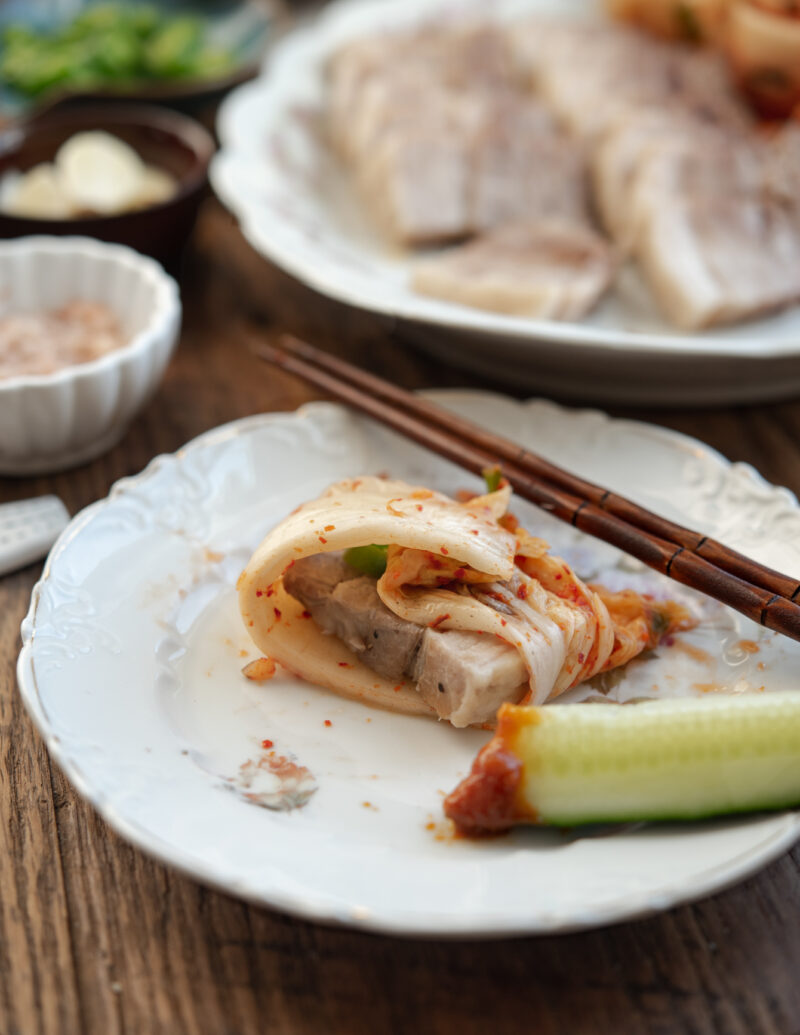
- To make a wrap, place a piece of pork belly on a cabbage leaf, lettuce or perilla leaf. Dot with bossam sauce, and top with a tiny bit of salted shrimp, raw garlic, green chili, and serve. You can also use a piece of cabbage kimchi to wrap a pork.
Notes
- If you want to prepare the cabbage well ahead of time, use a salt brine instead. Dissolve 1/2 cup salt in 6 cups of water.
- Soak the cabbage in the salt brine overnight until slightly wilted. Rinse and squeeze out the extra moisture. Keep the cabbage in a zip bag and chill until ready to use.

Nice recipe, looks delicious. Despite the pork belly not being entirely covered by liquid, you don’t need to flip it over at any point?
No need to flip the pork while braising. This low-moisture method in a heavy pot keeps the pork tender and juicy all the way through—locking in the flavor instead of letting it get lost in the liquid.
This is my kind of wrap! Looks incredibly delicious!
Hi..unfortunately I’m currently unable to eat / drink any food with any alcohol content. Is it possible to omit / remove the white wine? Or is there any other substitute for the w.wine?
Thanks!
As my son needs a gluten-free diet the available doenjang around here is a no go for me. I managed to make my own gluten-free gochujang, but making doenjang is a longer process (though I’m willing to try it out soon).
So, my question is, would it be possible to substitute doenjang with gluten-free miso to cook this recipe?
Yes, definitely!
Wonderful match!!!! Pork belly is so good with kimchi.
Pork belly is good stuff. Don’t eat it that often (all that fat, you know) but love it whenever I do. Thanks!