Kimchi Making #3
No matter how festive Korean meals are, how fancy everything looks, if there is no Kimchee on the table, then, that Korean feast is not completed. That’s how important our Kimchee is.
There are over 200 different types of Kimchee. Every region in Korea has developed their unique way of making it with different ingredients. This version of cabbage Kimchee method is good for winter time when the cabbages are in good season so that Kimchee can be stored through the winter.
In 2008, Health Magazine announced Kimchee (Kimchi) as one of the 5 world’s healthiest foods. According to the recent study the good bacteria called “Lactobacilli” in Kimchee help digestions in the body and prevents yeast infection, even the growth of cancer. However Kimchee has its weakness as well, the sodium intake and the spiciness. Using the solution of 1:10 (salt : water) ratio over a long period time rather than burying the cabbages in the salt directly will keep the sodium level on just right amount.
What is good Kimchee like? The texture. It should be crunch and cool. Good Kimchee should not be too salty nor spicy. Even Koreans won’t eat if the Kimchee is too spicy. Sometimes red chili flakes from Mexico yields strong spiciness. Chinese chili flakes tends to be darker in color, which means less appealing in the eyes, and not as flavorful as Korean origin.
Also You should be able to taste the pungent flavor in the mouth that is almost unforgettable if you never tried Kimchee before. Once you get used to the flavor, you are hooked. You will crave the flavor.
Welcome back to my final episode of Kimchee class. We are going to wrap up our cabbages to make scrumptious Kimchee.
Remember the Kimchee filling “soh” from the last session? If you are ready to move on to our last chapter of Kimchee making, there are two important items you need to have before we start.
First, go to your closet and find your husband’s (or boyfriend’s) hideous shirt that you hate. If you are a boy, put on the shirt that your grandma or mom gave you last Christmas that you don’t dare to wear in the public but can’t donate either for emotional reason. This is not a time to wear fancy Dolce and Gabbana silk blouse. Chances are you will get some splashes of chili filling on you and this will make a genius excuse to recycle them. Smart, huh!
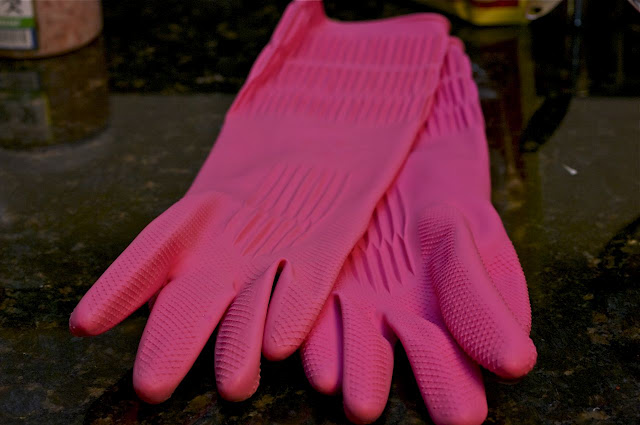
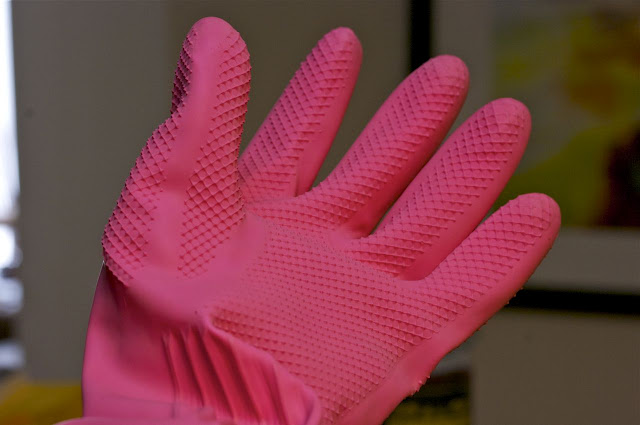
Second, get a pair of plastic glove.
Don’t you even think about a pair you have in your house that you used to clean the bathrooms. If you do, I won’t talk to you! This cost only about $1.60(USD) and you should declare them as the Holy Kimchee glove. They will be your guardian angel of your delicate hands.
Now, are you ready? Let’s get to work.
Chapter III : The grand assembly
If Edward has scissor hands, then, I have Kimchee hands. Put them on proudly.
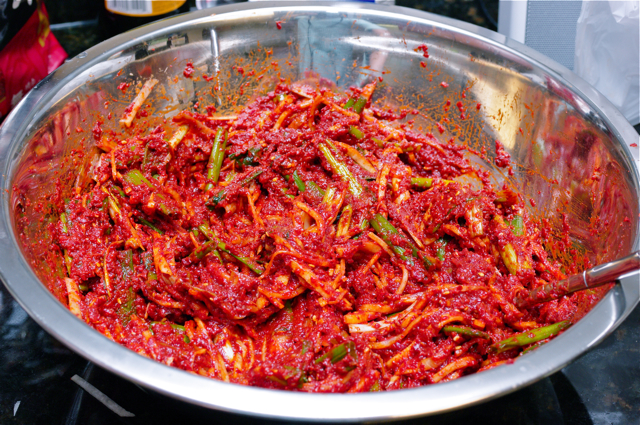
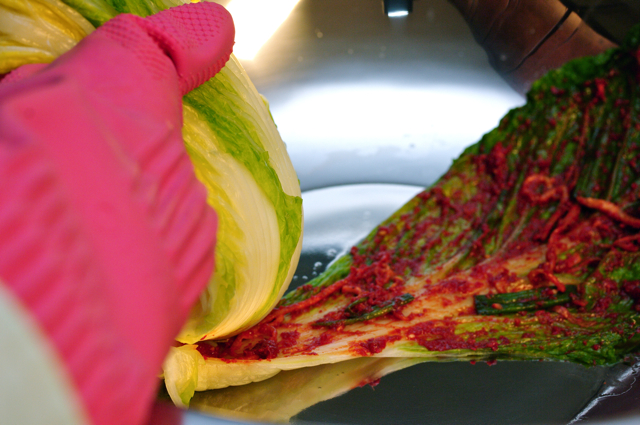
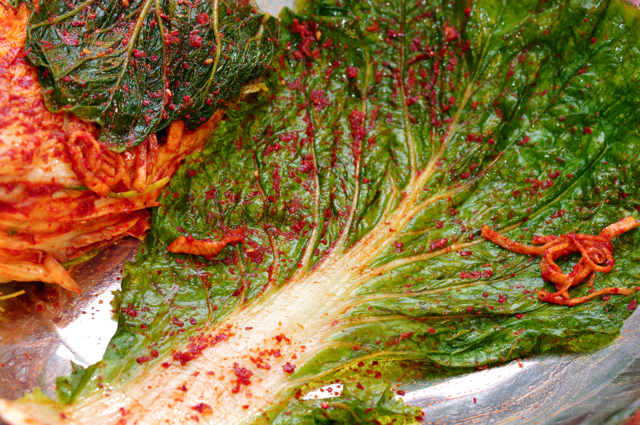
Now I am going to have you imagine yourself changing a baby’s diaper. Have you done it before? If not, this will be a good practice. With your left hand hold up the cabbage just like you would hold the baby’s legs and release the most outside leaf to be flat. (You will need a large somewhat shallow mixing bowl to do this) With right hand spread the filling onto the leaf just like on the photo. Make sure you reach to all the nooks and crannies like you would clean the baby’s bottom. Sorry to make you imagine that! 🙂
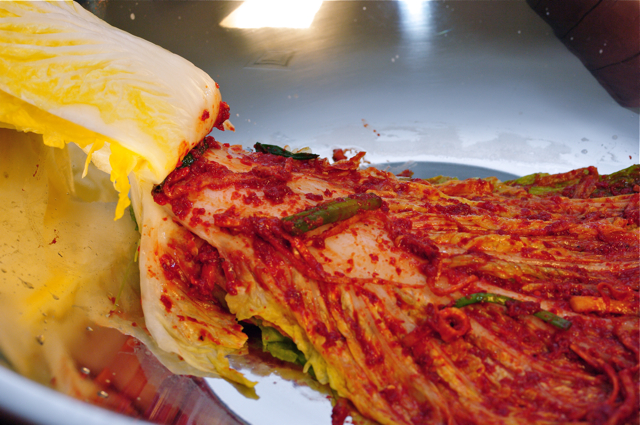
Repeat the layers one leaf at a time. Do not put too much “soh” on each leaf.
I don’t need Picasso on the wall. This is artistically good enough to inspire me everyday.
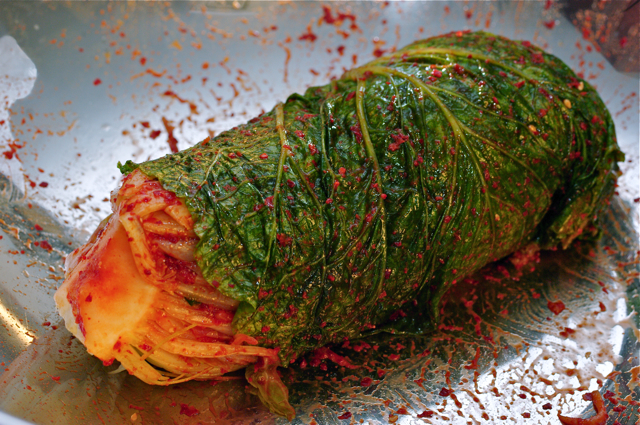
Fold the end leafy part of cabbage toward the stem holding them together.
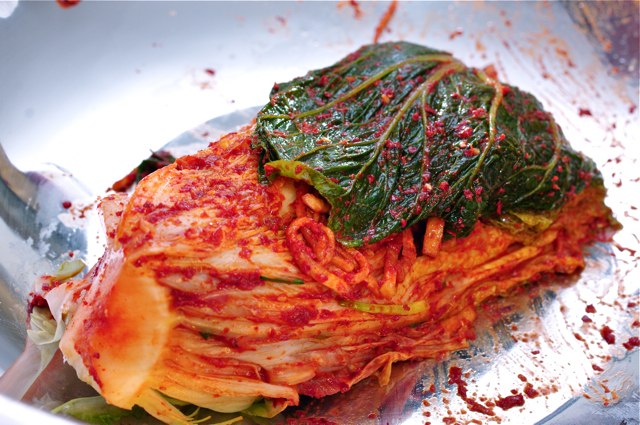
Remember the rough green leaves we reserved? Just scrunch it with a little bit of “soh“. (It was not easy to do wrapping with only one hand and trying to take a picture with the other)
If my fairy godmother would grant me one wish at that moment I would ask for an extra arm, and then later I will regret rest of my life for not asking a pair of glass slipper.
Tightly wrap around the cabbage. She needs to hibernate. Wrapping will help the cabbage to keep its flavor during fermentation process.
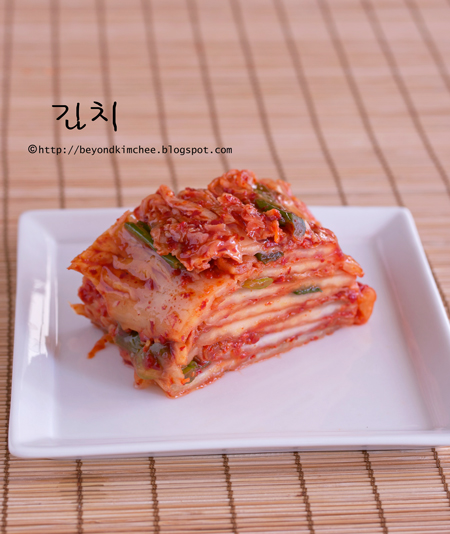
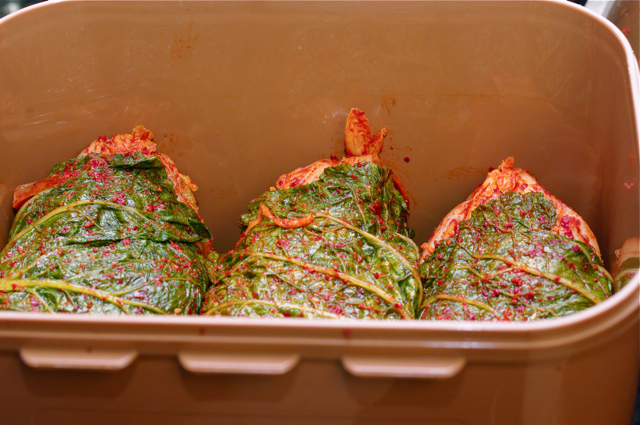
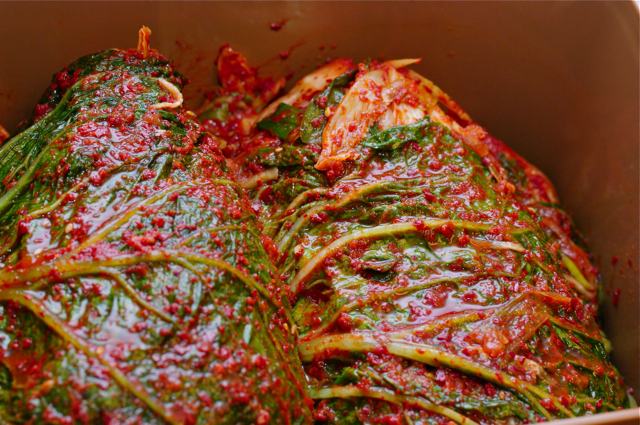
My Kimchee sisters are nicely stacked in an airtight container.
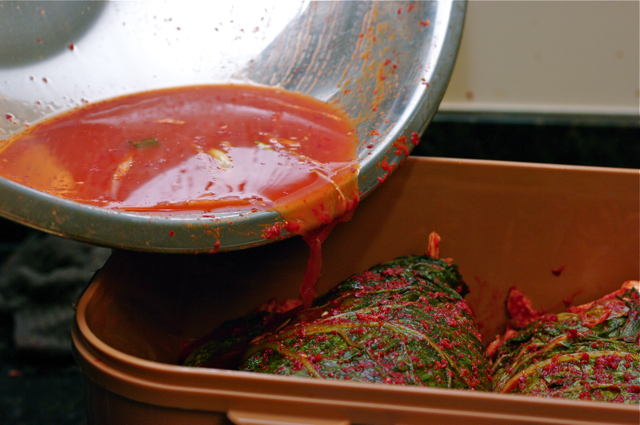
Add about 1 cup of water to your mixing bowl you assembled Kimchee in, swirl around to rinse the “soh” and pour over the Kimchee. This will make some Kimchee juice later on to use in soups and stews. The “soh” amount I gave you in the recipe should be more than enough for 2 cabbages. Keep the leftover in the fridge for later use.
“Behold the power of Kimchee!”
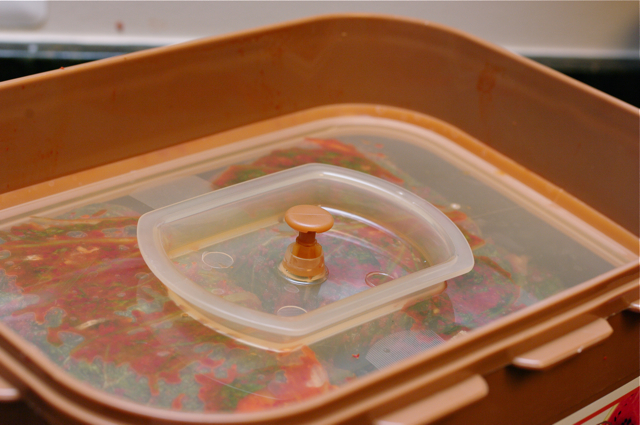
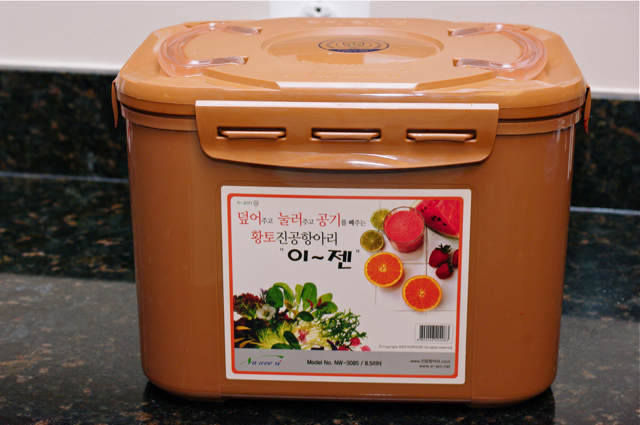
My container comes with airtight seal cover in it. It is better to keep your Kimchee not to contact with too much air. You don’t have to have this fancy container, of course. You can put your Kimchee in a ziplock back and let the air out, seal it, and then put in a container. That will help to shut out the air from Kimchee.
Let your Kimchee rest in the room temperature for a day or two depends on the room temperature in your house and how much of fermentation you desire. I left mine for a day and half in a 74ºF room and it was just right for me.
Put them in the fridge. They will continue to ferment in a slower speed than room temperature. Your Kimchee can last several month in the fridge.
Yes, Kimchee making is a work but it pays off. Think of how many dishes you can create; the soups and stews, fried rice, dumplings, noodles, stir-fries, and so on…, the possibilities are endless. I will be enjoying the fruit of my labor throughout this winter.
So next time you go to Korean market and see the gorgeous cabbages? Think hard.
Make it or buy it? That is the question.
The Kimchee class is now officially over.
The recipe is written below.
Thanks for all your kinds words and encouragements.
It is my favorite season of the year.
Hustle and bustle, fun to observe people shopping in the stores…
And
This petite Korean woman is getting in the mood of baking cookies.
Perhaps I will share with you one of my favorite holiday cookie recipe next posting.
I have been spicy for couple of weeks, so
I better show you the sweeter side of mine.
I am a sweet Ajumma after all,
Although I hate to admit that I am an Ajumma…
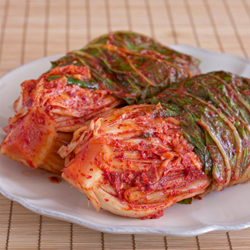
Cabbage Kimchi (Baechoo Kimchee)
Ingredients
For the soaking
- 2 whole nappa cabbage, about 5 lb or 2.3 kg each
- 3 cups Korean coarse sea salt plus 1 cup more for sprinkling
- 30 cups water
For the rice glue
- large dried anchovy, shrimp, kelp, and Pollock fish
- 3 cups water
- 2 Tbsp sweet, glutenous rice flour
For the filling
- 1 Korean radish, about 3 lb or 1kg sliced thin and julienne to 1/8" sticks
- 2 bunch green onion, cut into 1 1/2" long both white and green
- 4 cups Korean red chili flakes
- 1/2 large onion roughly diced
- 10 cloves garlic
- 2 " piece ginger peeled and roughly chopped
- 4 Tbsp Korean anchovy sauce
- 4 Tbsp shrimp sauce, salted shrimp
- 1 1/2 Tbsp sugar
- 2 Tbsp toasted sesame seeds
Instructions
- For the soaking; Remove the most rough outer leaves (about 2-3 leaves) from each cabbage, set aside. Give a 2" slit to the stem part of cabbage, open up and rinse them. You can give another 2" slit on the center stem part of the cabbage halves.
- Sprinkle some salt onto the white stem part of each leaf of the cabbage, make sure you salt each and reach to the tip of the stem. Be careful not to break the leaf.
- In a deep large container dissolve 3 cups of salt with 30 cups of water. Place the cabbage facing up and press them down so the solution will sip through each layer. It is okay if your cabbages are not completely immersed in the solution at this point.
- Cover the cabbage halves with the reserved green leaves, put plastic cover, and place something heavy on top. Let it soak for 8 hours, turn the cabbages to the other side, place the covers and heavy item back to push down, let it soak for another 4 hours.
- After 12 hours, try to bend the stem part of each cabbage. If they are willing to bend, it is done. If not, Sprinkle a little more salt on the stem part and soak for 2 more hours.
- Remove the cabbages and the rough leaves from the solution and rinse 3 times. Cut the cabbage laves into another half. This will make 8 cabbage quarters. Drain the cabbages in the colander or basket for at least 2 hours so the water will drain out thoroughly. You can cover them with a large bowl or plastic to prevent them from drying out during this step.
- For the rice glue; Bring to boil water with dried seafood in a pot, covered. Reduce the heat to low and simmer for 10 minutes. Remove from heat and let it sit for 20 minutes to intensify the stock. Strain the stock and reserve 2 cups.
- In a small pot, whisk 1 1/2 cup of stock with rice flour, bring to boil whisking continuously until it gets bubbly and thickened. Let it cool. Reserve 1/2 cup of the stock for other use later.
- For the filling; In a blender puree onion, garlic, ginger and the reserved 1/2 cup of seafood stock until smooth.
- Pour chili flakes in a large mixing bowl, add the garlic mixture puree and the cooled rice glue, anchovy sauce, shrimp sauce, sugar, sesame seeds. Mix well.
- Add sliced radish and the green onion to the chili mixture and mix again. It will look like mostly radish and green onion at this point. Let them sit for 30 minutes so the radish will extract their moisture and get wilted. Your filling should be spreadable consistency. You can adjust with more stock in case your filling seems too thick.
- Break a little piece from cabbage, put a little bit of chili filling and taste to see if it is seasoned right. You might need more fish sauce or salt depends on the sodium level in the soaked cabbage.
- For the assembly; You will need large shallow mixing bowl to do this job.
- Hold the cabbage quarter upward with your left hand and release the outside leaf to be flat in the bowl. With you right hand take some of the chili filling and spread all over the leaf, put down another layer one at a time and repeat. Don't put too much of filling on each leaf, just enough to cover. When all the layers are spread with chili filling, fold the leafy part of the cabbage toward the stem holding them together and wrap with the reserved rough green leaves tightly. Place each cabbage quarters in the air tight container. Add 1 cup of water to the mixing bowl and swirl around to rinse the filling residue in the bowl, pour it over the cabbage in the container. Seal the container and let it sit in a room temperature for 1-2 days depends on the room temperature or the fermentation level you desire. Keep your Kimchee in the fridge after that. It can store for several month to enjoy.
- Note:
- The filling amount is perhaps more than enough for 2 heads of cabbages. I always keep the leftover in the fridge and make Bean Sprout Kimchee with it.




Hi Holly
I am glad I found this and it is so close to what my late wife made. I have been trying to duplicate and found most of the ingredients at my local farmers market or on Amazon. She didn’t add sugar or shrimp so I will make it without. Looking forward to the smells and eating it
Hi Roy
Thanks for you comment. I am so sorry for the loss of your loving wife. I hope that this recipe will bring you lots of sweet memories you had with her. Let me know how it turns out.
Thank you.
Thanks Holly I will
oh I’m so excited to make kimchee this weekend, yesterday I went out to get ingredients! i loved your writing, in fact I will re-read again. Your memories of your Mother making kimchee with her neighbours was so lovely to read and imagine. I will be using this recipe! thanks for sharing!
may I ask, is Mooli same as Korean radish?
thanks!!!
Moo or moowoo is name for radish in Korean. I am not sure about Mooli.
I am glad that you want to try y recipe. Hope you like it. Enjoy your kimchi!
Love your post. I will definitely try it.
For the rice glue,… can I skip the pollock fish? Does the sweet glutinous rice flour same as sweet rice flour?
I am the only one eat it, therefore, it seem too much to serve one wrapped Kimchee. Can I cut it into cube and store it back to fridge? Or can I cut it into cube after braining, then only add in soh?
Btw will it cause bad to the kimchee by adding 1 cup of water to rinse the soh and pour it over the kimchee?
Thanks
I misread the recipe I used and added water to my jars…should I pour it out? is the whole thing ruined? Will it work with water in the jars?
No, it should be fine.
Thank you so much for this excellent tutorial!!!! My korean friends used to joke that I liked kimchi more than they did and I still remember the taste of homemade kimchi during kimchi season when my friends moms used to make sure I had some to last me the winter. Now that I am back in the states I miss that homemade taste and have used your recipe twice now to make my own. Other than adding carrots in the soh I make it exactly as written and it has come out great both times. Thank you for all of your wonderful recipes that bring back the taste of Korea for me.
Holly, thanks for the reply.
The package of chilli flakes I used has a map of South Korea and korean writings on it, so I presumed that the chilli must be grown and processed in South Korea. It has the expiry date no production date. Next time I will make sure the expiry date is still far off. I will also check the colour, and will buy it during Isetan korean food promotion, so as to avoid buying the wrong thing. After all making kimchee is long but enjoyable work. I would like the end result to be perfect!
After a little more than 2 weeks in the fridge, my cabbage kimchee has mellowed with a very robust taste. It has the unami of a well flavoured stock. The sourish taste has not set in yet (the small amount I left outside at room temperature fermented at day 3). Other recipes that I followed before did not offer this taste. I could be due to the larger quantity of dried seafood used in the stock.
Thanks Holly for this experience.
Hi Holly,
I used this recipe a few weeks ago. It is DELICIOUS! I made it with 4.9kg of napa cabbage and I used Korean Solar Salt. The solar salt is less salty than local sea salt.
I didn’t ferment it. I put it into 2 big stoneware containers, cover them with cling wrap and immediately put them into my fridge. By doing this I will be able to taste the different stages of fermenting kimchee. I love the taste of freshly made kimchee too. Wouldn’t it be nice if I can have a small onggi sitting in my fridge! But I can’t find any for sale around Kuala Lumpur.
The kimchee on your blog has such a nice colour – bright red; so do all the store bought kimchees. Mine always comes out a dark brown red no matter which recipe I used. I bought my korean chilli flakes from Isetan. What is my mistake? The next time I make this again I thought of adding paprika powder to get this bright red colour. But then the kimchee soh will become drier. So, can I puree 2 nashi pear to restore the kimchee soh to the right consistency? What is your advice?
Many thanks.
Hi Butterfingers
The major difference in kimchi color is the chili flake itself. I, most of times, use chili flakes produced in Korea with Korean chilies. Most chili flakes you buy at the stores are from China which usually has dark brown red hue compare to Korean origin with bright orange red. It is not easy to obtain Korean origin flakes overseas. Even Korean stores sells the Korean chili flakes produced in China or Mexico. Occasionally they might have Korean origin flakes, though.
The Korean origin chili flakes are 2 or 3 times more expensive than Chinese or Mexican.
Also check the expiration date as well. The older the flakes, the darker it gets. Always keep the flakes in the freezer to avoid mold and discoloration.
If you can’t purchase the Korean origin chili flakes, try one trick I do. Instead of paprika powder, you can mince fresh red finger long chilies and add to the filling. I often add the fresh chilies when I make my kimchi. It does add some brightness and the fresh flavor as well. The amount of fresh chili is depends on how much you desire. I would say, add about 5-6 chilies per cabbage, and minus a few tablespoons of chili flakes in the recipe.
Adding Asian pear is always wonderful. I think 1 pear is enough for 1 large cabbage. Also use rice glue in your kimchi filling as well. It helps with fermentation and the color as well.
Hope this helps. Let me know if you have more questions. I’m always happy to help.
I’m addicted!
I couldn’t find the containers you mentioned at my local Korean supermarket, but I bought some online from Livart and I love them! My sisters even use them now instead of the more traditional way of tightly packing glass jars.
Are you going to post a recipe for making kimchi stew using older kimchi? This was a childhood favorite of mine and I’d love to know how to make it.
Hi, I just followed exactly your recipe yesterday.everything looks fine but after 1 day left in room temperature ( Im in Vietnam so the temp about 30-34 Celcius degree) it tastes salty and too sour. Is it because the temp was too high and I left the kimchee outside too long? Will it flavor will ok after keeping in fridge few days? Do you have any solution for this? Thank you so much!
Hi Hoa
I think 30-34 degree is really hot to leave kimchi for an entire day. Also if the temperature is too hot, it won’t ferment properly, either. It gets very sour without producing the deep flavor and the crisp texture of good kimchi. It sounds like your kimchi might be too sour to eat as is, but it will be great to make stew or in other recipes that uses very fermented kimchi.
Thank you, Holly. Im thinking to make kimchi & mushroom hotpot. Next time I should put the kimchi into the fridge right away then 🙂
Thank you so much for the wonderful lesson on Kimchee making. I’ve looked all over the internet and this is the best one I’ve seen. I lived in Korea aor a year and fell in love with Kimchee. Store bought just doesn’t do Kimchee proud! Finally, traditional Kimchee! Can’t wait to get all the ingredients and make my own!
What to do if my kimchi become too watery after one overnight? Do I need to throw away the sauce?
Hi Crystal,
It is natural thing that you get more kimchi juice as the kimchi gets fermented. Do not throw away. The juice will add a great flavor when you add to kimchi stew or kimchi fried rice, and etc.
Hi, Holly.
Thank u for your information.
Holly!
My mouth is on fire! Any way to decrease the spiciness after the soh is made? I followed the recipe and used 4 cups of chili flakes, but I can’t handle the heat. Maybe I’m just a wimp.
Tito
I wonder if you used all the soh in the recipe. The given recipe makes more than you need for 2 very large heads of cabbages.
Also the spiciness of kimchi depends on the chili itself. Usually chili flakes from Mexico tastes a lot spicier than other.
Anyway, try this method to reduce the spiciness a little. Get a very small size of Korean radish (or dikon if you can’t find the Korean radish), cut it into 1/4″ thick slices. Cut each slice into 6-8 segments (about bite size pieces) and add to your kimchi. Just stick them between layers of cabbage leaves and try to rub off the soh from the cabbage and leave there. It will soak up some spiciness of chili but it will also dilute the saltiness of the kimchi and yield more juice as well.
Hope this helps.
Good luck and you are not a wimp! 🙂
Holly
Hi, I just made your kimchee over the weekend and I had a few questions:
1) I think the stems on some of my cabbage did not get salted enough. Even after soaking with the stuffing for two days some of the cabbage is crispy and has absorbed zero flavor. – Does that mean those crispy pieces are no good?
2) I read a lot of reviews of people who made kimchee that was “too salty” so I think i made mine not salty enough. Is there anyway to fix that?
3) The juice that my kimchee is sitting in is very thick, not nearly as watery as i’m used to seeing. Is that normal with this type of kimchee? Is it more of a paste that soaking liquid?
Hi Jason, Here is how I think.
1) Stem part of cabbage takes longer or requires more salt to wilt than leaf part. Therefore I suggested to sprinkle some salt onto the stem part in my tutorial. Even though they are crisp now, they will eventually wilt down during fermentation. so I would suggest to wait.
2) Usually fresh kimchi tastes a little saltier than what you hoped for but the saltiness will settle down a little as they ferment. if your kimchi is not salty enough (due to the lack of soaking time), Splash some (about 1-3 tablespoon depends on the amount of your kimchi) “Korean soy sauce for soup” over your kimchi. That will make up for lacking salt.
3) I am not sure how thick your juice is, but if it is too thick for your liking, and your kimchi is not salty enough, the “Korean soy sauce for soup” will bring out the moisture from the cabbage. You can add some water to moisten the juice as well.
From what I read in your question, I have a feeling that your cabbage did not get the proper soaking with salt step to draw the moisture from. Soaking part is the most important and the tricky step of kimchi making. Once you have experienced, you will do better next time. I have to confess, my first attempt of kimchi making was a disaster but after trying out 2-3 times, I finally mastered it. Hope your kimchi will ferment to a great tasting kimchi.
Please, let me know if you need further assistance.
Holly,
The kimchi is definitely getting better with age. The salt factor picked up and the cabbage wilted even more as it fermented. Most people are saying that it’s great. The one piece of feedback I got recently was that the kimchi was “soft” it is still crunchy to the bite but it’s very limp and they were saying that it makes it look not as “fresh” as what they are used to eating. Is there any way to remedy that? Have it look crisp and fresh or is that a result of quick brining vs. the older traditional way of making it?
The crispness of cabbage last longer in whole cabbage form(traditional way) than cut up. Also cabbage itself makes a big difference as well. I strongly recommend the nappa cabbage from the big Korean market rather than local ones. Cabbages with greener outside and yellower inside, feel heavy and dense when you held it. I had made kimchi with local cabbage e, which was pale in yellow, and the crispness didn’t last long and the kimchi got soggy fast.
Hi Holly. Thank you for the kimchee tutorial. This is probably the most detailed and visually beautiful kimchee class I’ve attended. Just one question: Why does my Kimchee often turn sour very quickly? I often put it to the fridge after one day of room-temperature fermentation. I haven’t tried your recipe, but I’ve experimented with so many Kimchee recipes with good reviews, and strangely the first time I made Kimchee is the only time I got it right.
May I ask you, is it ok if I put my kimchee right away in fridge, without standing in outside one day. I forgot to leave in warm temperature and I put Kimchi in fridge.
Of course you can store in the fridge right away. It will take longer to ferment but you can always take out and put it in the room temperature if you want to speed up the fermentation.
Hi Holly,
today I tried your way of making kimchi. Actually it is my first time making it and if the soh is an indicator it’ll taste wonderful. Thank you!
I had to use ziplocs as I haven’t got an airtight container. It’s a great tip, but I’m wondering whether I have to leave the kimchi inside of the ziplocs for the whole time or do I decant the goodness later into a simple container?
I’ve got some questions about the handling of ingredients, too.
Every time I buy some Gochugaru the chili flakes start to mold very fast. Even if the date of expiration is still months away. I tried a glass jar and I tried to keep the chili in the ziploc package it came in. Both times the molding process started early. What am I doing wrong? (I tried two different brands, too.)
About the salted shrimps used for Kimchi. I live in Germany and I only found them in the deep freezer. The jar I bought has an experation date of sometime in 2015, but I had to defreeze it to use it. Now I’m unsure how long the little aliens will last. I made some of your radish kimchi too, but there are still so many left over and I don’t want to waste them. Otoke?
Thank you in advance for your response and thank you for your fantastic blog!
Greetings from Germany
Bee
Hi Bee
You must store chili flakes in the freezer once you open it. It will get moldy easily if you leave it out in the room temperature. (Same goes with dried anchovies, seaweed sheets, etc)
Keep your kimchi in the ziplock bag and put the bag inside a container. Avoiding the air contact is a good way to keep the flavor and the texture of kimchi longer.
Salted shrimp will last forever. As long as you don’t see green mold forming in the jar, you should be able to use it. Just thaw it out and store in the refrigerator. Try to use the salted shrimp in many Asian inspired dishes. I use in the soup and stew to flavor, and add in eggs to make Kroean style rolled eggs or egg pudding, and season with many vegetable side dishes to punch up the flavor.
Thank you so much for your fast reply. *facepalm* I would never have tried the freezer for Gochugaru! Will do that with my next bag and I’ll try to be inventive using the salted shrimps.
Every recipe of yours I tried so far was delicious. You should write your own book!
Beautiful tutorial! Thank you! I’ve made kimchi a few times, but this is a more detailed recipe. I look forward to trying it.
I’m making this for the second time cuz we go through kimchi soooo quickly in my house (we’re not even Korean, we’re Sout African!) and this was a great recipe! I’m just wondering where you bought your container, or where I could online, because I bought one at the Korean grocery store and it didn’t have an airtight lid inside 🙁 and I didn’t like the ziplocks when trying to get them out made a bit if a mess!
Thanks!!
This is why I love traditional recipes. Thank you for sharing this recipe, it’s absolutely wonderful.
Hi Holly,
I’m so glad I found your website and I really enjoy reading your recipes and how you bring across a recipe by sharing a story first. I have tried making kimchee using different recipes and your kimchee recipe is really unique and easy to follow. I’ve just made kimchee using your recipe 5 days ago and waiting for my kimchee to ferment more in the fridge. I’ve tried it after 4 days, tasted good and am excited to tried it again a few more days later. By the way, the 이젠 container that you are using, what is the difference between the brown container and the transparent container ? The transparent is slight cheaper than the brown ones, just curious whether the brown ones is better and why…
I don’t think it will make much difference as long as the container is air thight.
I think dark colours might be popular cause kimchi tends to stain the tub.
How long can it stay uneaten for in the fridge?
You can eat the kimchi as it gets fermented. Some likes the flavor of the early fermentation stage and some likes really sour. It can last as long as it is edible. If you store the kimchi in the right container in the right temperature, it can actually last up to 3 years. But most kimchi stored in a regular household fridge will last about 3-5 month and the kimchi becomes too sour to eat as is.
Holly, I could not find the container in the H-Mart website but I found it in Shopliveart.com (they are called E-Jen). What size is your container (for 2 heads of cabbage)? They have 1.7, 3.4, 8.5 and 12 liter sizes. Great website and recipes.
It is 8.5 liter.
Thanks for the detailed tutorial! I went to my husband’s family 김장 event last year in Korea, but nowadays they are using the pre-salted cabbage that comes in boxes you can order (cause they make so much) so when I came back home and wanted to make my own, I was a little daunted about figuring out how to salt it just right. I used your method yesterday, and today, just as you said, the cabbages were reborn and JUST like the ones we ordered in Korea.. Now I just have to get the balance right in my 김치소 (I’m trying to copy my husband’s family’s style, so I hope you wont be offended that I altered your recipe.. but I still think I need to make a few more adjustments next time ;)) Thanks very much~!
Hi,
I’ve tried various kimchee recipe & am excited to try yours now. It sounds so authentic!
Previously, for the salting of cabbage, i’ve just added salt into cabbage n did not soak into salted water again. The salting time was 4hours. Can i do the same with your recipe?
I’ve used normal coarse salt but now i’d like to try korean coarse salt. Is it the same measurement for saltiness?
I like well fermented kimchee. Is it ok to let it ferment for 1 week in cool, dark place before storing in the fridge.
Would love to hear from you.
Thanks!
You can use ordinary coarse salt. The ratio of slat to water is 1:10. The amount of salt is depends on how many or how big your cabbages are, so adjust accordingly. I think letting your kimchi to sit on the room temperature for `1 week is slightly too long. Your kimchi will continue to ferment even in the fridge. I wouldn’t go more than 3 days outside fridge unless you really want your kimchi to be very sour.
I have a 30+ year love affair with Korean food. It was love at first bite!! Believe it or not but this country boy from the deep south (US) makes a pretty mean batch of Kimchi. I cannot wait to try your recipe. Using the dried pollock, shrimp, kelp and anchovy is something I’ve need tried before. I can’t wait. We are so lucky to have some wonderful Korean grocery stores here in Atlanta.. Thanks for sharing. (your photos are great…!)
Thank you Mike. Hope you give my recipe a try. It will bring more depth than ordinary kimchi. It is so amazing to know that Korean groceries are available in many cities. Take the great advantage and make lots of good Korean food.
Hi, I really like the container you used here. What brand is it? Any way I can buy it online?
You can buy at H-mart
This was such an unbelievably great read!!! I love how passionate and involved you are with the whole process of making this delicious dish. Inspiring is an understatement!! Thank you so much for taking the time to explain this magical journey 🙂
I’m going to make kimchee with your instruction. But in Vietnam’s market I can’t find Pollock fish! What is the alternative, please!
You can use any dried fish. Make sure they are not overly salted (some do have quite a salt in them). You can also use fresh fish head such as cod, yellow croaker, red snapper, etc. Clean and wash well before you make stock. Have fun making kimchi. Please let me know how it turned out.
Your photos are absolutely gorgeous and I love your writing voice. You are truly a wonderful writer!! I wanted to give my own kimchee a try, but I was a bit intimidated. This tutorial definitely makes it all seem much more possible! Thank you!
Thank you!
Hi Eva
You can keep the leftover paste in the fridge for up to 3 month. I always make more than enough so that I can use it to make different type of kimchi such as radish kimchi etc. Hope your kimchi will taste great for you. You can use fermented kimchi into endless dishes.
I used to live in Korea and ate kimchi every day while I was there. But I noticed recently after coming back to the U.S. that I was eating less healthily, had gained some weight and was having digestive problems. So I decided to go back to my daily Korean food and kimchi diet. I'm feeling much healthier already!
I was attracted to your kimchi recipe because of the beautiful photos and variety of delicious ingredients (although I didn't add the seafood at the end). I soaked my 2 cabbages overnight and applied the hot pepper paste mixture last night. I'm excited to taste the fruits of my labor!
But I didn't realize that I would have so much hot pepper paste mixture left over. How long can it sit in my refrigerator before I need to use it on more cabbage or for Korean radish? I dídn't expect to have so much left over and it will probably take me months to finish this batch of kimchi! Thanks for your help!
Hi. I used to live in Korea and ate kimchi every day over there. I also felt I was more healthy eating Korean food than I am now that I'm back in the U.S. So I decided to make my own batch of kimchi from scratch.
The photos of your kimchi are gorgeous which made me want to try your recipe. I made it last night after soaking the 2 heads of cabbage overnight and it's fermenting on my counter as we speak! But I didn't realize I would have enough hot pepper paste for 2 more heads of cabbage! Do I have to use it right away and how long can it sit in my fridge before adding it to cabbage or Korean radish? Wow, I think I'll be eating kimchi every day for the next 6 months!
I have always wondered how kimchee was made
I love this page and Kimchi! I eat Kimchi Noodles every day and now I can make it. Thank you so much!
It will last in the fridge for several month or until you use it all. You can add to Korean rolled egg dish as seasoning instead of salt, add to stir-fry zucchini ban-chan, add to any Korean jjigae (stew) or soup dishes as well.
With my jar of
새우젓, how long will it keep now that I've opened it? And are there any other recipes that tend to call for it, or things I can use it for?
You can skip the radish since the Soh has radish in it. However it won't hurt to add more radish especially in bean sprout kimchee. You still need to soak the radish with salt and sugar though.
You also can use the kimchee soh in spicy soups and stews, too. Try with fish/seafood stew. Amazingly good!
A quick question Holly. When we have left over soh after making cabbage kim chee and I want to make soybean sprout kim chee, what part of your soy bean sprout kim chee recipe should I take out? Do I still need to salt and sugar the radish?
Thanks!
Mine is 8.5 liter capacity. It can hold 2 very large cabbages
Contact the site to see if they can tell you where you can buy one. I bought mine at the H-mart in Northern VA.
I was wondering what the liter capacity is of the kimchi container you have? I found the official site but I'm having trouble figuring out which size and how to get one. I really like the design though!
Hi
I totally understand the smelly fridge with kimcheee in it.
Make sure you keep your kimchee in an airtight container. Keep 2-3 box of baking soda in the fridge along with your kimchee. The soda will absorb the odor and keep the fridge smell freee. You need to replace the soda every 3-4 month.
Hope this helps.
Hi, I had been making kimchi for myself but in fact, my whole fridge remained with a speical smell from the fermenation of the kimchi. Is it possible to avoid it because I am living with somebody else.
I just followed your recipe and made the kimchee last night, but I didn't use any fish or shrimp stuff, I made it vegetarian, and hopefully it's going to be tasty. I love kimchee and Korean food, I make them at home very often. Thanks for your detailed writing and pictures, which helped me a lot!
I'm the founder/moderator for Punk Domestics (www.punkdomestics.com), a community site for those of use obsessed with, er, interested in DIY food. It's sort of like Tastespotting, but specific to the niche. I'd love for you to submit this to the site. Good stuff!
Whoa!!!! LOVE the instructions and explanations.
Thanks, Tina. I would love to hear how it turns out on you in the fall.
Thank you so much for this passionate Kimchi class, I will try it this fall as a birhday present to myself!
You can make it, Jen. it sounds daunting but I actually enjoy it. In fact the soaking part can be done while you are sleeping or at work, and all you need to do is making filling and assembling together. However there are easy ways to making Kimchee.
When Spring comes and I have access to spring cabbage, I will show you how to make spring/summer cabbage Kimchee.
Have a wonderful Christmas.
Excellent course for kimchi making! Very enjoyable read as well..I admit I am totally addicted to kimchi now though I have not been ambitious enough to make it myself yet…hopefully one day soon 🙂